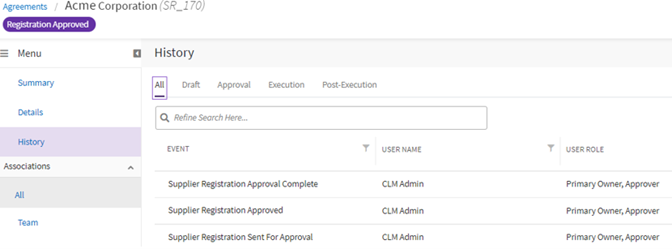
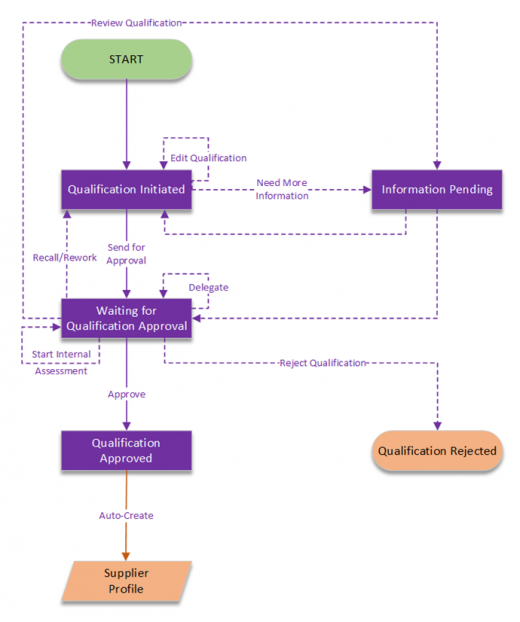
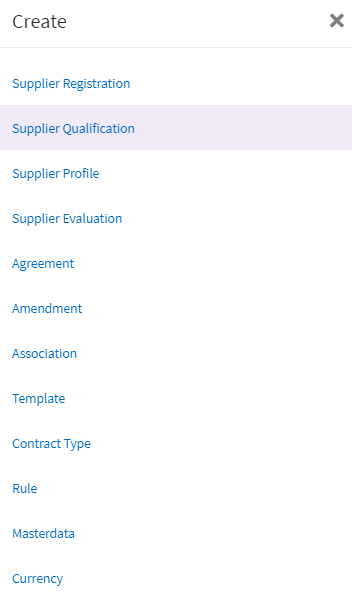
| (20 intermediate revisions by one other user not shown) | |||
| Line 915: | Line 915: | ||
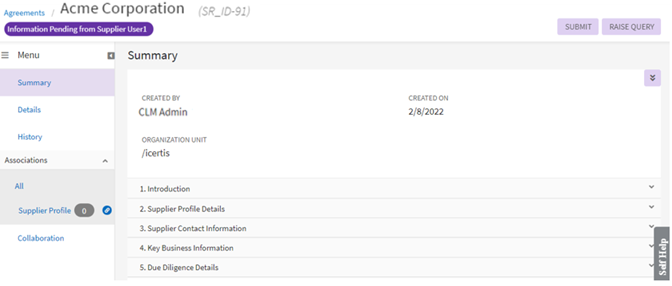
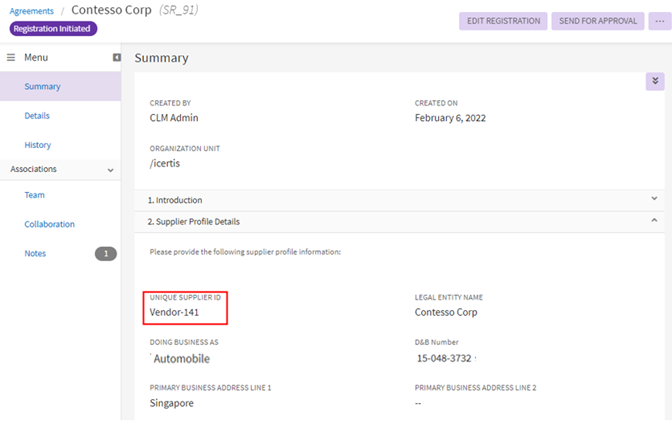
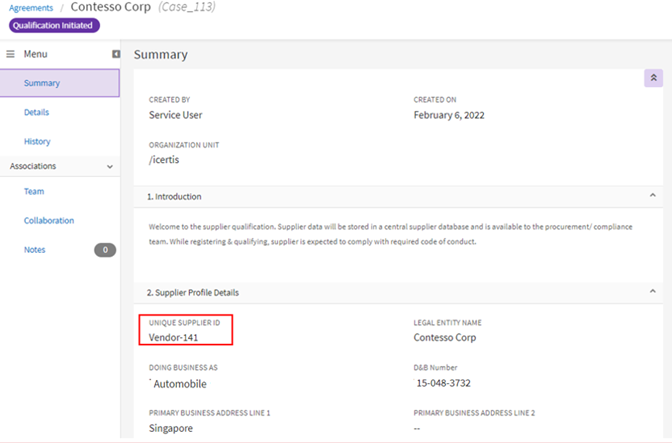
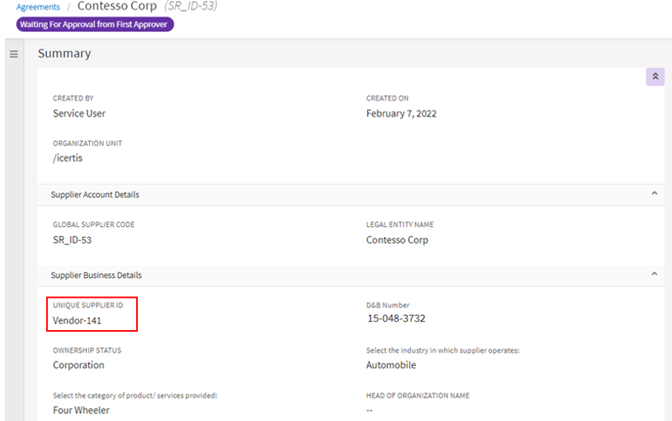
Users can modify any attributes of the vendor database apart from the unique set of supplier identifiers in Supplier Registration, Qualification or Profile. | Users can modify any attributes of the vendor database apart from the unique set of supplier identifiers in Supplier Registration, Qualification or Profile. | ||
</div> | </div> | ||
| + | |||
== Supplier Onboarding Dashboard == | == Supplier Onboarding Dashboard == | ||
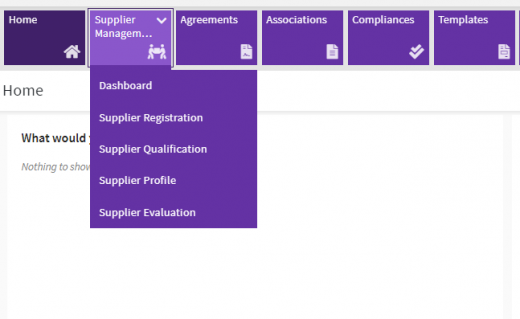
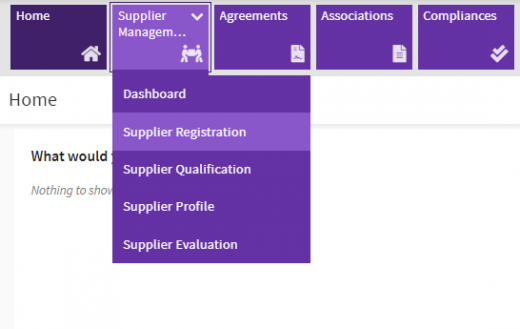
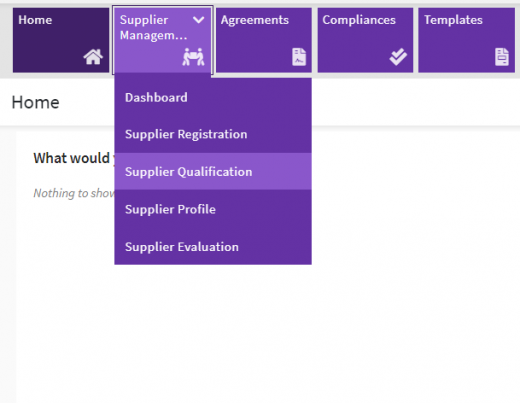
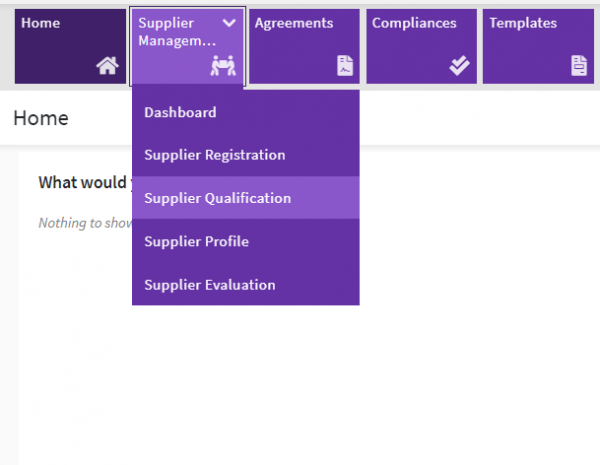
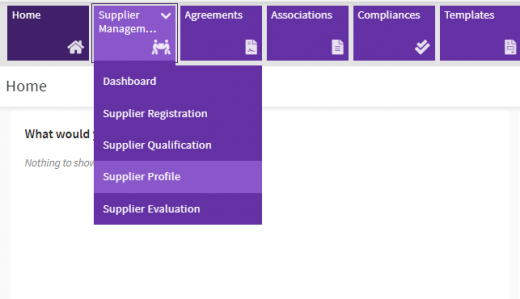
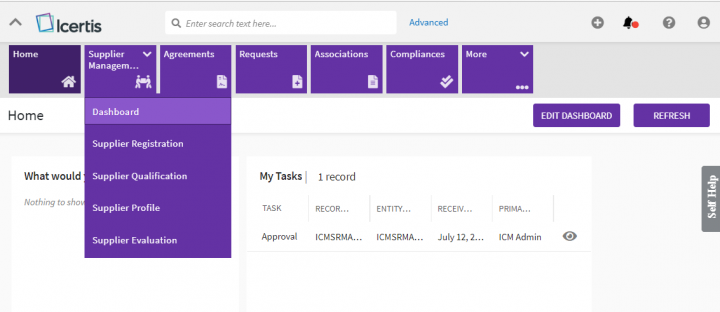
ICI Supplier Onboarding and Diversity Compliance App allows users with appropriate privileges to access the newly introduced “Dashboard” tile. <br/> To access the Supplier Onboarding Dashboard: | ICI Supplier Onboarding and Diversity Compliance App allows users with appropriate privileges to access the newly introduced “Dashboard” tile. <br/> To access the Supplier Onboarding Dashboard: | ||
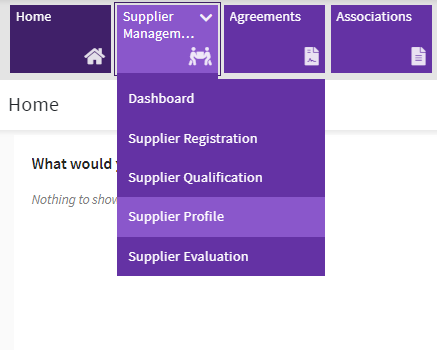
| − | 1. | + | 1. Click on “Supplier Management” tile on Home page. |
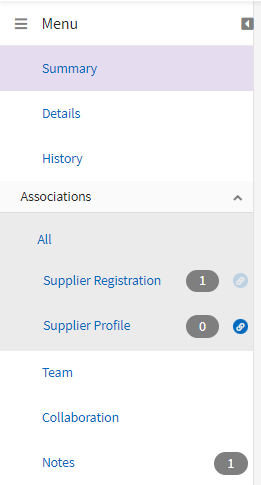
| − | <div class="image-green-border">[[File: | + | <div class="image-green-border">[[File:Dashboard Access.PNG|720px]]</div> <div class="image-green-border"> </div> <div class="image-green-border"> </div> <div class="image-green-border"> </div> <div class="image-green-border">Users can access the following reports from the “Supplier Management Dashboard” page.</div> <div class="image-green-border"> </div> |
*Supplier Registration | *Supplier Registration | ||
*Supplier Qualification | *Supplier Qualification | ||
| Line 927: | Line 928: | ||
'''Supplier Registration Dashboard''' | '''Supplier Registration Dashboard''' | ||
| + | <ol start="2"> | ||
| + | <li> | ||
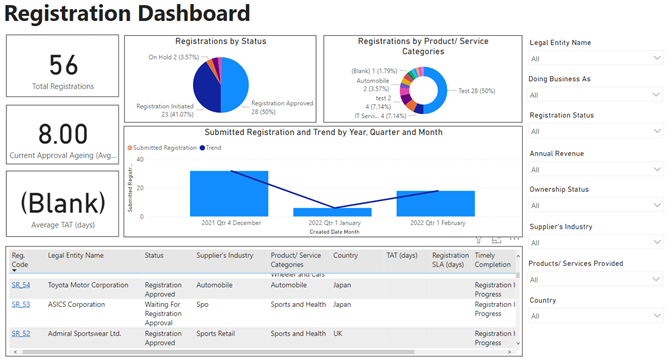
| + | Click on “Dashboard”. “Supplier Registration” dashboard opens. | ||
| + | </li> | ||
| + | </ol> | ||
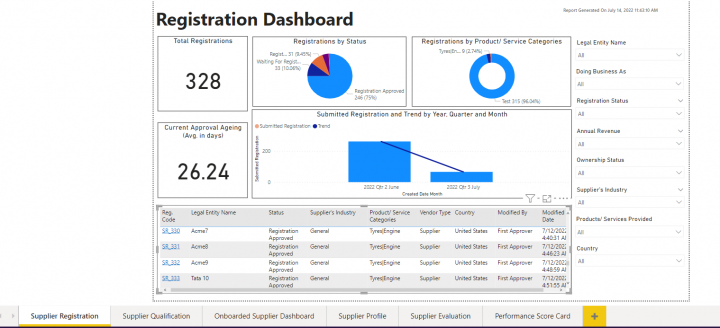
| − | [[File: | + | This Dashboard provides overall insight of Suppliers who are registered. Filters such as Registration Status, Annual Revenue, Country etc. facilitate user to get accurate data. |
| + | <div class="image-green-border" paraeid="{f8a17157-1c0c-4b72-ab93-c38ad1a7f3a6}{76}" paraid="336929762">[[File:Supplier Registration Dashboard.png|720px]]</div> | ||
| + | | ||
Users can filter and view the supplier registration specific information such as : | Users can filter and view the supplier registration specific information such as : | ||
| Line 940: | Line 948: | ||
'''Supplier Qualification Dashboard ''' | '''Supplier Qualification Dashboard ''' | ||
| + | <ol start="3"> | ||
| + | <li> | ||
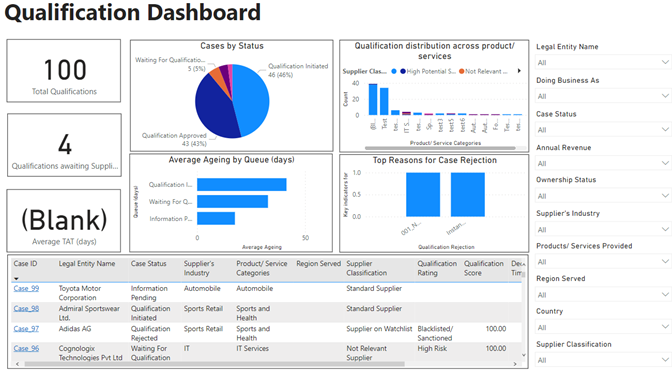
| + | Click on “Supplier Qualification” tab from bottom tabs. | ||
| + | </li> | ||
| + | </ol> | ||
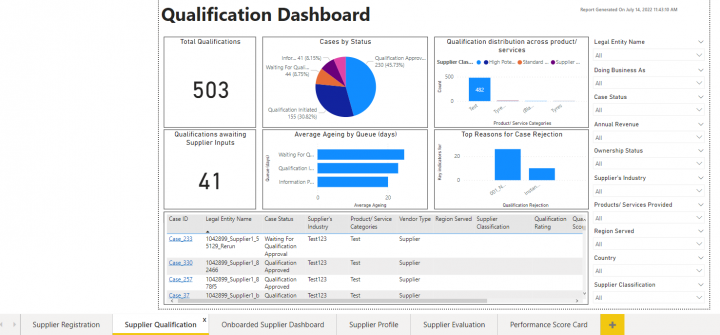
| − | + | This Dashboard provides overall insight into Supplier Qualifications along with filters such as Case Status, Ownership Status, Supplier classifications etc. | |
| + | <div class="image-green-border" paraeid="{f8a17157-1c0c-4b72-ab93-c38ad1a7f3a6}{137}" paraid="593011250">[[File:Qualification Dashboard.png|720px]]</div> | ||
| + | | ||
<div class="image-green-border">Users can filter and view the supplier qualification specific information such as:</div> | <div class="image-green-border">Users can filter and view the supplier qualification specific information such as:</div> | ||
*The number of qualifications filtered by its status. | *The number of qualifications filtered by its status. | ||
| Line 949: | Line 964: | ||
'''Onboarding Dashboard''' | '''Onboarding Dashboard''' | ||
| + | <ol start="4"> | ||
| + | <li> | ||
| + | Click on “Onboarded Supplier Dashboard” from bottom tabs. | ||
| + | </li> | ||
| + | </ol> | ||
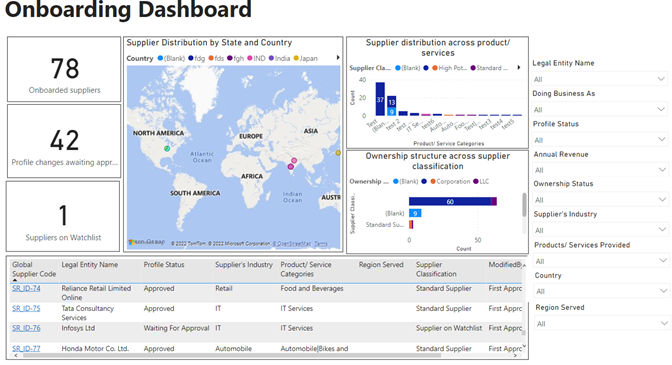
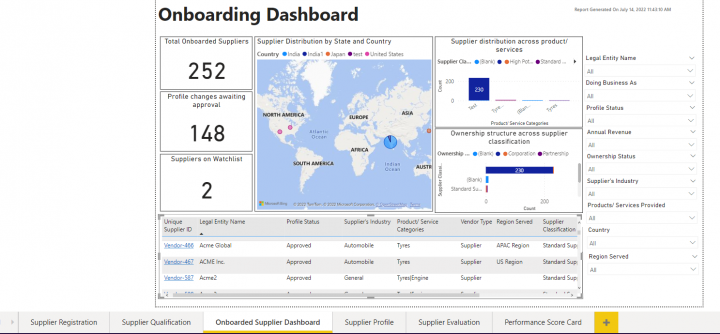
| − | + | This Dashboard provides an overview of onboarded suppliers. It has geographical distribution, Supplier on watchlist, Ownership structure section for better clarity on onboarded suppliers. It provides filters such as Profile Status, Products/ Services Provided etc. | |
| + | <div class="image-green-border" paraeid="{f8a17157-1c0c-4b72-ab93-c38ad1a7f3a6}{177}" paraid="416222021">[[File:Onboarding Dashboard.png|720px]]</div> | ||
| + | | ||
Users can filter and view the onboarding specific information such as: | Users can filter and view the onboarding specific information such as: | ||
| Line 960: | Line 982: | ||
'''Supplier Profile Dashboard''' | '''Supplier Profile Dashboard''' | ||
| + | <ol start="5"> | ||
| + | <li> | ||
| + | Click on “Supplier Profile” tab from bottom tabs. | ||
| + | </li> | ||
| + | </ol> | ||
| + | <ol start="6"> | ||
| + | <li> | ||
| + | Select supplier from “Legal Entity Name” dropdown | ||
| + | </li> | ||
| + | </ol> | ||
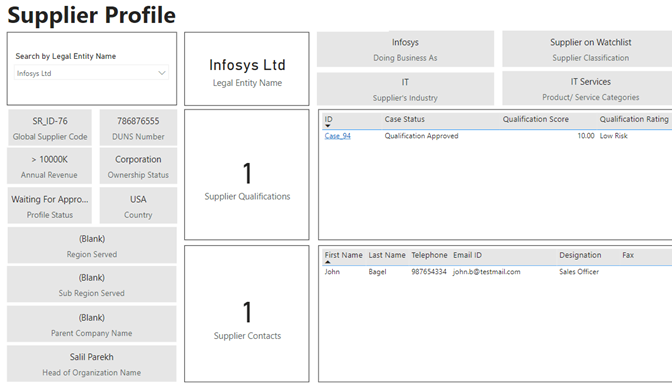
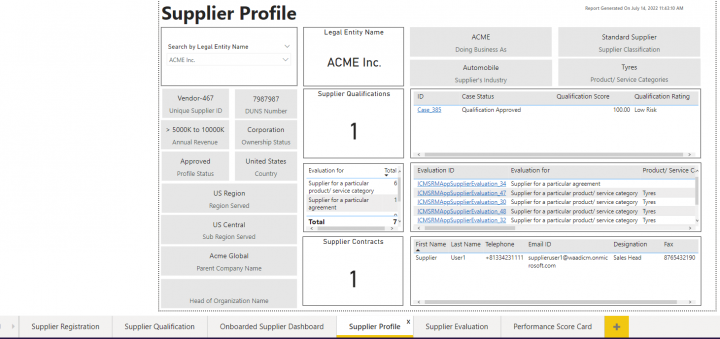
| − | + | This dashboard will provide specific supplier profile details along with its evaluation and qualification details. | |
| + | <div class="image-green-border">[[File:Supplier Profile.png|720px]]</div> | ||
| + | | ||
Users can search by the legal entity name and view the Supplier Profile specific information such as: | Users can search by the legal entity name and view the Supplier Profile specific information such as: | ||
| Line 970: | Line 1,004: | ||
'''Note''': The supplier does have access to the Dashboard. | '''Note''': The supplier does have access to the Dashboard. | ||
| − | | + | '''Performance Evaluation Dashboard ''' |
| + | <ol start="7"> | ||
| + | <li> | ||
| + | Click on “Supplier Evaluation” tab from bottom tabs. | ||
| + | </li> | ||
| + | </ol> | ||
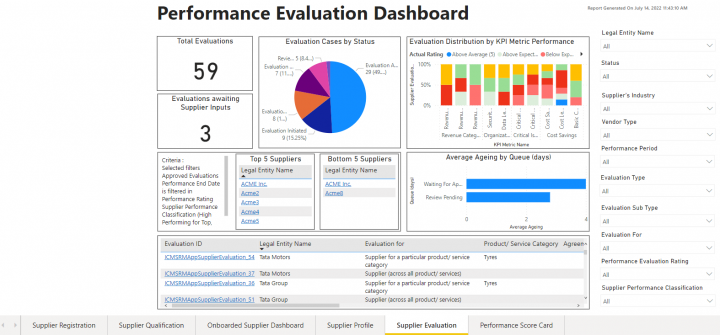
| − | | + | This Dashboard allows the Procurement team to analyze and evaluate performance of all Suppliers based on status and take appropriate actions with help of KPI metrics performance. It provides an overview of the ageing of evaluations in review or approval states. Also, the complex process of identifying top and poor performing suppliers is made easy. |
| + | <div class="image-green-border">[[File:Performance Evaluation Dashboard.png|720px]]</div> | ||
| + | '''Performance Score Card Dashboard ''' | ||
| + | <ol start="8"> | ||
| + | <li> | ||
| + | Click on “Performance Score Card” tab from bottom tabs. | ||
| + | </li> | ||
| + | </ol> | ||
| + | <ol start="9"> | ||
| + | <li> | ||
| + | Select supplier from “Legal Entity Name” dropdown at right navigation. | ||
| + | </li> | ||
| + | </ol> | ||
| − | | + | In addition to other dashboards, a 360-degree snapshot of any specific supplier is provided in the Performance Score Card dashboard. Users can view the performance trend, Supplier certificates that are expired or are expiring within 5 days, color coded performance evaluation section, KPI – Expected Rating vs Actual Rating. |
| + | <div class="image-green-border" paraeid="{ec6423c1-ba7c-405c-8136-4ba59b41051f}{58}" paraid="397213703">[[File:Performance Score Card.png|720px]]</div> | ||
== Working with Supplier Evaluation == | == Working with Supplier Evaluation == | ||
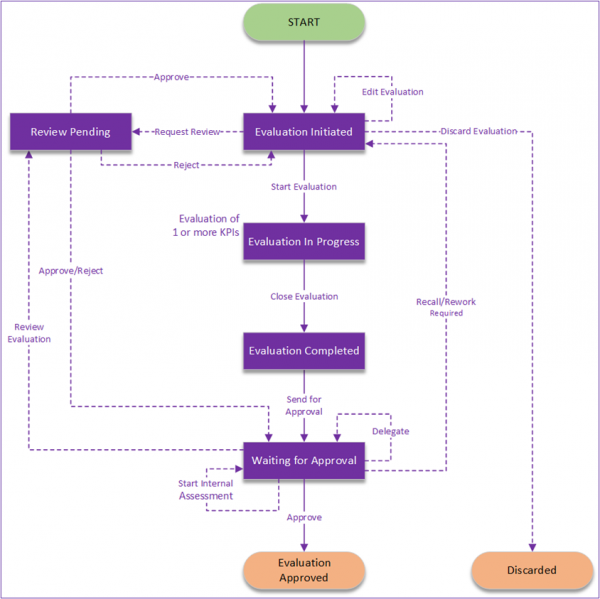
| Line 984: | Line 1,036: | ||
*Evaluation Schedule | *Evaluation Schedule | ||
*Outcome | *Outcome | ||
| − | + | <div class="image-green-border">[[File:8.1-SupplierEvaluationOverview.png|600px|8.1-SupplierEvaluationOverview.png]]</div> | |
| | ||
| − | + | <div class="image-green-border">[[File:8.1-SupplierEvaluationFlow.png|600px]]</div> | |
| | ||
| + | |||
| + | |||
| + | |||
=== Creating Supplier Evaluation === | === Creating Supplier Evaluation === | ||
| Line 994: | Line 1,049: | ||
Buyers must inherit the specific supplier profile for creating the supplier evaluation. Buyers can create the evaluation from the “Create” workbench as well as from the supplier evaluation index page. | Buyers must inherit the specific supplier profile for creating the supplier evaluation. Buyers can create the evaluation from the “Create” workbench as well as from the supplier evaluation index page. | ||
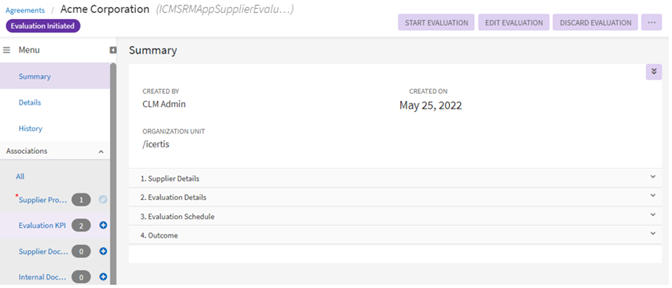
| − | + | <div class="image-green-border">[[File:8.1-SupplierEvaluation1.png|600px|8.1-SupplierEvaluation1.png]]</div> | |
The “Create Supplier Evaluation” page consists of the following sections. | The “Create Supplier Evaluation” page consists of the following sections. | ||
| Line 1,036: | Line 1,091: | ||
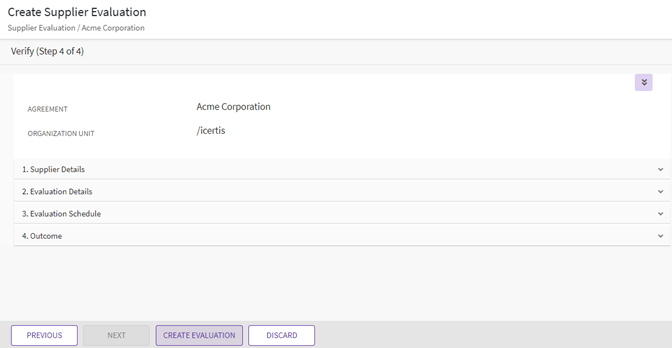
2. '''Click''' “Next” to open the “Verify” page and verify the information added. | 2. '''Click''' “Next” to open the “Verify” page and verify the information added. | ||
| + | <div class="image-green-border">[[File:8.1-SupplierEvaluation2.png|720px|8.1-SupplierEvaluation2.png]]</div> | ||
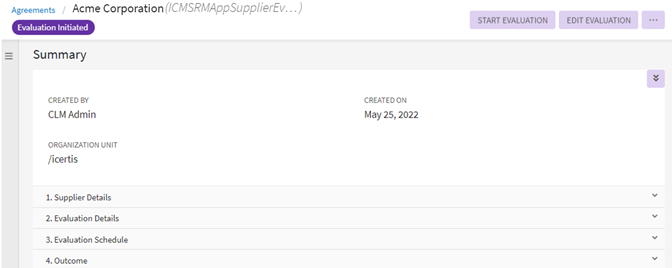
| + | 3. '''Click''' “Create Evaluation”. The evaluation is created in “Evaluation Initiated” state. | ||
| + | <div class="image-green-border">[[File:8.1-SupplierEvaluation3.png|720px|8.1-SupplierEvaluation3.png]]</div> <div class="image-green-border"> </div> | ||
| − | |||
| − | |||
| − | |||
| − | + | === Supplier Evaluation Details Page''' ''' === | |
The Supplier Evaluation Details page is based upon the standard ICI structure. | The Supplier Evaluation Details page is based upon the standard ICI structure. | ||
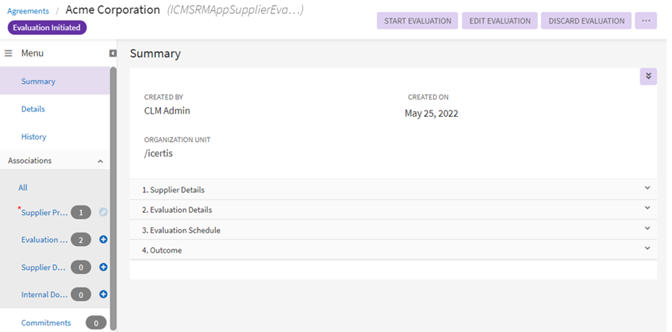
| Line 1,052: | Line 1,107: | ||
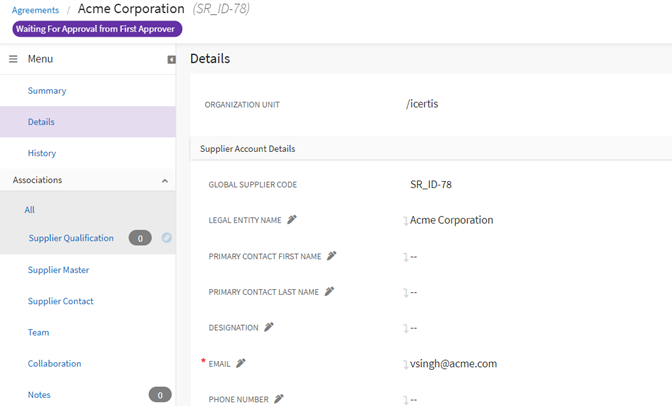
*Details: Displays the details specified while creating the supplier evaluation. | *Details: Displays the details specified while creating the supplier evaluation. | ||
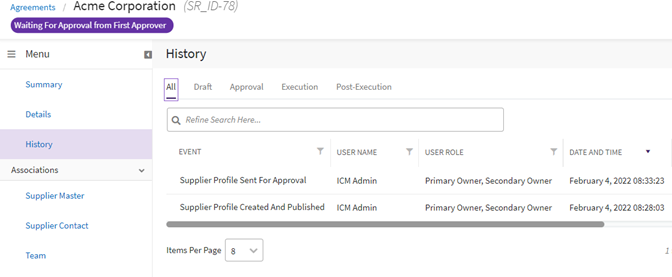
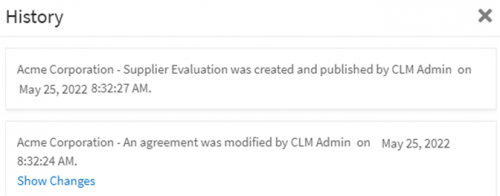
*History: Displays how the supplier evaluation has progressed till now, including the actions performed in supplier evaluation, as is under “History” in the left pane. Buyers can also view the history by clicking the status of the supplier evaluation which opens the “History” drawer. | *History: Displays how the supplier evaluation has progressed till now, including the actions performed in supplier evaluation, as is under “History” in the left pane. Buyers can also view the history by clicking the status of the supplier evaluation which opens the “History” drawer. | ||
| + | <div class="image-green-border">[[File:8.1-SupplierEvaluation-History.png|500px|8.1-SupplierEvaluation-History.png]]</div> | ||
*Associations: Displays the number of associated documents to the supplier evaluation. Click the plus icon to add new associations to the supplier evaluation. | *Associations: Displays the number of associated documents to the supplier evaluation. Click the plus icon to add new associations to the supplier evaluation. | ||
**Supplier Profile: Displays the supplier profile associated with the supplier evaluation. | **Supplier Profile: Displays the supplier profile associated with the supplier evaluation. | ||
| Line 1,061: | Line 1,117: | ||
'''Note''' : Suppliers get limited access on the left navigation pane on the evaluation “Summary” page based on the privileges. | '''Note''' : Suppliers get limited access on the left navigation pane on the evaluation “Summary” page based on the privileges. | ||
| + | <div class="image-green-border">[[File:8.1-SupplierEvaluation-LeftPanel.png|920px|8.1-SupplierEvaluation-LeftPanel.png]]</div> | ||
| + | | ||
| + | |||
| − | + | === Editing Evaluation === | |
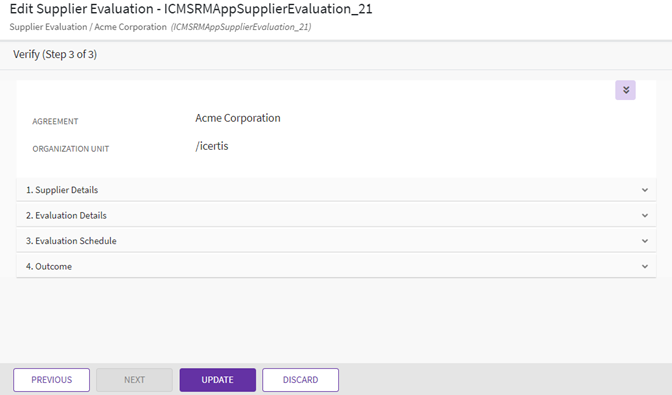
A Supplier Evaluation can be edited as follows: | A Supplier Evaluation can be edited as follows: | ||
1. '''Click''' “Edit Evaluation” on the Supplier Evaluation “Summary” page. The “Edit Supplier Evaluation” page opens. | 1. '''Click''' “Edit Evaluation” on the Supplier Evaluation “Summary” page. The “Edit Supplier Evaluation” page opens. | ||
| − | + | <div class="image-green-border">[[File:8.1-EditEvaluation.png|400px|8.1-EditEvaluation.png]]</div> | |
2. Make the desired changes and '''click''' “Next”. | 2. Make the desired changes and '''click''' “Next”. | ||
3. '''Verify''' all the information and '''click''' “Update”. The evaluation will get updated with the latest changes. | 3. '''Verify''' all the information and '''click''' “Update”. The evaluation will get updated with the latest changes. | ||
| + | <div class="image-green-border">[[File:8.1-EditEvaluation1.png|720px|8.1-EditEvaluation1.png]]</div> | ||
| + | | ||
| − | + | ||
| + | |||
| + | === Supplier Outreach === | ||
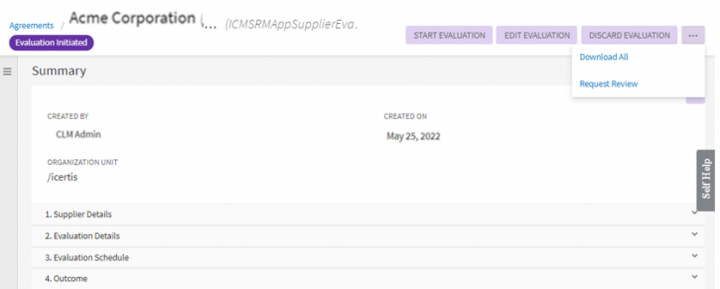
Buyer organization often needs more information from suppliers when performing supplier evaluation. Suppliers are provided temporary and restricted access to ICI to provide missing documents. Suppliers can then submit the documents or raise queries. | Buyer organization often needs more information from suppliers when performing supplier evaluation. Suppliers are provided temporary and restricted access to ICI to provide missing documents. Suppliers can then submit the documents or raise queries. | ||
| + | |||
| + | Request Review option is not displayed when the evaluation is in progress. <br/> Discard Evaluation option is displayed only when the evaluation is in the initiated state. <br/> | ||
To perform supplier outreach: | To perform supplier outreach: | ||
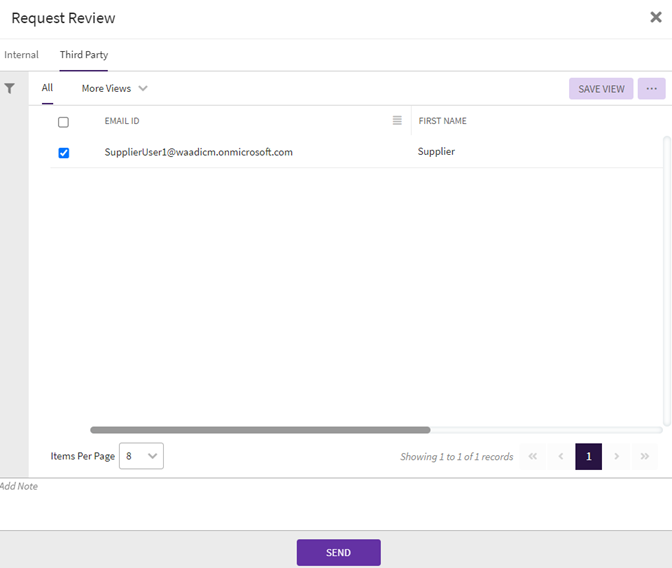
1. '''Click''' “Request Review” on the supplier evaluation “Summary” page. The “Request Review” window opens indicating to select the supplier user from the “Third Party” tab. | 1. '''Click''' “Request Review” on the supplier evaluation “Summary” page. The “Request Review” window opens indicating to select the supplier user from the “Third Party” tab. | ||
| − | + | <div class="image-green-border">[[File:8.1-SupplierEvaluation-Outreach.png|720px|8.1-SupplierEvaluation-Outreach.png]]</div> | |
2. '''Select''' the supplier contact on the “Third Party” tab to whom you want to send the supplier evaluation for review and '''click''' “Send”. | 2. '''Select''' the supplier contact on the “Third Party” tab to whom you want to send the supplier evaluation for review and '''click''' “Send”. | ||
'''Note''': Buyers can add additional information in the “Add Note” section before sending it for supplier review. | '''Note''': Buyers can add additional information in the “Add Note” section before sending it for supplier review. | ||
| − | + | <div class="image-green-border">[[File:8.1-SupplierEvaluation-RequestReview.png|720px|8.1-SupplierEvaluation-RequestReview.png]]</div> | |
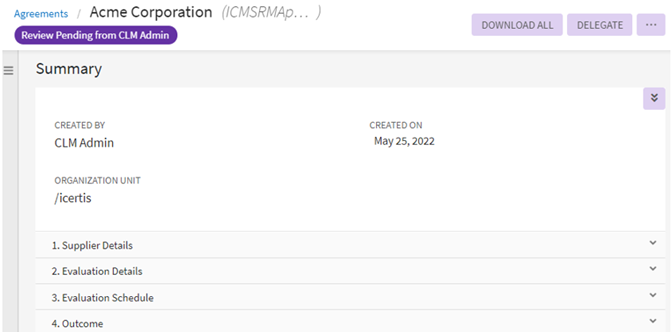
Suppliers receive a note in the form of email notification indicating the documents that are missing to complete the process of supplier evaluation. <br/> The status of the supplier evaluation changes to “Review Pending”. Buyers can perform the following actions at this stage: | Suppliers receive a note in the form of email notification indicating the documents that are missing to complete the process of supplier evaluation. <br/> The status of the supplier evaluation changes to “Review Pending”. Buyers can perform the following actions at this stage: | ||
| Line 1,094: | Line 1,159: | ||
*Approve: Allows approving the supplier evaluation documentation. | *Approve: Allows approving the supplier evaluation documentation. | ||
*Reject: Allows rejecting the supplier evaluation documentation. | *Reject: Allows rejecting the supplier evaluation documentation. | ||
| + | <div class="image-green-border">[[File:8.1-SupplierEvaluation-RequestReview2.png|RTENOTITLE]]</div> <div class="image-green-border"> </div> | ||
| − | + | === Adding Evaluation KPI === | |
Buyers can add evaluation KPIs when the evaluation is in “Evaluation Initiated” state. Evaluation KPIs are the quantifiable measure of supplier performance for the decided timeline. | Buyers can add evaluation KPIs when the evaluation is in “Evaluation Initiated” state. Evaluation KPIs are the quantifiable measure of supplier performance for the decided timeline. | ||
| Line 1,102: | Line 1,168: | ||
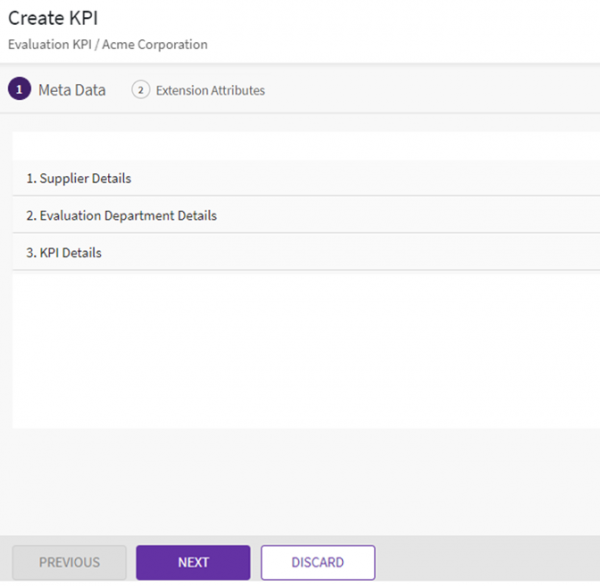
1. '''Click''' the plus icon next to “Evaluation KPI” on the Evaluation “Details” page. | 1. '''Click''' the plus icon next to “Evaluation KPI” on the Evaluation “Details” page. | ||
| − | + | <div class="image-green-border">[[File:8.1-SupplierEvaluation-Add KPI.png|920px|8.1-SupplierEvaluation-Add KPI.png]]</div> | |
2. '''Select''' or '''enter''' the details in the following sections. | 2. '''Select''' or '''enter''' the details in the following sections. | ||
| Line 1,120: | Line 1,186: | ||
**Other KPI Evaluator: Buyers can add more than one KPI evaluators in case the assigned evaluator is not available. | **Other KPI Evaluator: Buyers can add more than one KPI evaluators in case the assigned evaluator is not available. | ||
**KPI Evaluation Approver: Is the user responsible for approving the evaluation performed based on the defined KPIs. | **KPI Evaluation Approver: Is the user responsible for approving the evaluation performed based on the defined KPIs. | ||
| + | *KPI Details: This section contains the following options. | ||
| + | **KPI Category: Is the category of the KPI against which the supplier performance is evaluated. For example, Annual Revenue of the supplier organization. | ||
| + | **KPI Metric Name: Are the specific metrics that must be captured under the KPI category against which the supplier performance is evaluated. For example, revenue gains in terms of percentage. | ||
| + | **Unit of Measurement: Is the unit against which the KPI metrics are captured. For example, percentage, | ||
| + | **Expected Rating : Is the rating that is expected as an outcome of the performance evaluation of the supplier. | ||
| + | **Tolerance Threshold Rating: Is the minimum rating expected as an outcome of the performance evaluation. | ||
| + | **KPI Weightage: Is the weight of the KPIs based on which the supplier performance will be evaluated. | ||
| + | **Value : Is used to capture the absolute KPI score without weightage. | ||
| + | **Actual KPI Score: It is the multiplication of the values added in KPI Weightage and Value options. This score is used in calculating the performance evaluation overall score. | ||
| + | **Actual Rating: Is the actual rating added for a particular supplier after evaluating. | ||
| + | **Rating comments (if any): This is the additional information to justify the comments added for a particular supplier when performing the evaluation. | ||
| + | **Deviation from Threshold Rating : Toggle the button as “Yes” in case there is a deviation in the supplier performance rating from the tolerance ratings. | ||
| + | <div class="image-green-border">[[File:8.1-SupplierEvaluation-Add KPI1.png|600px|8.1-SupplierEvaluation-Add KPI1.png]]</div> | ||
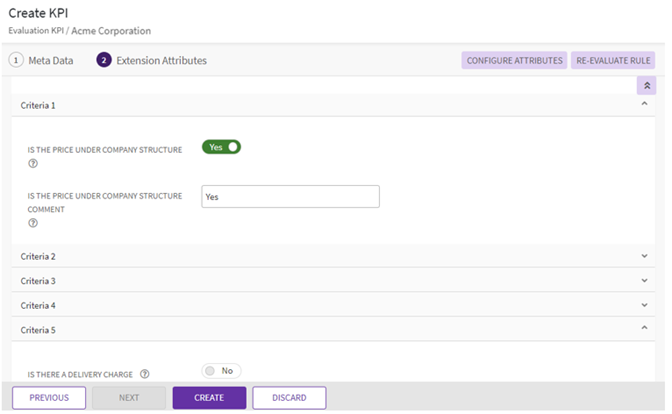
| + | 3. '''Click''' “Next”. The “Extension Attributes” window opens displaying the configured questions. | ||
| − | | + | 4. '''Select''' or enter the appropriate answers to the questions configured under extension attributes. For example, toggle the option to “Yes” for “Is the Price under Company Structure” and enter the value for “Is the Price under Company Structure Comment” as appropriate. |
| − | | + | '''Note''': The questions added under Extension Attributes are defined by buyer team. |
| + | 5. '''Click''' “Create”. The evaluation KPI is created, and the count is updated in the left navigation pane on the supplier evaluation “Details” page. | ||
| + | <div class="image-green-border">[[File:8.1-SupplierEvaluation-Add KPI2.png|720px|8.1-SupplierEvaluation-Add KPI2.png]]</div> <div class="image-green-border"> </div> | ||
| + | |||
| + | |||
| + | === Starting the Evaluation === | ||
| + | |||
| + | It is mandatory to add an evaluation KPI before starting the evaluation. On clicking “Start Evaluation” the evaluation KPIs are sent for assessment to the evaluator if they are not in “Approved” state already. | ||
| + | |||
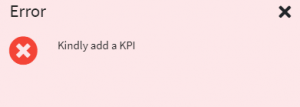
| + | '''Note''': Clicking “Start Evaluation” before adding an evaluation KPI displays an error indicating to add evaluation KPI. | ||
| + | <div class="image-green-border">[[File:8.1-SupplierEvaluation-Start-Error.png|300px]]</div> | ||
| + | To start evaluation: | ||
| + | |||
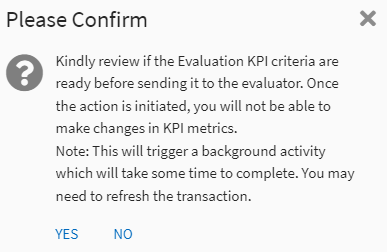
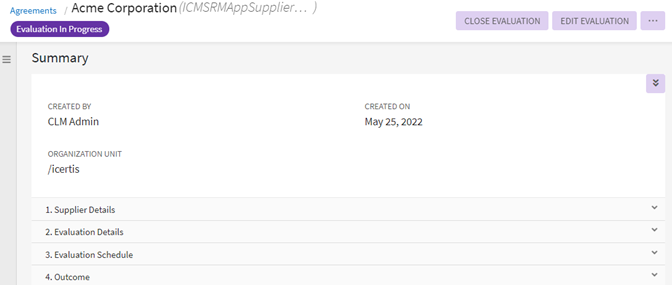
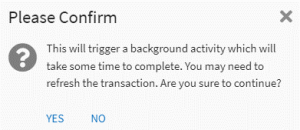
| + | 1. '''Click''' “Start Evaluation” on the evaluation “Details” page. The “Please Confirm” window opens indicating to review if the evaluation KPI are ready before sending to evaluator. Click “Yes” or “No” dependent on whether you want to start evaluation. Clicking “Yes” changes the evaluation status to “Evaluation in Progress ”. Clicking “No” keeps the evaluation in the “Evaluation Initiated” state. | ||
| + | <div class="image-green-border">[[File:8.1-SupplierEvaluation-Start.png|450px]]</div> <div class="image-green-border"> </div> <div class="image-green-border"> </div> <div class="image-green-border">[[File:8.1-SupplierEvaluation-Start1.png|920px]]</div> | ||
| | ||
| + | |||
| + | === Submitting the Evaluation === | ||
| + | |||
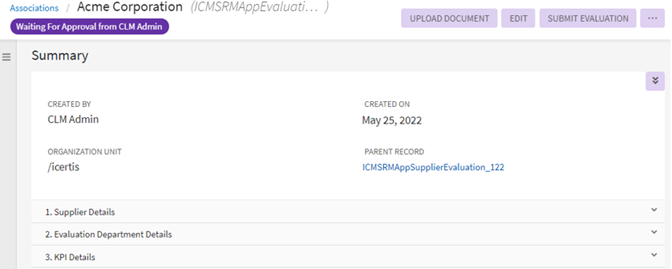
| + | Evaluators can submit the evaluation after performing all the necessary steps. <br/> To submit the evaluation: <br/> 1. '''Click''' the eye icon next to the relevant task under “My Tasks” that displays the relevant supplier evaluation to be submitted. The Evaluation KPI “Summary” page opens. | ||
| + | <div class="image-green-border">[[File:8.1-SupplierEvaluation-Submit.png|600px|8.1-SupplierEvaluation-Submit.png]]</div> | ||
| + | 2. '''Click''' “Edit” to edit the supplier evaluation and add the scores, answer questions, and '''click''' “Next”. | ||
| + | <div class="image-green-border">[[File:8.1-SupplierEvaluation-Submit1.png|520px|8.1-SupplierEvaluation-Submit1.png]]</div> | ||
| + | 3. '''Click''' “Update” to open the evaluation KPI “Summary” page. | ||
| + | |||
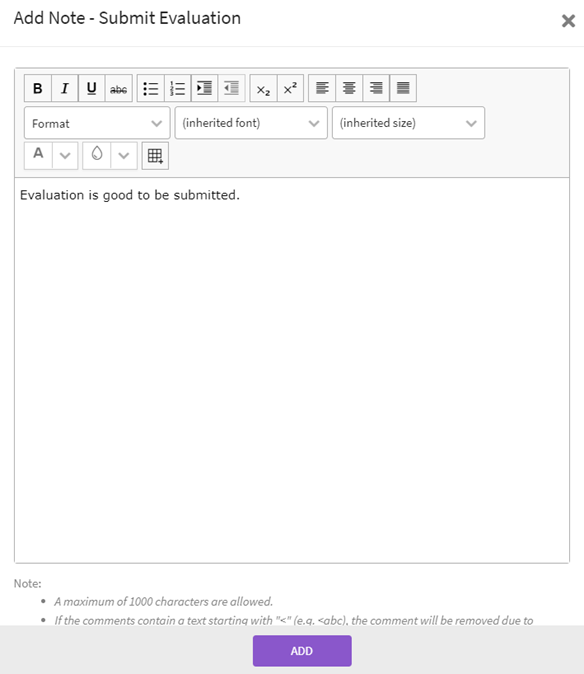
| + | 4. '''Click''' “Submit Evaluation” after making the necessary updates to the evaluation. The “Add Note-Submit Evaluation” window opens. | ||
| + | <div class="image-green-border">[[File:8.1-SupplierEvaluation-Submit2.png|920px|8.1-SupplierEvaluation-Submit2.png]]</div> | ||
| + | 5. '''Add''' the desired information on the “Add Note- Submit Evaluation” window and '''click''' “Add”. | ||
| + | <div class="image-green-border">[[File:8.1-SupplierEvaluation-Submit3.png|600px|8.1-SupplierEvaluation-Submit3.png]]</div> <div class="image-green-border"> </div> | ||
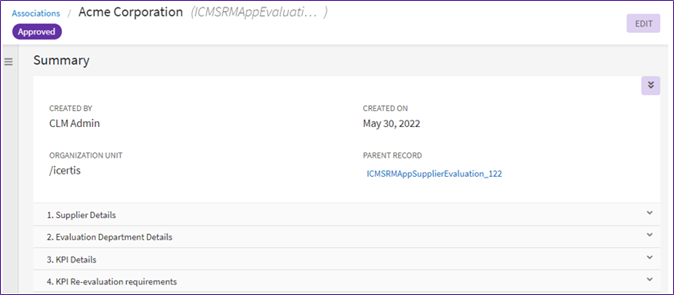
| + | The status of the evaluation KPI changes to “Approved ” . | ||
| + | <div class="image-green-border">[[File:8.1-SupplierEvaluation-Submit4.png|920px]]</div> | ||
| + | |||
| + | |||
| + | === Closing the Evaluation === | ||
| + | |||
| + | On closing the evaluation, the actual score of the evaluation KPIs is set automatically based on the addition of all evaluation KPIs. <br/> If the evaluation KPI is not approved, an error message is displayed indicating that evaluation KPI is ongoing. | ||
| + | <div class="image-green-border">[[File:8.1-Closing Evaluation Error.png|300px]]</div> <div class="image-green-border"><br/> After all the evaluation KPIs are approved, buyers can close the supplier evaluation. </div> <div class="image-green-border"><br/> To close the evaluation:</div> | ||
| + | 1. '''Click''' “Close Evaluation” on the evaluation “Details” page. The “Please Confirm” window opens indicating to confirm closing the evaluation. | ||
| + | <div class="image-green-border">[[File:8.1-ClosingEvaluation.png|300px]]</div> | ||
| + | 2. '''Click''' “Yes” to confirm closing the evaluation. The status of the evaluation changes to “Evaluation Completed”. Clicking “No” on this window keeps the evaluation status to “Evaluation in Progress”. | ||
| + | |||
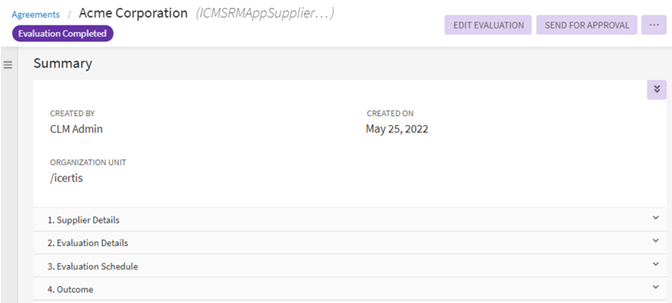
| + | After the evaluation is completed, buyers can define the performance classification. For low performing suppliers, buyers can define a plan as per the requirement using the “Edit Evaluation” section. | ||
| + | <div class="image-green-border">[[File:8.1-ClosingEvaluation1.png|920px]]</div> | ||
| | ||
| − | ''' | + | |
| + | === Sending the Evaluation for Approval === | ||
| + | |||
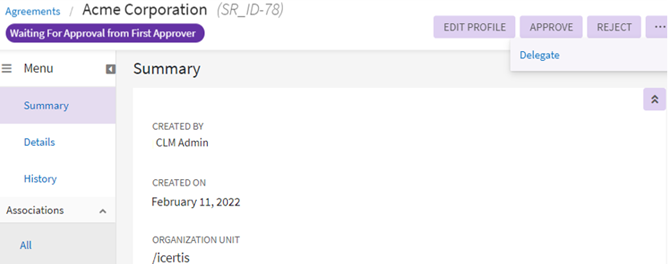
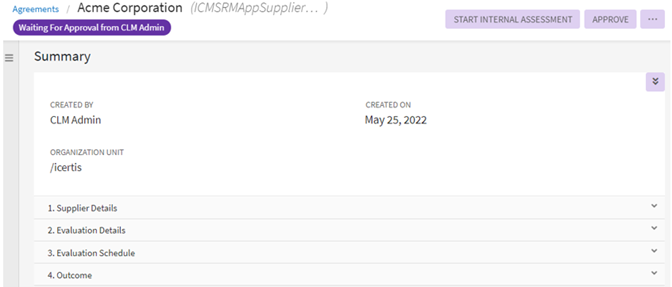
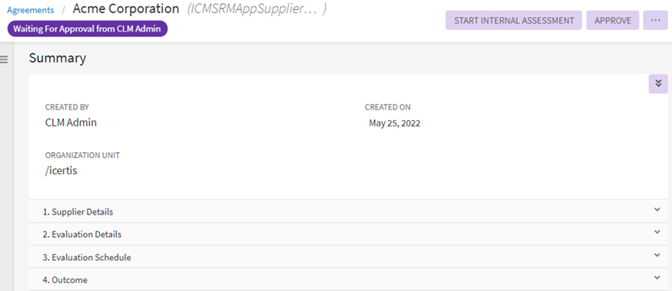
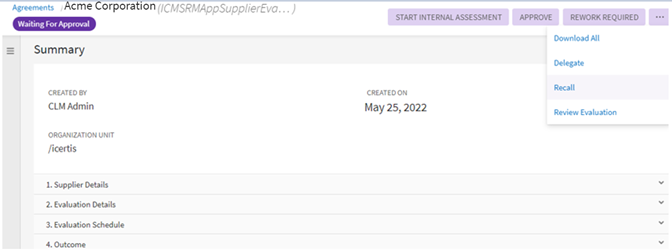
| + | Buyers can send the evaluation for management approval after the evaluation is completed. This changes the status of the supplier evaluation to “Waiting for Approval” state. | ||
| + | <div class="image-green-border">[[File:8.1-SendingEvaluationforApproval.png|920px]]</div> | ||
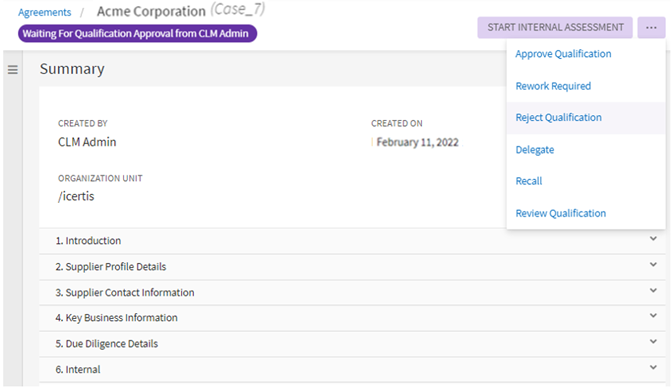
| + | The approver from the buyer team can perform the following actions in this stage. | ||
| + | |||
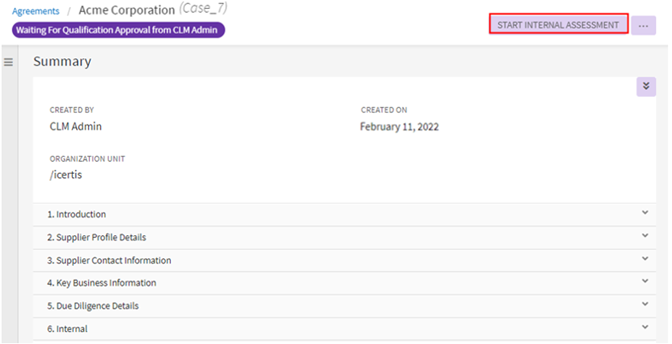
| + | *Start Internal Assessment: This allows performing the internal review of the supplier evaluation after the supplier evaluation is completed. | ||
| + | *Approve: This stage involves approving the supplier evaluation. | ||
| + | *Rework Required: This stage involves rejecting and sending the supplier evaluation for rework. | ||
| + | *Download All: Allows downloading the supplier evaluation along with its attachments. | ||
| + | *Delegate : Allows delegating the process of approving the supplier evaluation. | ||
| + | *Recall: Buyers can recall the evaluation sent for approval. | ||
| + | *Review Evaluation: This allows sending the evaluation for additional reviews as per the requirement. | ||
| + | |||
| + | |||
| + | === Starting Internal Assessment === | ||
| + | |||
| + | To start internal assessment: | ||
| + | |||
| + | 1. '''Click''' “Start Internal Assessment” on the evaluation “Details” page. The “Edit Supplier Evaluation” page opens. | ||
| + | <div class="image-green-border">[[File:8.1-StartingInternalAssessment.png|920px|8.1-StartingInternalAssessment.png]]</div> | ||
| + | 2. '''Make''' the required changes to the “Edit Supplier Evaluation” page and '''click''' “Update” to complete the internal assessment. | ||
| | ||
| + | |||
| + | |||
| + | === Approving the Supplier Evaluation === | ||
| + | |||
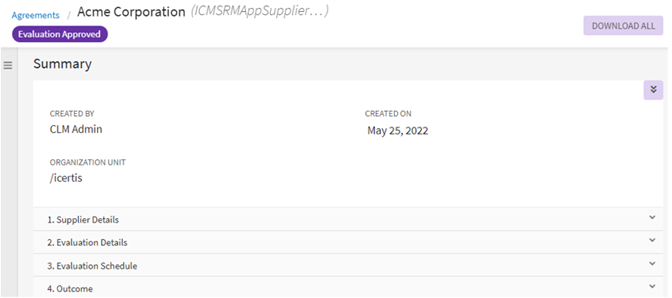
| + | On approving the supplier evaluation, the supplier evaluation status changes to “Evaluation Approved”. | ||
| + | <div class="image-green-border">[[File:8.1-Approving Evaluation.png|920px]]</div> | ||
| + | Supplier evaluation can be rejected by clicking the “Rework Required” on the evaluation “Summary” page. Rejecting the supplier evaluation changes its status to “Evaluation Initiated”. | ||
| + | |||
| + | '''Note''': Approvers can request for additional information about the evaluation using the “Review Evaluation” option on the evaluation “Summary” page. | ||
| + | |||
| + | |||
| + | |||
| + | === Recalling the Supplier Evaluation === | ||
| + | |||
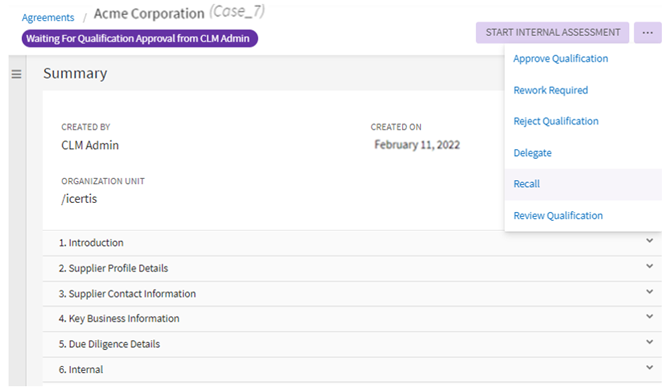
| + | Buyers can recall the supplier evaluation only after the evaluation is completed and its status changes to “Waiting for Approval”. | ||
| + | |||
| + | To recall the supplier evaluation: | ||
| + | |||
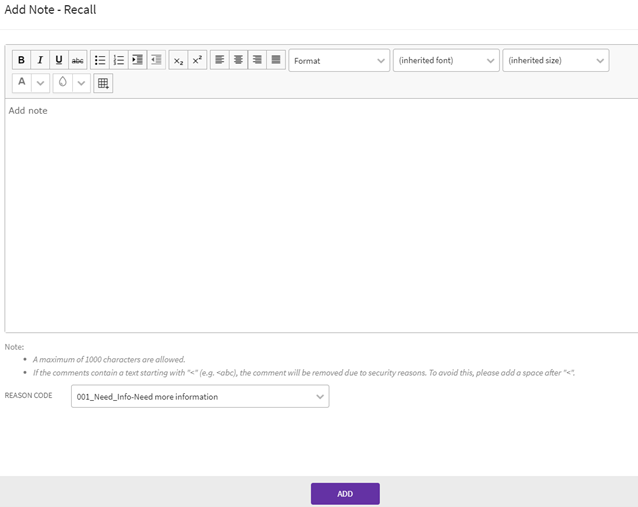
| + | 1. '''Click''' “Recall” under the three dots on the supplier evaluation “Summary” page. The “Add Note-Recall” window opens. | ||
| + | <div class="image-green-border">[[File:8.1-RecallEvaluation.png|920px|8.1-RecallEvaluation.png]]</div> | ||
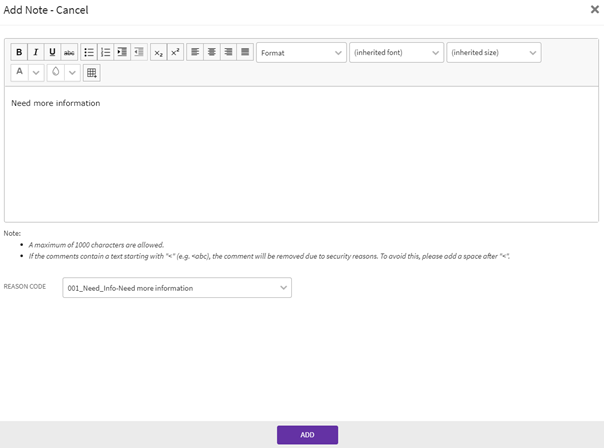
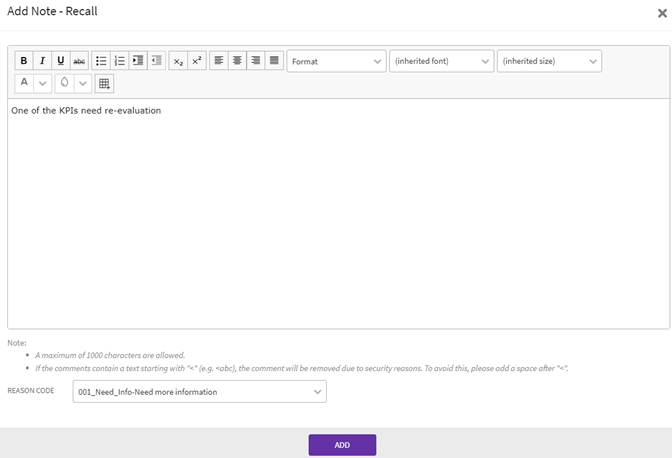
| + | 2. '''Type''' the necessary information on the “Add Note-Recall” window and '''click''' “Add”. | ||
| + | <div class="image-green-border">[[File:8.1-RecallEvaluation1.png|720px|8.1-RecallEvaluation1.png]]</div> | ||
| + | This changes the status of the evaluation to “Evaluation Initiated”. | ||
| + | |||
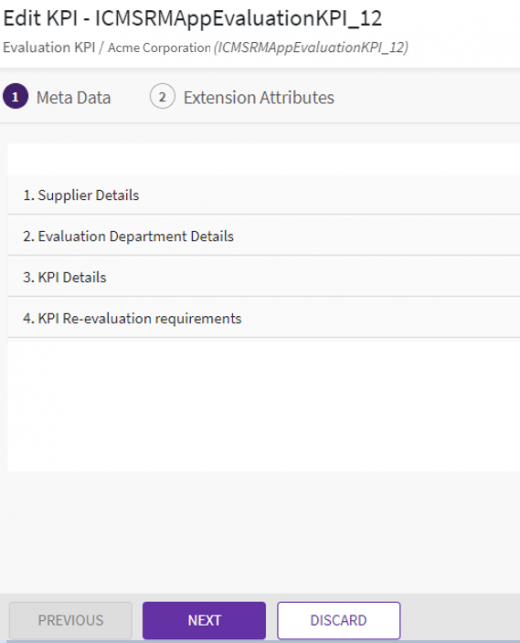
| + | 3. '''Click''' the icon next to the evaluation KPI to open it and click “Edit” on the evaluation KPI “Summary” page. The “Edit KPI” page opens which now displays a new section called “Re-evaluation Requirements”. | ||
| + | <div class="image-green-border">[[File:8.1-RecallEvaluation2.png|920px]]</div> | ||
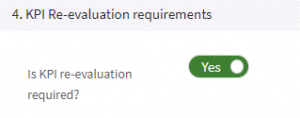
| + | 4. '''Toggle''' the “Is KPI re-evaluation required” option as “Yes" and click “Next” to open the “Extension Attributes” section. | ||
| + | <div class="image-green-border">[[File:8.1-RecallEvaluation3.png|300px]]</div> | ||
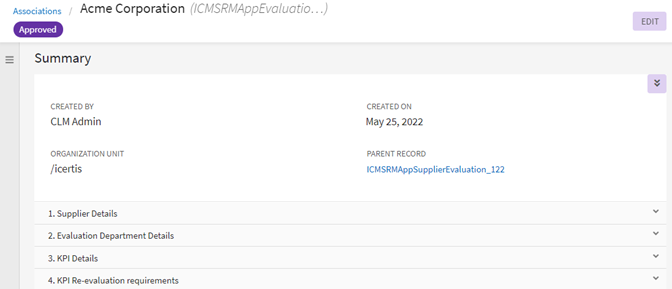
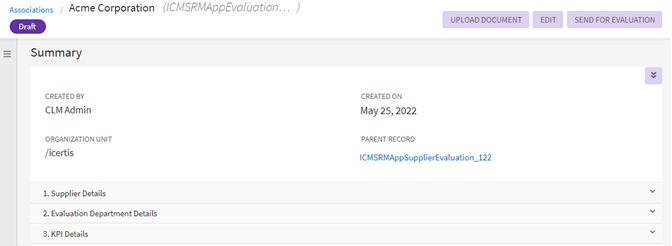
| + | 5. '''Click''' “Update”. The Evaluation KPI is updated with the latest information and its status changes to “Draft”. | ||
| + | <div class="image-green-border">[[File:8.1-RecallEvaluation4.png|920px]]</div> | ||
| + | 6. '''Click''' the link under “Parent Record” on the evaluation KPI “Summary” page and perform the evaluation process again as described in the above sections and send it for approval after completing the evaluation. | ||
| + | |||
| + | === Discarding the Evaluation === | ||
| + | |||
| + | Buyers can discard the supplier evaluation while initiating the evaluation. <br/> To discard the supplier evaluation:<br/> 1. '''Click''' “Discard Evaluation” on the evaluation “Summary” page. The “Please Confirm” window opens indicating to confirm whether the evaluation must be deleted. | ||
| + | <div class="image-green-border">[[File:8.1-Discarding Evaluation.png|300px]]</div> | ||
| + | 2. '''Click''' “Yes” to confirm deleting the supplier evaluation. The supplier evaluation is deleted, and the buyer user is redirected to the supplier evaluation index page. | ||
| | ||
| | ||
| + | |||
| + | '''Related Topics''': [[Agreement_Management|Agreement Management]] | ||
Latest revision as of 05:43, 5 August 2022
Contents
- 1 ICI Supplier Relationship Management
- 1.1 Overview
- 1.2 The Solution Framework
- 1.3 The Benefits
- 1.4 The Users
- 1.5 Navigating the App
- 1.6 Working with Supplier Registration
- 1.6.1 Supplier Registration Workflow
- 1.6.2 Submitting the Registration Request from External Location
- 1.6.3 Creating Supplier Registration
- 1.6.4 Viewing Supplier Registration
- 1.6.5 Editing Supplier Registration
- 1.6.6 Discarding Supplier Registration
- 1.6.7 Sending Registration for Approval
- 1.6.8 Internal Assessment of Supplier Registration
- 1.6.9 Rejecting Supplier Registration
- 1.6.10 Putting Supplier Registration on Hold
- 1.6.11 Recalling Supplier Registration
- 1.6.12 Delegating Supplier Registration
- 1.6.13 Approving the Supplier Registration
- 1.6.14 Post-Approval Supplier Registration Details
- 1.6.15 Validating the Duplicate Registrations
- 1.7 Supplier Registration Details page
- 1.8 Working with Supplier Qualification
- 1.9 Supplier Qualification Workflow
- 1.9.1 Creating a Supplier Qualification
- 1.9.2 Viewing Supplier Qualification
- 1.9.3 Editing Supplier Qualification
- 1.9.4 Supplier Outreach
- 1.9.5 Approving Supplier Qualification
- 1.9.6 Delegating a Supplier Qualification
- 1.9.7 Starting Internal Assessment of Supplier Qualification
- 1.9.8 Rejecting Supplier Qualification
- 1.9.9 Reworking Supplier Qualification
- 1.9.10 Reviewing Supplier Qualification
- 1.9.11 Recalling Supplier Qualification
- 1.10 Supplier Qualification Details Page
- 1.11 Working with Supplier Profile
- 1.12 Supplier Profile Workflow
- 1.13 Supplier Profile Details Page
- 1.14 Managing Supplier Hierarchy
- 1.15 Unique Supplier ID across Supplier Onboarding
- 1.16 Supplier Onboarding Dashboard
- 1.17 Working with Supplier Evaluation
- 1.17.1 Creating Supplier Evaluation
- 1.17.2 Supplier Evaluation Details Page
- 1.17.3 Editing Evaluation
- 1.17.4 Supplier Outreach
- 1.17.5 Adding Evaluation KPI
- 1.17.6 Starting the Evaluation
- 1.17.7 Submitting the Evaluation
- 1.17.8 Closing the Evaluation
- 1.17.9 Sending the Evaluation for Approval
- 1.17.10 Starting Internal Assessment
- 1.17.11 Approving the Supplier Evaluation
- 1.17.12 Recalling the Supplier Evaluation
- 1.17.13 Discarding the Evaluation
ICI Supplier Relationship Management
Overview
Icertis is expanding its market coverage through Supplier Relationship Management (SRM) Suite that provides value to the procurement functions in the enterprise set up.
Built on top of the ICI Platform, this app enables businesses to handle both standard supplier management challenges and those unique to their business
cases, processes, and policies.
Icertis gives the flexibility to configure the App as per the customer requirement, making it a truly enterprise App.
The Solution Framework
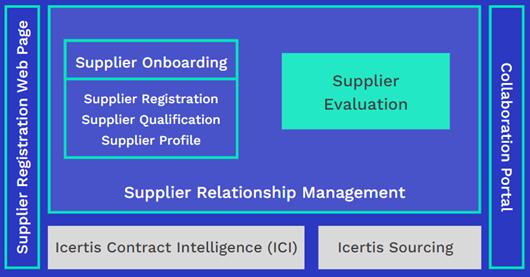
The App brings forth a solution to supplier relationship management, before Sourcing processes are kicked off. The App comprises these stages in the Supplier Relationship Management process:
- Supplier Onboarding
- Supplier Registration: This stage is the initial registration process of suppliers, wherein potential suppliers express their interest to engage in business with the buyer organization, by submitting a registration request. This includes suppliers’ complete profile information along with the industry and category of goods or services they offer.
- Supplier Qualification: This stage is where suppliers are assessed and qualified to be eligible for onboarding. The procurement and compliance teams in qualification will
perform due diligence by checking supplier’s industry vertical, geography, conformance to compliance regulations, and their overall business credibility and capabilities. - Supplier Profile: Once suppliers pass qualification, they are onboarded and their detailed supplier profiles are auto created. Suppliers also get access to their profiles to view and update.
- Supplier Evaluation: The Supplier Evaluation module introduced in the Supplier Relationship Management suite helps organizations manage supplier performance and evaluate and mitigate risks associated with working with suppliers. It is part of the Supplier Relationship Management application, which is built on Icertis Contract Intelligence.
Each stage is unique and has its own process flow that connects and contributes to the overall lifecycle of the supplier relationship management process.
- Supplier Registration
- Comprehensive Approval Process
- Email invitiation with link to registration form.
- Self-registration with easily available public registration form.
- Supplier Qualification
- Supplier Capability Assessment for business products/ services.
- Supplier Due Diligence for regulatory compliance, diversity compliance(if applicable) and background check.
- Supplier Management
- Supplier Onboarding
- Supplier Evaluation
- Gathering supplier documents
- Configuring Evaluation KPIs
- Evaluate KPIs based on the metrics
- Review and approval activities
The Benefits
The App ensures that buyers and suppliers are both facilitated in procurement activities and
processes, with significant benefits for both parties. It focuses on managing suppliers efficiently, and therefore, eliminates the woes of procurement
teams, who are constantly striving to assess and choose the right suppliers. The App is a comprehensive solution to the existing pain points in buyer-supplier relationships,
and it helps by:
- Providing a single source of truth, with a unified and synchronized data source solving problems related to data disparity between multiple systems (CLM, ERP, P2P etc.).
- Improving Governance and Compliance by real-time tracking, monitoring and detection of changes in critical supplier information (external databases and federated lists).
- Expediting the supplier onboarding cycle time, and removing potential bottlenecks, with automated workflows, rules, notifications/reminders and dashboards, all of which ensure continuous tracking of SLAs.
- Improving relationships through collaboration, allowing supplier’s self-service capabilities to keep their information updated and relevant.
- Fostering interoperability with other business apps, and deriving benefits by seamless integration with Sourcing App.
The Users
There are multiple classes of users with varied privileges and responsibilities within the App. The current class of users include:
- Procurement Team: This team will be involved with Supplier Registration and Onboarding.
- Review Registration.
- Initiate Onboarding (after qualification).
- Define service related KPIs along with business.
- Compliance Team: This team will take care of Supplier Qualification.
- Perform due diligence and background checks.
- Check with external database for risk, non-compliance, sanctions, watchlists etc.
- Supplier: This is the primary focus of the App, the the quintessential Suppliers, who will be part of all processes and stages of the app’s lifecycle.
- Suppliers can submit registration through a web page.
- Suppliers can provide qualification documents.
- A provisioned supplier can edit supplier profile and bid to invited sourcing event.
Based on the user or security group access, the tile options visible to a user would vary:
- View Access: the ability to view:
- Supplier Registration
- Supplier Qualification
- Supplier Profile
- Supplier Evaluation
- Manage Access: the ability to view and create:
- Supplier Registration
- Supplier Qualification
- Supplier Profile
- Supplier Evaluation
Users within the buyer organization can create and view supplier registration, supplier qualification ,supplier profile and supplier evaluation based on the permissions provided in security group.
Supplier contacts, when provisioned in ICI and based on the permissions provided, can only view and not create the Supplier Qualification, Supplier Evaluation and Supplier Profile.
Note: External users can only view their supplier organization records and no other supplier organization records. Supplier contacts (external users) do not have “Manage” access after being provisioned in ICI.
Buyers can access the available options by clicking the supplier management tile.
To access the options under supplier management:
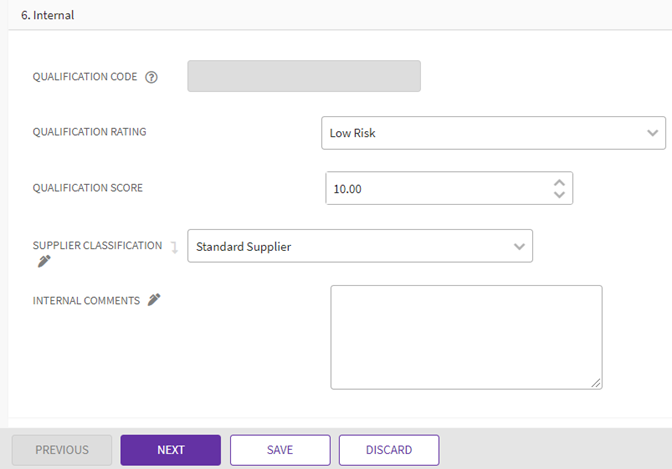
Click Supplier Management tile on the Home page. The following options are displayed.
- Dashboard
- Supplier Registration
- Supplier Qualification
- Supplier Profile
- Supplier Evaluation
Working with Supplier Registration
An integral part of the App, Supplier Registration is the process that sets the overall app objectives in motion. This stage is the initial registration process of suppliers, wherein potential suppliers express their interest to engage in business with the buyer organization, by submitting a registration request. This includes suppliers’ complete profile information along with the industry and category of goods or services they offer.
Supplier registrations have to be created at first, before their workflow moves forward towards qualification and onboarding.
Supplier Registration Workflow
In the App, these are the ways for submitting a Supplier Registration request:
- Supplier can submit a registration form from a publicly available web location outside ICI. This can happen in two ways:
- Buyer can send a public web page link, via email, to the supplier registration form hosted on an external web location, which the supplier can access.
- Supplier can browse and visit the buyer’s website and locate the publicly hosted registration form.
- Buyer can also submit the registration request on behalf of the supplier from within the App.
Submitting the Registration Request from External Location
As mentioned in the previous section, the supplier registration form can be hosted external to App, and accessible to all. The form’s web location can either be shared to the supplier by the
buyer, or a supplier browsing the web can directly visit the buyer’s website, fill and submit the form.
With a publicly available form that is conveniently accessible for any interested supplier to register, it becomes quite easy to collect basic information about suppliers, as a foundational
step towards building a good supplier network.
With this feature:
- Suppliers can easily fill up and submit a publicly available registration request form, on a public web page accessible by all and external to the App.
- Appropriate data format guidelines and validations are provided in filling up the form.
- Mandatory fields are marked, and validation messages are provided, if the form is submitted without filling such fields.
- Success messages will be displayed when the form is submitted.
- Email notifications will also be sent to the potential suppliers for successful form submissions, acknowledging the registration form submission in the email.
- The information captured in the form will be transmitted to the registration form within the App.
- All standard form data types will be supported in the registration form.
- Multiple users can simultaneously use and submit the registration form.
- Users may open the same page on multiple browser tabs.
Potential suppliers may submit the public registration form as follows:
1. Open the external URL and Click on the Supplier Registration button. The supplier registration form opens, in English language, by default.
2. Fill out all the required and desired fields in the form.
When a Supplier Registration form gets submitted:
- A confirmation message is displayed if the submission is successful.
- Appropriate notifications are sent to both the supplier and the buyer via email, containing a unique “Registration Code”.
- An instance of the supplier registration is automatically created within the App with the status “Waiting for Registration Approval”.
- If, for any technical reason, the form submission fails, a failure notification will be sent to the buyer team.
Creating Supplier Registration
The buyer can create a registration, on behalf of the supplier, from within the App:
- From the “Create” workbench on the “Home” page.
- From the “Supplier Management” tile
Creating Supplier Registration using “Create” workbench
Click the plus icon on the top right corner of the “Home” page to open the “Create” workbench and then click “Supplier Registration” to open the “Create Supplier Registration” page.
Follow the steps mentioned below to create supplier registration.
Creating Supplier Registration using “Supplier Management” tile
1. Click the "Supplier Management" tile, and click the "Supplier Registration" option. The "Supplier Registration" index page opens.
- Introduction: This is a generic welcome message for supplier registrations, including instructions and suggestions.
- Terms of Use: This is a conditional message asking the user to comply and accept the terms of using supplier registrations in the App. Selecting Yes allows to move forward
with the registrations, whereas, if No is selected, then the registration will not be processed any further.
- Vendor Type: It is used to depict the type of vendor. For example, supplier, provider, sub-contractor and so on.
- Legal Entity Name: This is the legal name of the supplier’s organization.
- Doing Business As: The business name used by the supplier, in cases where suppliers may conduct business by a name different from their registered legal entity name.
- D&B Number: A 9-digit unique number assigned by Duns & Bradstreet to any organization.
- Primary Business Address Line 1: This is the first part of the supplier organization’s official address, covering the building and street details.
- Primary Business Address Line 2: This is the supplier’s official address, second part.
- City: This is the supplier company’s official location city.
- State: This is the supplier company’s official location state.
- Country: This is the supplier company’s official location country.
- Zip Code: This is the supplier company’s official location zip code.
- Website: This is the supplier company’s official website.
- Primary Contact First Name: The first name of the designated primary contact of the supplier organization.
- Primary Contact Last Name: The last name of the designated primary contact of the supplier organization.
- Designation: The name or title of the designated primary contact of the supplier organization.
- Email: The email address of the designated point of contact from the supplier side.
- Telephone: The phone number of the designated point of contact from the supplier side.
- Fax: The fax of the designated point of contact from the supplier side.
- Ownership Status: This is a dropdown to select the supplier’s type of business ownership, for example – “LLC”, “Corporation”, “Partnership” etc.
- Supplier Operative Industry: This is the supplier company’s industry vertical.
- Products /Services Provided: This is to select the category of products or services that the supplier provides.
- Head of Organization Name: This is the supplier organization’s head personnel.
- Head of Organization Email: This is the supplier organization’s head personnel’s official email address.
- Year of Incorporation: This is the supplier organization’s year of incorporation.
- Annual Revenue: This is to select the supplier organization’s annual revenue range, in US Dollars, from a dropdown with different ranges.
- Do you have a Parent Company: This is to indicate if there is a parent company of the supplier organization.
- Holding Company Name: This displays the list of all holding companies where “Is Holding Company” option is set as “True”.
- Are you a Holding Company: This helps capture whether the selected company is a holding company. Select “Yes” to make it the holding company. Holding companies are setup specifically to group multiple subsidiaries together.
- Are you a Parent Company: This helps capture whether the company is the parent company. The default value of this attribute is set to “No”. Select “Yes” to make it the parent company. Parent companies typically have controlling interest in other companies that provides them the right to control other company’s interests.
- Parent Company Name: Is the one that has controlling interest and has the right to control the subsidiaries operations. This option is enabled only if the "Do you have a Parent Company" is selected as "Yes". This displays the list of all parent companies where “IsParentCompany” option is set as “True”.
- Parent Company DBA: This option is enabled only if the "Do you have a Parent Company" is selected as "Yes". This specifies the name with which the company does the business.
The following attribute fields are internal, for buyer procurement team to assess registrations. This section is not available on the public webpage for supplier's view.
- Registration Code: This is the auto-generated code given as a reference identification for each supplier registration.
- Supplier Classification: This indicates the classification of the supplier per their credibility, for example – High Potential Supplier, Standard Supplier etc.
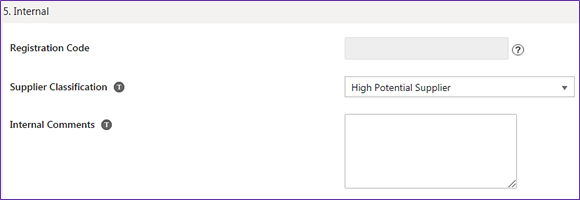
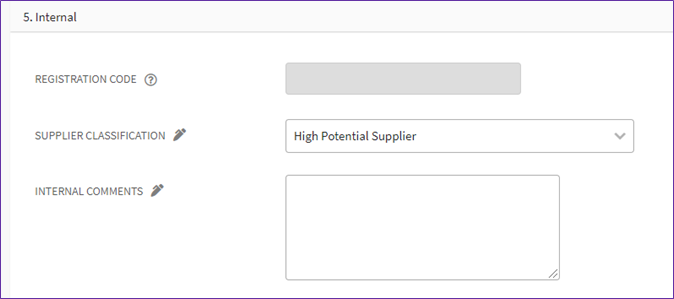
- Internal Comments: This is to add any internal note for the supplier in consideration.
3. Click "Next", once all desired and mandatory attribute fields are filled out. The Discard option is chosen to discard/delete registrations.
Note: The user can click on Save to save the information entered so far to finish later.
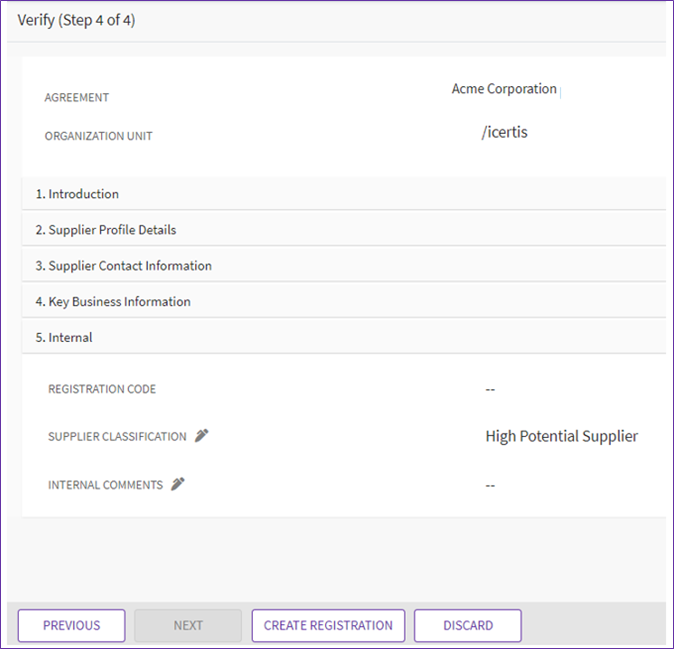
4. Verify all information, and click "Create Registration".
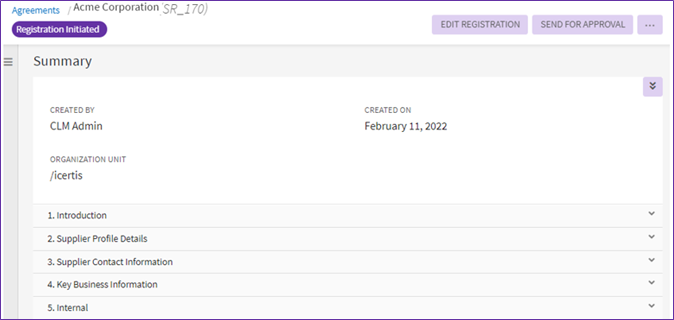
The supplier registration is created, with the status "Registration Initiated".
Viewing Supplier Registration
A supplier registration can be viewed as follows:
1. Click the "Supplier Management" tile, on the App Home page.
Editing Supplier Registration
A supplier registration can be edited as follows:
1. Click "Edit Registration" on the Supplier Registration Details page. The Attributes page opens.
Discarding Supplier Registration
Supplier registrations can be deleted or discarded, as required, at the discretion of the buyer, in case the buyer created the registration request incorrectly in the system and would need to
discard the same.
To delete the registration:
1. Navigate to Supplier Registrations page and open the desired Supplier Registration in draft state (Registration Initiated).
2. Click on "Discard Registration". A delete confirmation popup opens.
Sending Registration for Approval
After the buyer creates the registration request in the App and the supplier registration goes to Registration Initiated status, it is required to send the registration for approval.
On the bottom right of the Supplier Registration Details page click Send For Approval. This will initiate the approval request and notify respective approvers, as necessary. The supplier registration status will now become Waiting for Registration Approval.
Note: All web applications submitted by suppliers, via the public registration form, will directly go to a Waiting for Registration Approval status by default.
- Scoring the registration application by starting internal assessment.
- Reject the registration.
- Put the registration on hold.
- Approve the registration.
Internal Assessment of Supplier Registration
When a supplier registration is sent for approval and is in the Waiting for Registration Approval state, it can be internally assessed as follows:
1. 'C'lick Start Internal Assessment on the Supplier Registration Details page. The Attributes page opens.
Rejecting Supplier Registration
A supplier registration can be rejected when its in the Waiting for Registration Approval state. For the approver to Reject the supplier registration request.
1. Click on "Reject Registration".
Putting Supplier Registration on Hold
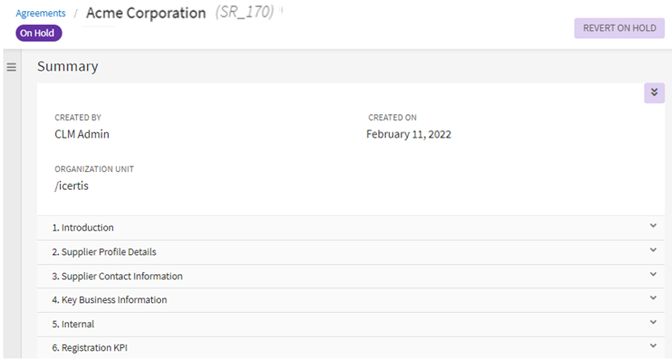
When a need arises to pause the supplier registration, mostly because sufficient registration requests have been received already for a business category, a registration could be put On Hold.
To put a Supplier Registration On Hold:
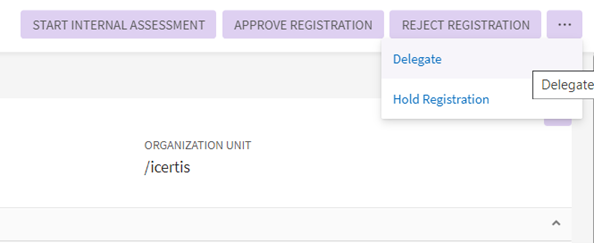
1. On the supplier registration Details page, click on "Show More" to expand more options.
Recalling Supplier Registration
If there is any anomaly or reason to recall a supplier registration, while it is in the state Waiting for Registration Approval, the buyer who submitted the request on behalf of supplier can do so.
To recall a supplier registration:
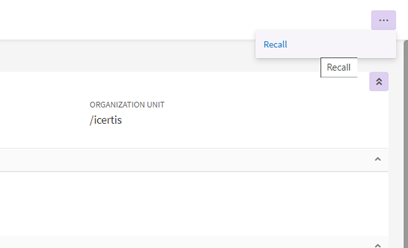
1. On the supplier registration "Details" page, click on "Show More" to expand more options.
2. Click on the "Recall" button.
3. Add a desired note, and select an appropriate Reason Code.
4. Click Add. The supplier registration will be recalled and assigned a Registration Initiated status.
Delegating Supplier Registration
To Delegate a supplier registration:
1. The approver logs into App and goes to Tasks window and opens the case.
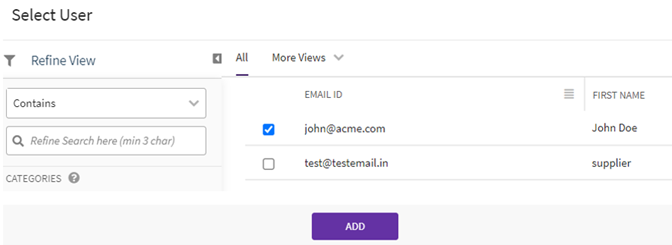
2. Click Delegate to delegate the supplier registration approval. Team popup window opens.
Approving the Supplier Registration
As described in previous sections, either the buyer creates the supplier registration within the App or the supplier submits an externally hosted registration request which automatically goes to the Waiting for Registration Approval status in the App.
Once the approver receives the approval request notification:
1. The approver logs into App and goes to Tasks window and opens the case.
2. The approver clicks "Approve Registration" to approve the supplier registration request.
- If the registration is approved, then the registration status changes to "Registration Approved".
- When supplier registration is approved the buyer receives a notification of the approval in an email containing a link to the registration case.
- Supplier also receives a notification, in email, about their registration request approved status.
- Once the registration is approved, a Supplier Qualification is auto-created, triggering the workflow for Supplier Qualification.
Post-Approval Supplier Registration Details
Once a supplier registration is approved, a new set of attributes get added to the registration details, and that is Registration KPI.
- Registration Creation Date: The auto-computed date when the supplier registration is initiated in the SRM app system.
- Registration Decision Date: The date when registration decisions (like On-hold, Reject, Approve etc.) are taken.
- Decision Time Taken: This indicates the duration taken in days from registration creation to actual decision.
- Registration SLA: SLAs defined by organization based on which registration decisions are usually taken.
- Deviation from SLA: This is the difference between decision time taken and registration SLA to identify if there is any deviation.
- Is Registration process completed timely: If decision time exceeds SLA, then it implies that the registration process is not completed in a timely manner. If it is less than the SLA, then the registration process is marked as completed in time.
Validating the Duplicate Registrations
Buyers may receive more than one registration from the same supplier submitted through the web page.
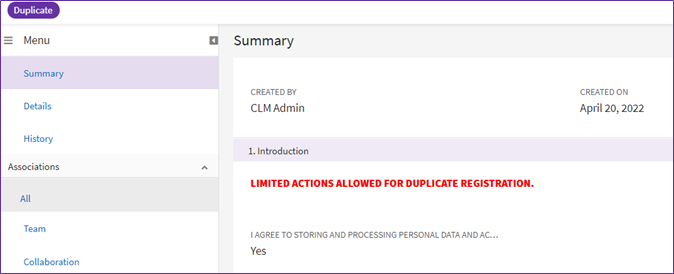
ICI Supplier Relationship Management can now match the supplier registration records based on the unique identifier attributes. This helps identifying the duplicate registrations and the status of the supplier registration is marked as “Duplicate”. Buyers can perform limited actions on the duplicate registrations and the supplier qualification is not generated.
Supplier Registration Details page
The Supplier Registration Details page is based upon standard ICI structure.
Registration Left Pane
These are the left pane line items seeded with the supplier registration Details page:
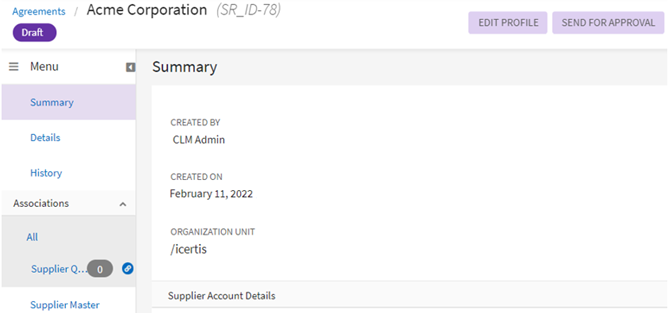
- Summary: Displays the name of the supplier registration instance (that is added when creating), who created it, and supplier registration instance details.
- Details: Displays the details specified when creating the supplier registration instance.
- History: Displays how the supplier registration has progressed till now, including the actions performed in supplier registration, as is also under “History” in the left pane.
- Associations: Displays the number of associated documents to the registration agreement. Click the plus icon to add new associations to the supplier registration.
- Team: Displays the members added to the team for this supplier registration instance. Click the plus icon to add new team members to the registration.
- Collaboration: Allows the internal team members to communicate with other internal team members by creating topics and posting messages in it.
- Notes: Displays the additional information about the supplier registration if it is added.
History
The History displays how the supplier registration has progressed till now and presents an overall audit for the supplier registration, under History in the left navigation pane on supplier registration Details page. History includes the activities and statuses for supplier registration, with Events, User Name, User Role, Date and Time, Details and Notes.
Working with Supplier Qualification
Supplier Qualification Workflow
This stage is where suppliers are assessed and qualified to be eligible for onboarding. The procurement and compliance team performs due diligence by checking supplier’s industry vertical, geography, conformance to compliance regulations, and their overall business credibility and capabilities.
- Create the supplier qualification manually.
- View the history of the actions performed on the supplier qualification.
- Initiate request for missing documents or certificates from supplier.
Note: The left navigation pane and the icons on the supplier qualification “Details” page are displayed based on the privileges granted to the logged-on user.
Creating a Supplier Qualification
Supplier Qualification is created automatically after the supplier registration is approved or is created manually by buyers.
The buyer can create a qualification from within the App in the following ways:
- From the “Create” workbench on the “Home” page.
- From the “Supplier Management” tile.
Creating Supplier Qualification using “Create” workbench
Click the plus icon on the top right corner of the “Home” page to open the “Create” workbench and then click “Supplier Qualification” to open the “Create Supplier Qualification” page.
Creating Supplier Qualification using “Supplier Management” tile
To create supplier qualification:
1. Click Supplier Management on the Home page and then click "Supplier Qualification". The Supplier Qualification index page opens.
2. Click "Create" on the supplier qualification index page. The "Create Supplier Qualification" page opens.
The Create Supplier Qualification page consists of the following sections:
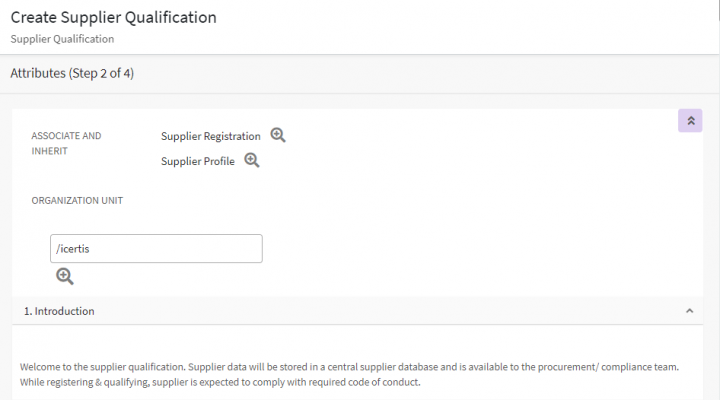
- Introduction: This section consists of the basic information about the supplier.
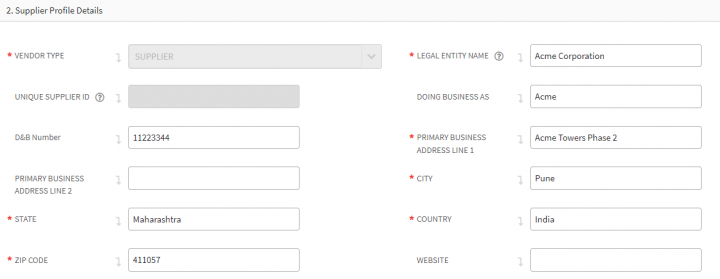
- Supplier Profile Details: This section consists of multiple options as below:
- Vendor Type: It is used to depict the type of vendor. For example, supplier, provider, sub-contractor and so on.
- Legal Entity Name: This is the legal entity name of the supplier organization. For example, Acme Corporation.
- Doing Business As: The business name used by the supplier, in cases where suppliers may conduct business by a name different from their registered legal entity name.
- D&B number: A 9-digit unique number assigned by Duns & Bradstreet to any organization.
- Primary Business Address Line 1: This is the supplier company’s official address, that includes the building and street details.
- Unique Supplier ID: This is a unique ID assigned to all suppliers.
- Supplier Contact Information: Type the values of attributes in this section to add the supplier contact information.
- Primary Contact First Name: The first name of the designated primary contact of the supplier organization.
- Primary Contact Last Name: The last name of the designated primary contact of the supplier organization.
- Designation: The name or title of the designated primary contact of the supplier organization.
- Email: The email address of the designated point of contact from the supplier side.
- Phone number: The phone number of the designated point of contact from the supplier side.
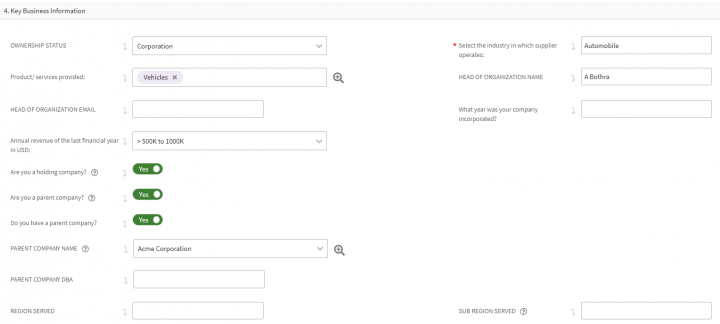
- Key Business Information: Type the values of attributes in this section to enter the key business information.
- Ownership Status: The ownership status of the supplier organization. For example, Corporation.
- Select the industry in which supplier operates: The industry in which the supplier organization operates in. For example, Appliance Parts.
- Product/Services Provided: The products or services provided by the supplier organization. For example, Ball Bearings.
- Head of Organization Name: This is the supplier organization’s head personnel.
- Head of Organization Email: This is the supplier organization’s head personnel’s official email address.
- What year was your company incorporated: The year in which the supplier organization was incorporated.
- Annual Revenue of the last financial year in USD: The annual revenue of the supplier organization for the last financial year.
- Do you have a parent company: Select “Yes” if the supplier organization for which the qualification is being created has the parent organization.
- Are you a Holding Company: This helps capture whether the selected company is a holding company. Select “Yes” to make it the holding company. Holding companies are setup specifically to group multiple subsidiaries together.
- Holding Company Name: This displays the list of all holding companies where “Is Holding Company” option is set as “True”.
- Are you a Parent Company: This helps capture whether the company is the parent company. The default value of this attribute is set to “No”. Select “Yes” to make it the parent company. Parent companies typically have controlling interest in other companies that provides them the right to control other company’s interests.
- Parent Company Name: Is the one that has controlling interest and has the right to control the subsidiaries operations. This option is enabled only if the "Do you have a Parent Company" is selected as "Yes". This displays the list of all parent companies where “IsParentCompany” option is set as “True”.
- Parent Company DBA: This option is enabled only if the "Do you have a Parent Company" is selected as "Yes". This specifies the name with which the company does the business.
- Region Served: The region where the supplier organization provides its products and services.
- Sub Region Served: The sub region where the supplier organization provides its products and services.
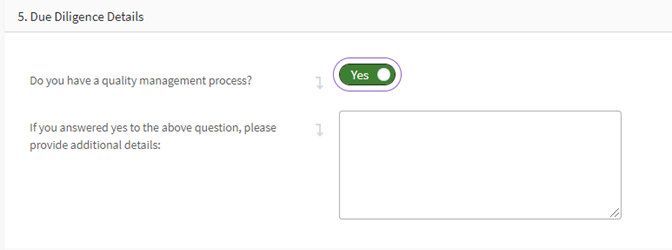
- Due Diligence Details: Select the appropriate value of the attribute under this section
- Do you have a quality management process: Select Yes if the supplier organization has the quality management process, else select No.
If a buyer selects Yes, the If you answered yes to the above question, please provide additional details option is enabled. Enter the information if any in this option.
- Internal: This section consists of the following options.
- Qualification Code: Is created automatically after the qualification is created.
- Qualification Rating: Select the appropriate value to specify the rating of the supplier for whom the qualification is created. For example, select Low Risk.
- Qualification Score: Type the qualification score for the supplier for whom the qualification is created. For example, 10.
- Supplier Classification: Lists the different categories of suppliers. For example, select Standard Supplier.
- Internal Comments: Enter the internal comments if any.
- KPI: This section consists of the following options.
- Registration Decision Date: The date when registration decisions (like On-hold, Reject, Approve etc.) are taken.
- Time taken to complete registration: The time taken by the procurement team to approve the supplier registration.
- Deviation from SLA for Registration: Indicates whether there was a deviation from the SLA for supplier registration.
- Is registration process completed timely? : If decision time exceeds SLA, then it implies that the registration process is not completed in a timely manner. If it is less than the SLA, then the registration process is marked as completed in time.
- Qualification Creation Date: The date on which the supplier qualification was created.
- Qualification SLA: The decided commitment between the buyer and external supplier about completing the supplier qualification.
- Qualification Decision Date: The date on which the qualification was approved or rejected for the supplier.
- Time taken to complete qualification: The time taken by procurement or compliance team to approve or reject the supplier qualification.
- Deviation from SLA for Qualification: The deviation if any from the SLA for the supplier qualification.
- Is qualification process completed timely? : If decision time exceeds SLA, then it implies that the qualification process is not completed in a timely manner. If it is less than the SLA, then the qualification process is marked as completed in time.
- Qualification is valid till (In Months): The duration (in months) till which the qualification is valid.
- Qualification Expiry Date: The expiry date of the supplier qualification.
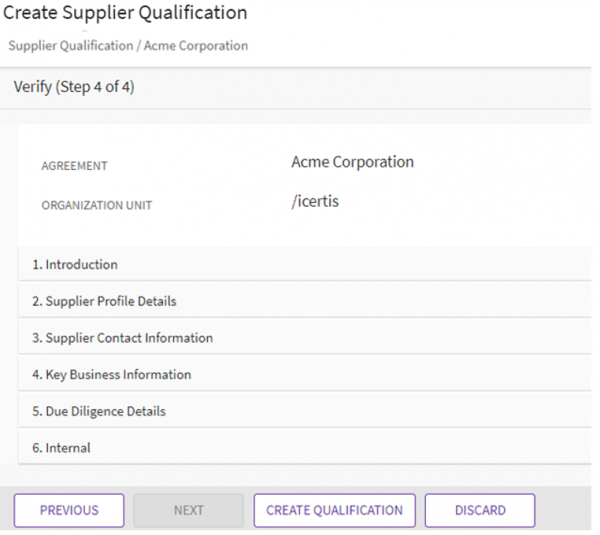
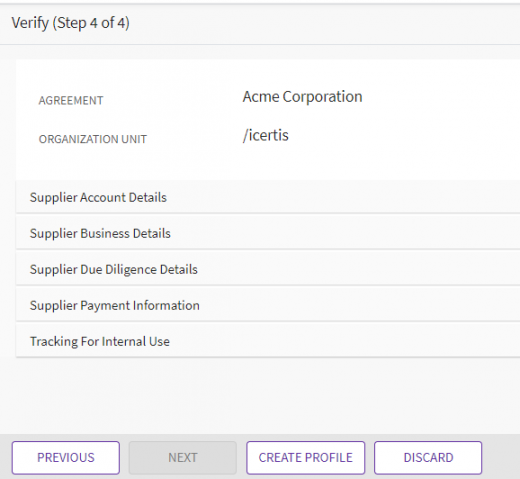
2. Click Next. The Verify (Step 4 of 4) page opens.
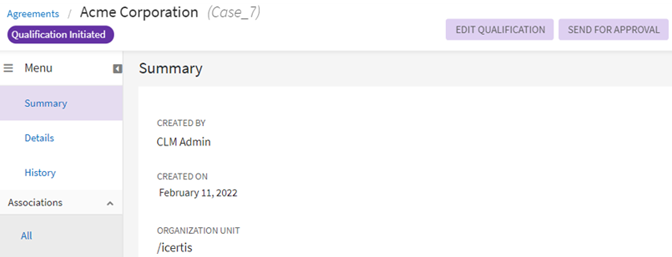
3. Click Create Qualification. The qualification is created in the Qualification Initiated state.
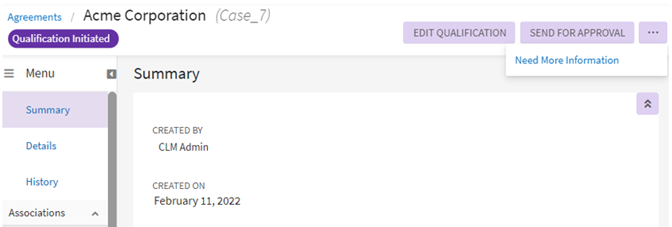
- Edit Qualification
- Send for Approval
- Need More Information
Viewing Supplier Qualification
Buyers can view the supplier qualification from the Supplier Management tile.
To view the supplier qualification:
1. Click Supplier Management and then click Supplier Qualification on the Home page. The supplier qualification index page opens.
Editing Supplier Qualification
A supplier qualification can be edited as follows:
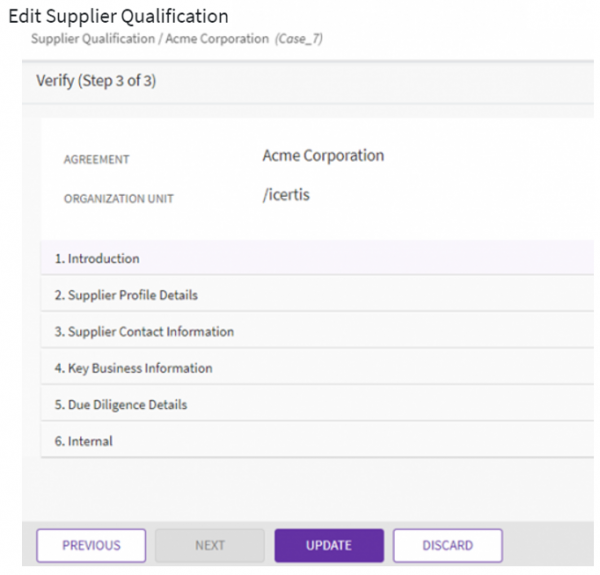
1. Click Edit Qualification on the qualification Details page.
3. Verify all information and click Update. The qualification will get updated with the latest changes.
Supplier Outreach
Buyer organization often needs more information from suppliers when performing qualification, procurement, and compliance process for suppliers. Suppliers are provided temporary and restricted access to ICI to provide missing documents. Suppliers can then submit the documents or raise queries.
Users can send the supplier qualification for review for its quality and compliance check.
To perform supplier outreach:
1. Click Need More Information on the Supplier Qualification Details page. The Search User window opens.
Suppliers receive a note in the form of email notification indicating the documents that are missing to complete the process of supplier qualification.
Users can perform following actions in this state:
- Cancel Request: Allows canceling the review request if the buyer raised it accidentally. Clicking this changes the status of the supplier qualification to Qualification Initiated again.
- Submit: Suppliers can upload the missing or additional documents and submit them on which a notification is sent to the buyer team.
- Raise Query: Suppliers can raise query with the buyer team on which a notification is sent to the buyer team. Clicking this changes the status of the supplier qualification to Qualification Initiated again.
Accessing Supplier Qualification as Supplier
External Suppliers can access the supplier qualification to provide more information as required.
To access the supplier qualification:
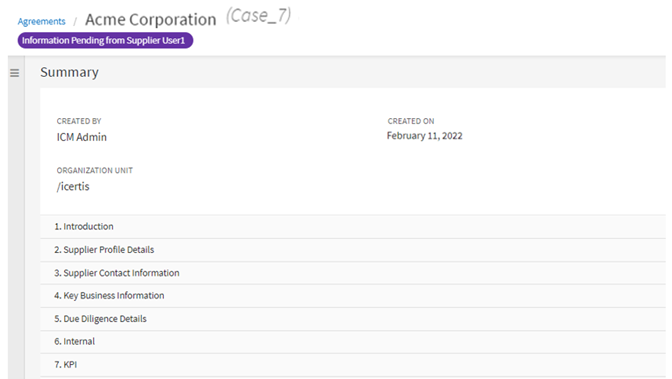
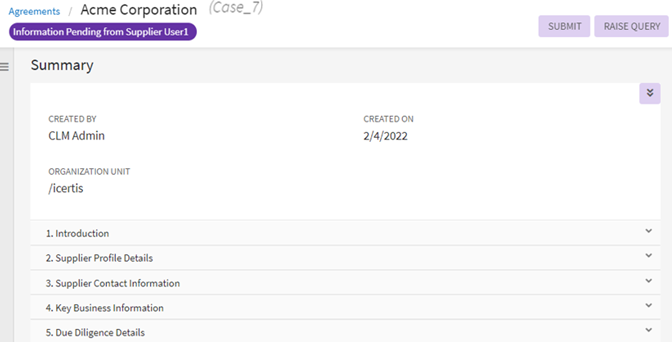
1. Click the eye icon next to the specific task to open the supplier qualification in “Information Pending from <Supplier” state.>.
2. Click Raise Query to edit the supplier qualification and make the required changes or click Submit to the supplier qualification as a supplier.
Approving Supplier Qualification
The approvers can perform the following actions on the Supplier Qualification “Details” page.
- Approve Qualification
- Delegate Qualification
- Start Internal Assessment
- Reject Qualification
- Rework Required
- Review Qualification
To approve the qualification:
1. Click Approve Qualification on the Supplier Qualification Details page. The Add Note window opens.
2. Type the information if any in the Add Note window and click Add. The status of the supplier qualification changes to Qualification Approved.
Supplier Profile is created automatically after the supplier qualification is approved, if the supplier profile did not exist. If supplier profile already existed based on unique parameters, the supplier profile is updated.
Delegating a Supplier Qualification
Approvers can delegate the task of approving or rejecting the supplier qualification to other users.
To delegate a supplier qualification:
1. Click Delegate on supplier qualification Details page. The Search User window opens.
2. Search the required user or select it from the available list.
3. Click Add. The Agreement task delegated successfully message appears.
Note: You can recall delegation on supplier qualification Details page by clicking Recall Delegation.
Starting Internal Assessment of Supplier Qualification
Approvers can perform internal assessment of the supplier qualification when it is sent for approval.
1. Click Start Internal Assessment on the qualification Details page.
3. Verify all information and click Update. The qualification will get updated with the latest changes.
Rejecting Supplier Qualification
Approvers can reject the supplier qualification if it does not meet the requirements of the buyer organization.
To reject a supplier qualification:
1. Click Reject Qualification on supplier qualification Details page. The Add Note window opens.
2. Enter a note and select a reason for rejection.
3. Click Add. The status of the supplier qualification changes to Qualification Rejected.
Note: Users cannot perform any action on the rejected supplier qualification.
Reworking Supplier Qualification
Approvers can click the Rework Required on the supplier qualification Details page to send the supplier qualification for rework. This changes the status of supplier qualification to Qualification Initiated. The qualification is sent for rework if the approver finds that the qualification is not done properly.
Reviewing Supplier Qualification
Buyer teams may require reviewing the supplier qualification from compliance or other business teams. They can do this by initiating the review by clicking the Review Qualification button.
Follow the same steps mentioned in the Supplier Outreach section to review the supplier qualification.
Recalling Supplier Qualification
Buyer can recall the supplier qualification to make any changes to it as required.
To recall a supplier qualification:
1. Click Recall on supplier qualification Details page. The Add Note window opens.
3. Click Add. The status of the supplier qualification changes to Qualification Initiated state.
Supplier Qualification Details Page
Buyers can view the status and details of the supplier qualification in various sections of the left navigation pane on supplier qualification Details page. Buyers can also perform a variety of actions based on the status of the supplier qualification.
Qualification Left Pane
Here is a brief description of the options in the left navigation pane of supplier qualification Details page.
- Summary: Displays the name of the supplier qualification instance (that is added when creating), who created it, and supplier qualification instance details.
- Details: Displays the details specified when creating the supplier qualification instance.
- Supplier Registration: Supplier Registration is the process that sets the overall app objectives in motion. Supplier registrations must be created at first, before their workflow moves forward towards qualification. Click this option to view the list of associated supplier registration.
- Team: Displays the members added to the team for this supplier qualification instance. Click the plus icon to add new team members.
- Collaboration: Allows the internal or external team members to communicate with other internal or external team members by creating topics and posting messages in it.
- Notes: Displays the additional information about the supplier qualification if it is added.
Note: The left navigation pane of supplier qualification Details page is displayed differently for buyers and suppliers. Some options such as Team, Notes are not displayed to the supplier in the left navigation pane.
History
The History displays how the supplier qualification has progressed till now and presents an overall audit for the supplier qualification, under History in the left navigation pane on supplier qualification Details page. History includes the activities and statuses for supplier qualification, with Events, Username, User Role, Date and Time, Details and Notes.
Working with Supplier Profile
Supplier Profile Workflow
Once suppliers pass qualification, they are onboarded, and their detailed supplier profiles are auto created. Suppliers also get access to their profiles to view and update. Supplier Profile is created automatically after the supplier qualification is approved, if the supplier profile did not exist. If supplier profile already existed based on unique parameters, the supplier profile is updated.
Note: Buyers can also create the supplier profile on behalf of the suppliers.
- Create the supplier profile manually.
- View and edit the supplier profile.
- View the history of the actions performed on the supplier profile.
Note: The left navigation pane and the icons on the supplier profile Details page are displayed based on the privileges granted to the logged-on user.
Creating Supplier Profile
Supplier Profile is created automatically after the supplier qualification is approved. After qualification is approved, ICI checks the unique parameters and creates the supplier profile if no match is found.
The buyer can create a supplier profile from within the App in the following ways:
- From the “Create” workbench on the “Home” page.
- From the “Supplier Management” tile.
Creating Supplier Profile using “Create” workbench
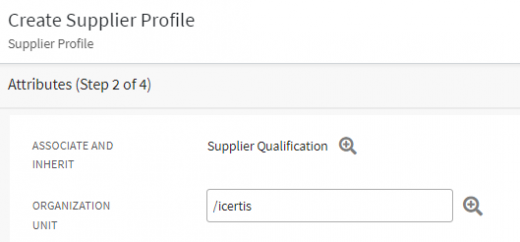
Click the plus icon on the top right corner of the “Home” page to open the “Create” workbench and then click “Supplier Profile” to open the “Create Supplier Profile” page.
To create supplier profile:
1. Click Supplier Management on the Home page and then click "Supplier Profile". The "Supplier Profile" index page opens.
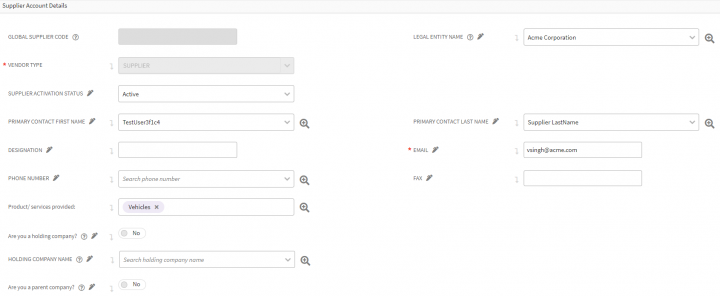
- Supplier Account Details: This section contains basic information about the supplier profile being created.
- Vendor Type: It is used to depict the type of vendor. For example, supplier, provider, sub-contractor and so on.
- Products /Services Provided: This is to select the category of products or services that the supplier provides.
- Global Supplier Code: Is created automatically after the supplier profile is created.
- Legal Entity Name: This is the legal entity name of the supplier organization.
- Primary Contact First Name: The first name of the designated primary contact of the supplier organization.
- Primary Contact Last Name: The last name of the designated primary contact of the supplier organization.
- Designation: The title of the designated primary contact of the supplier organization.
- Email: The email address of the designated point of contact from the supplier side.
- Phone Number: The phone number of the designated point of contact from the supplier side.
- Are you a Holding Company: This helps capture whether the selected company is a holding company. Select “Yes” to make it the holding company. Holding companies are setup specifically to group multiple subsidiaries together.
- Holding Company Name: This displays the list of all holding companies where “Is Holding Company” option is set as “True”.
- Are you a Parent Company: This helps capture whether the company is the parent company. The default value of this attribute is set to “No”. Select “Yes” to make it the parent company. Parent companies typically have controlling interest in other companies that provides them the right to control other company’s interests
- Do you have a parent company? Select “Yes” if the supplier organization for which the supplier profile is being created has the parent organization. Enter the parent company name if you select “Yes” in this option.
- Parent Company Name: Is the one that has controlling interest and has the right to control the subsidiaries operations. This option is enabled only if the "Do you have a Parent Company" is selected as "Yes". This displays the list of all parent companies where “IsParentCompany” option is set as “True”.
- Parent Company DBA: This option is enabled only if the "Do you have a Parent Company" is selected as "Yes". This specifies the name with which the company does the business.
- Supplier Activation Status: Specifies whether the supplier is active or not.
Supplier Business Details: This section contains the business specific information.
- D&B Number: A 9-digit unique number assigned by Duns & Bradstreet to any organization.
- Ownership Status: The ownership status of the supplier organization. For example, Partnership, Corporation.
- Select the industry in which supplier operates: The industry in which the supplier organization operates in.
- Head of Organization Name: This is the supplier organization’s head personnel.
- Head of Organization Email: This is the supplier organization’s head personnel’s official email address.
- What year was your company incorporated? The year in which the supplier organization was incorporated.
- Annual Revenue of the last financial year in USD: The annual revenue of the supplier organization for the last financial year.
- Region Served: The region where the supplier organization provides its products and services.
- Sub Region Served: The sub region where the supplier organization provides its products and services.
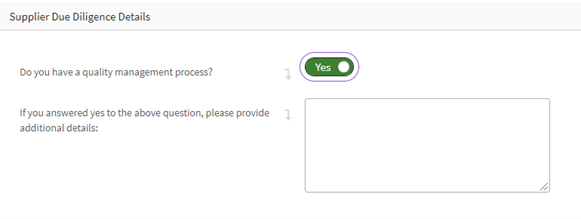
Supplier Due Diligence Details: Select the appropriate value of the attribute under this section.
- Do you have a quality management process? Select Yes if the supplier organization has the quality management process, else select No.
If a buyer selects Yes, the If you answered yes to the above question, please provide additional details option is enabled. Enter the information if any in this option.
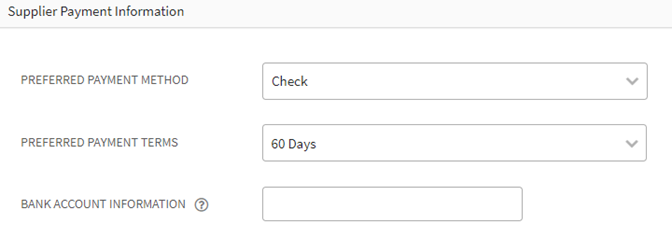
- Supplier Payment Information: This section contains the payment details of the supplier.
- Preferred Payment Method: The preferred payment method to be used for the suppliers. For example, Check.
- Preferred Payment Terms: The preferred payment terms agreed upon with the supplier. For example, 60 days.
- Bank Account Information: The bank account information of the supplier.
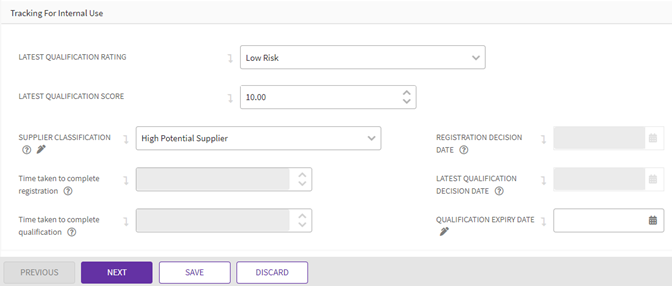
Tracking for internal use: This section contains the information to be used by the buyer organization as provided by the supplier.
- Latest Qualification Rating: The latest qualification rating of the supplier profile being created. For example, Low Risk.
- Latest Qualification Score: The latest qualification score of the supplier profile being created. For example, 10.
- Supplier Classification: The criteria that can be used to classify the suppliers for the business category. For example, High Potential Supplier.
- Registration Decision Date: The date on which the supplier registration was approved. This value is populated automatically based on the legal entity (supplier registration record) selected.
- Time taken to complete registration: The time taken by the procurement team to approve the supplier registration.
- Latest Qualification Decision Date: The date on which the qualification was approved for the supplier profile being created.
- Time taken to complete qualification: The time taken by procurement or compliance team to approve the supplier qualification.
- Qualification Expiry Date: The expiry date of the supplier qualification.
3. Click Create Profile to create the supplier profile. The supplier profile is created in Draft state.
Viewing Supplier Profile
Buyers can view the supplier profile from the Supplier Management tile.
To view the supplier profile:
1. Click Supplier Management and then click Supplier Profile on the Home page. The supplier profile index page opens.
Editing Supplier Profile
A supplier profile can be edited as follows:
1. Click Edit Profile on the profile Details page.
Approving Supplier Profile
The approvers can perform the following actions on the Supplier Profile Details page.
- Edit Profile
- Approve
- Reject
- Delegate
To approve the supplier profile:
1. Click Approve on the supplier profile Details page. The Add Note window opens.
Rejecting Supplier Profile
Approvers can reject the supplier profile if it does not meet the requirements of the buyer organization.
To reject a supplier profile:
1. Click Reject on supplier profile Details page. The Add Note window opens.
Recalling Supplier Profile
Buyer or Supplier can recall the supplier profile to make any changes to it as required when it is in Waiting for Approval state.
To recall a supplier profile:
1. Click Recall on supplier profile Details page. The Add Note window opens indicating to add the reason for recalling the supplier profile.
Delegating Supplier Profile
Approvers can delegate the task of approving or rejecting the supplier profile to other users.
To delegate the supplier profile:
1. Click Delegate on supplier profile Details page. The Search User window opens.
3. Click Add. The Agreement task delegated successfully message appears.
Supplier Profile Details Page
Buyers can view the status and details of the supplier profile in various sections of the left navigation pane on supplier profile Details page.
Profile Left Pane
Here is a brief description of the options in the left navigation pane of supplier profile Details page.
- Summary: Displays the name of the supplier profile instance (that is added when creating), who created it, and supplier profile instance details.
- Details: Displays the details specified when creating the supplier profile instance.
- All: Displays the list of associations relevant to the supplier profile being created.
- Supplier Qualification: Supplier Qualification is the process of ensuring that the registered supplier is qualified to meet the requirements of the buyer organization. Click this option to view the list of associated supplier qualifications.
- Supplier Master: This manages the details of all suppliers and their organizations. Suppliers are created automatically after qualification is approved and the supplier is added automatically in the supplier master.
- Supplier Contact: This manages the list of all supplier contact information of every supplier organization. The supplier contact is created automatically in supplier contact master. It is used by Sourcing teams for events such as RFx.
- Team: Displays the members added to the team for this supplier profile instance. Click the plus icon to add new team members to the supplier profile.
- Collaboration: Allows the internal or external team members to communicate with other internal or external team members by creating topics and posting messages in it.
- Notes: Displays the additional information about the supplier profile if it is added.
History
The History displays how the supplier profile has progressed till now and presents an overall audit for the supplier profile, under History in the left navigation pane on supplier profile Details page. History includes the activities and statuses for supplier profile, with Events, Username, User Role, Date and Time, Details and Notes.
Accessing Supplier Profile as Supplier
External Suppliers can access the supplier profile after onboarding.
To access the supplier profile:
1. Click Supplier Profile on the Home page. The Search page opens and displays their profile.
2. Click the supplier profile to be accessed by clicking the eye icon to open the supplier profile in Approved state.
3. Click Edit Profile to edit the supplier profile and make the required changes or click Send for Approval to send the supplier profile for approval. The status of the supplier profile changes to Approved once it is approved by the buyer team.
Managing Supplier Hierarchy
Managing Relevant Supplier Organizations
The Supplier Relationship Management application now provides a mechanism to connect supplier organizations with their Parent, Holding or Subsidiary organizations. This is to ensure that you have a complete overview of the business you do with one supplier and its related entities.
Following attributes have been updated or newly introduced when creating or editing supplier registration, qualification, or profile.
• Vendor Type: It is used to depict the type of vendor. For example, supplier, provider, sub-contractor and so on.
• Are you a Holding Company: This helps capture whether the selected company is a holding company. Select “Yes” to make it the holding company. Holding companies are setup specifically to group multiple subsidiaries together. .
• Holding Company Name: This displays the list of all holding companies where “Is Holding Company” option is set as “True”.
• Are you a Parent Company: This helps capture whether the company is the parent company? The default value of this attribute is set to “No”. Select “Yes” to make it the parent company. Parent companies typically have controlling interest in other companies that provides them the right to control other company’s interests.
• Parent Company Name: Is the one that has controlling interest and has the right to control the subsidiaries operations. This option is enabled only if the "Do you have a Parent Company" is selected as "Yes". This displays the list of all parent companies where “IsParentCompany” option is set as “True”.
• Parent Company DBA: This option is enabled only if the "Do you have a Parent Company" is selected as "Yes". This specifies the name with which the company does the business.
• Supplier Activation Status: Specifies whether the supplier is active or not.
Unique Supplier ID across Supplier Onboarding
After the supplier registration is created, the “Unique Supplier ID” is populated automatically.
The value for “Unique Supplier ID” is displayed after creating qualification without an existing supplier registration.
After the supplier qualification is approved, and supplier profile is auto created, the value of the “Unique Supplier ID” remains the same as that of supplier registration and qualification.
The values for “Legal Entity Name”, “Unique Supplier ID” are not editable as displayed in the image below.
The masterdata record is created in the vendor database with the same “Unique Supplier ID”.
1. Click “Configure” > “Masterdata” and then click the “View Details” icon next to the vendor database masterdata record.
Note: The Legal Entity Name is the parameter to uniquely identify supplier. Every client implementation can have a different set of identifiers to uniquely identify a supplier.
Managing Unique Supplier Records
The uniqueness of a supplier record is validated based on a combination of attributes. One or more of the unique identifier’s attributes can be made editable. This is to account for entities that may change the Legal Entity Name while doing business, considering legal entity name is one of the unique identifier attributes.
If the unique identifier attributes are configured as editable, only then the attributes will be editable in supplier profile. If such attributes are changed for an organization, the ICI Supplier Relationship Management validates and checks for duplicate records before allowing users to make the change. For example, buyers can edit the existing supplier master using the following steps:
1. Click “Masterdata” and then click the icon next to “Supplier Master”. The Supplier Master “Details” page opens.
2. Edit the value in the “Name” option and click “Update”.
The following error is displayed indicating that the supplier already exists.
If the supplier does not exist already, then the masterdata record is updated and synchronized with the supplier profile and vendor database.
Users can modify any attributes of the vendor database apart from the unique set of supplier identifiers in Supplier Registration, Qualification or Profile.
Supplier Onboarding Dashboard
ICI Supplier Onboarding and Diversity Compliance App allows users with appropriate privileges to access the newly introduced “Dashboard” tile.
To access the Supplier Onboarding Dashboard:
1. Click on “Supplier Management” tile on Home page.
- Supplier Registration
- Supplier Qualification
- Onboarded Supplier Dashboard
- Supplier Profile
Supplier Registration Dashboard
- Click on “Dashboard”. “Supplier Registration” dashboard opens.
This Dashboard provides overall insight of Suppliers who are registered. Filters such as Registration Status, Annual Revenue, Country etc. facilitate user to get accurate data.
Users can filter and view the supplier registration specific information such as :
- The number of registrations filtered by its status.
- The number of registrations filtered by the product or service categories.
- The number of submitted registrations per year, month or quarter.
- The details of registrations by the legal entity name, registration status and so on. Clicking the case URL under the Reg code column opens the case details in a new tab.
Supplier Qualification Dashboard
- Click on “Supplier Qualification” tab from bottom tabs.
This Dashboard provides overall insight into Supplier Qualifications along with filters such as Case Status, Ownership Status, Supplier classifications etc.
- The number of qualifications filtered by its status.
- The number of qualifications filtered across the product or service categories.
- The details of qualifications by the legal entity name, qualification status and so on. Clicking the case URL under the Case ID column opens the case details in a new tab.
- It also captures the cases that await supplier inputs for tracking.
Onboarding Dashboard
- Click on “Onboarded Supplier Dashboard” from bottom tabs.
This Dashboard provides an overview of onboarded suppliers. It has geographical distribution, Supplier on watchlist, Ownership structure section for better clarity on onboarded suppliers. It provides filters such as Profile Status, Products/ Services Provided etc.
Users can filter and view the onboarding specific information such as:
- The number of suppliers onboarded by status and country.
- The number of suppliers across products, or services.
- The details of suppliers onboarded based on the legal entity name, and so on. Clicking the link under the Global Supplier Code column opens the case details in a new tab.
- It also displays the suppliers on the watchlist that helps the teams to track them.
Supplier Profile Dashboard
- Click on “Supplier Profile” tab from bottom tabs.
- Select supplier from “Legal Entity Name” dropdown
This dashboard will provide specific supplier profile details along with its evaluation and qualification details.
Users can search by the legal entity name and view the Supplier Profile specific information such as:
- Details of qualifications linked with the supplier profile.
- Details of supplier contacts linked with the supplier profile
Note: The supplier does have access to the Dashboard.
Performance Evaluation Dashboard
- Click on “Supplier Evaluation” tab from bottom tabs.
This Dashboard allows the Procurement team to analyze and evaluate performance of all Suppliers based on status and take appropriate actions with help of KPI metrics performance. It provides an overview of the ageing of evaluations in review or approval states. Also, the complex process of identifying top and poor performing suppliers is made easy.
Performance Score Card Dashboard
- Click on “Performance Score Card” tab from bottom tabs.
- Select supplier from “Legal Entity Name” dropdown at right navigation.
In addition to other dashboards, a 360-degree snapshot of any specific supplier is provided in the Performance Score Card dashboard. Users can view the performance trend, Supplier certificates that are expired or are expiring within 5 days, color coded performance evaluation section, KPI – Expected Rating vs Actual Rating.
Working with Supplier Evaluation
Supplier Evaluation module is part of the Supplier Relationship Management application, which is built on Icertis Contract Intelligence.
Once suppliers are onboarded, users can evaluate suppliers on the products or services they offer. The KPI criteria, schedule, and the evaluators can be set up within the module and on completing the assessment the supplier can be classified as high performing, low performing or standard supplier.
A routine supplier evaluation can help organizations set expectations from their preferred suppliers and manage low performing suppliers.
Supplier Evaluation can be created using the following details:
- Supplier Details
- Evaluation Details
- Evaluation Schedule
- Outcome
Creating Supplier Evaluation
To create a supplier evaluation:
Buyers must inherit the specific supplier profile for creating the supplier evaluation. Buyers can create the evaluation from the “Create” workbench as well as from the supplier evaluation index page.
The “Create Supplier Evaluation” page consists of the following sections.
1. Select or enter the information on this page.
- Supplier Details: This section includes the basic information about the supplier such as:
- Unique Supplier ID
- Legal Entity Name
- Vendor Type
- Industry in which the supplier operates
- Products/Services Provided
- Primary Contact First Name
- Primary Contact Last Name
- Primary Contact Email
- Evaluation Details: This section includes the evaluation specific information such as:
- Evaluation ID: The unique identification details of the supplier evaluation that is generated automatically after creating.
- Evaluation to be performed for: This consists of the following options.
- Suppliers across all products/services : The suppliers are evaluated for all products and service offerings.
- Suppliers for a particular product/service category: Suppliers must select the product or service offerings for which the supplier must be evaluated. Selecting this option enables the option to select the “Product/Service category for evaluation”.
- Supplier for a particular Agreement: Suppliers are prompted to capture agreement ID for reference when evaluating the supplier performance against a specific agreement. Selecting this option enables the option to enter the “Agreement ID”.
- Evaluation Type: Buyers can perform different types of evaluations depending on the type of industry. For example, Technical evaluation is conducted to ensure that the supplier is capable of providing relevant products or services with the required quality.
- Evaluation Sub Type: This captures the evaluation details and categorization.
- Triggering Event: Is the event that initiates the performance evaluation for the supplier.
- Evaluation Schedule: This section includes the evaluation schedule specific parameters such as :
- Performance Evaluation Period Start Date : This is used for capturing the start date of the time in which supplier performance is evaluated. For example, if the supplier is evaluated for the past quarter, then enter the date as 1 January 2022.
- Performance Evaluation Period End Date : This is used for capturing the end date of the time in which the supplier performance is evaluated. For example, if the supplier is evaluated for the past quarter, then enter the date as 31 March 2022.
- Completion Due Date: This is used to capture the deadline by which the supplier evaluation must be completed.
- Actual Completion Date: This captures the actual date of completing the supplier evaluation.
- Time taken to complete Evaluation: This calculates the time taken to complete the supplier evaluation (in days).
- Evaluation is valid for (in Months) : This defines the time in months for which the performance scoring and classification will be valid.
- Evaluation validity date: Is the addition of the actual completion date and the period for which the evaluation is valid for. ICI Supplier Relationship Management computes the date till when the performance scoring and classification will be valid.
- Outcome: This section includes the evaluation outcome specific parameters such as:
- Performance Evaluation Overall Score : It is the sum of the actual score of all the Evaluation KPIs added to the supplier evaluation.
- Performance Evaluation Overall Rating : Supplier performance overall rating is defined based on the overall evaluation score.
- Rating Comments (If Any): This is the additional information to justify the comments added for a particular supplier when performing the evaluation.
- Supplier Performance Classification: This helps in classifying the performance and defining the relationship with the supplier. For example, a supplier can be a high performing supplier, standard supplier etc.
- Does Supplier require development plan for performance improvement and monitoring periodically: This option will be enabled when the supplier is classified as poor performing supplier.
- Development Plan Comments: The development plan is introduced for suppliers classified as poor performers.
- Create Tracking Obligation: This is enabled if the supplier requires a development plan and if tasks need to be created for tracking the performance improvement.
- Create Tracking Risk: This is enabled if the supplier requires a development and if there are risks involved in the process of performance improvement.
2. Click “Next” to open the “Verify” page and verify the information added.
3. Click “Create Evaluation”. The evaluation is created in “Evaluation Initiated” state.
Supplier Evaluation Details Page
The Supplier Evaluation Details page is based upon the standard ICI structure.
Evaluation Left Pane
These are the left pane items seeded with the supplier evaluation “Details” page for the buyer team.
- Summary: Displays the name of the Supplier Evaluation (that is added while creating), who created it, and Supplier Evaluation instance details.
- Details: Displays the details specified while creating the supplier evaluation.
- History: Displays how the supplier evaluation has progressed till now, including the actions performed in supplier evaluation, as is under “History” in the left pane. Buyers can also view the history by clicking the status of the supplier evaluation which opens the “History” drawer.
- Associations: Displays the number of associated documents to the supplier evaluation. Click the plus icon to add new associations to the supplier evaluation.
- Supplier Profile: Displays the supplier profile associated with the supplier evaluation.
- Supplier Documents: Supplier documents can be accessed by buyers and suppliers. Suppliers can provide additional information relevant to evaluation as per the requirement. Click the plus icon to create the supplier documents.
- Evaluation KPI: Displays the key performance indicators based on which the supplier will be evaluated. Click the plus icon to create the evaluation KPI.
- Internal Documents: Displays the list of documents relevant to the supplier being evaluated and are visible to the buyer team only.
The left navigation pane also displays the Commitments, Collaboration, Team, Notes relevant to the supplier evaluation.
Note : Suppliers get limited access on the left navigation pane on the evaluation “Summary” page based on the privileges.
Editing Evaluation
A Supplier Evaluation can be edited as follows:
1. Click “Edit Evaluation” on the Supplier Evaluation “Summary” page. The “Edit Supplier Evaluation” page opens.
2. Make the desired changes and click “Next”.
3. Verify all the information and click “Update”. The evaluation will get updated with the latest changes.
Supplier Outreach
Buyer organization often needs more information from suppliers when performing supplier evaluation. Suppliers are provided temporary and restricted access to ICI to provide missing documents. Suppliers can then submit the documents or raise queries.
Request Review option is not displayed when the evaluation is in progress.
Discard Evaluation option is displayed only when the evaluation is in the initiated state.
To perform supplier outreach:
1. Click “Request Review” on the supplier evaluation “Summary” page. The “Request Review” window opens indicating to select the supplier user from the “Third Party” tab.
2. Select the supplier contact on the “Third Party” tab to whom you want to send the supplier evaluation for review and click “Send”.
Note: Buyers can add additional information in the “Add Note” section before sending it for supplier review.
Suppliers receive a note in the form of email notification indicating the documents that are missing to complete the process of supplier evaluation.
The status of the supplier evaluation changes to “Review Pending”. Buyers can perform the following actions at this stage:
- Download All: This allows downloading the supplier evaluation along with all the supporting documents.
- Cancel Request: This allows cancelling the review of supplier evaluation.
Suppliers can perform limited actions at this stage:
- Adding Supplier Documents: Suppliers can add additional documents to support the supplier evaluation.
- Approve: Allows approving the supplier evaluation documentation.
- Reject: Allows rejecting the supplier evaluation documentation.
Adding Evaluation KPI
Buyers can add evaluation KPIs when the evaluation is in “Evaluation Initiated” state. Evaluation KPIs are the quantifiable measure of supplier performance for the decided timeline.
To add Evaluation KPI:
1. Click the plus icon next to “Evaluation KPI” on the Evaluation “Details” page.
2. Select or enter the details in the following sections.
- Supplier Details : The information is populated automatically based on the information entered while creating the supplier evaluation for the following options.
- Evaluation to be performed for : This consists of the following options
- Suppliers across all products/services : The suppliers are evaluated for all products and service offerings.
- Suppliers for a particular product/service category: Suppliers must select the product or service offerings for which the supplier must be evaluated. Selecting this option enables the option to select the “Product/Service category for evaluation”.
- Supplier for a particular Agreement: Suppliers are prompted to capture agreement ID for reference when evaluating the supplier performance against a specific agreement. Selecting this option enables the option to enter the “Agreement ID”.
- Evaluation Type: Buyers can perform different types of evaluations depending on the type of industry. For example, technical evaluation is conducted to ensure that the supplier can provide relevant products or services with the required quality.
- Evaluation Sub Type: This captures the evaluation details and categorization.
- Completion Due Date: This is used to capture the deadline by which the supplier evaluation must be completed.
- Evaluation to be performed for : This consists of the following options
- Evaluation Department Details: This section captures the hierarchy of business unit of the evaluator who will assess the KPIs.
- Evaluation Party: This is the internal or external organization responsible for performing supplier evaluation.
- Business Unit: Is the business unit responsible for performing the supplier evaluation. For example, product management.
- Functional Team: Is the team within the business unit who is responsible for performing the supplier evaluation. For example, product management applications team.
- KPI Evaluator: Is the individual person responsible for performing the supplier evaluation.
- Other KPI Evaluator: Buyers can add more than one KPI evaluators in case the assigned evaluator is not available.
- KPI Evaluation Approver: Is the user responsible for approving the evaluation performed based on the defined KPIs.
- KPI Details: This section contains the following options.
- KPI Category: Is the category of the KPI against which the supplier performance is evaluated. For example, Annual Revenue of the supplier organization.
- KPI Metric Name: Are the specific metrics that must be captured under the KPI category against which the supplier performance is evaluated. For example, revenue gains in terms of percentage.
- Unit of Measurement: Is the unit against which the KPI metrics are captured. For example, percentage,
- Expected Rating : Is the rating that is expected as an outcome of the performance evaluation of the supplier.
- Tolerance Threshold Rating: Is the minimum rating expected as an outcome of the performance evaluation.
- KPI Weightage: Is the weight of the KPIs based on which the supplier performance will be evaluated.
- Value : Is used to capture the absolute KPI score without weightage.
- Actual KPI Score: It is the multiplication of the values added in KPI Weightage and Value options. This score is used in calculating the performance evaluation overall score.
- Actual Rating: Is the actual rating added for a particular supplier after evaluating.
- Rating comments (if any): This is the additional information to justify the comments added for a particular supplier when performing the evaluation.
- Deviation from Threshold Rating : Toggle the button as “Yes” in case there is a deviation in the supplier performance rating from the tolerance ratings.
3. Click “Next”. The “Extension Attributes” window opens displaying the configured questions.
4. Select or enter the appropriate answers to the questions configured under extension attributes. For example, toggle the option to “Yes” for “Is the Price under Company Structure” and enter the value for “Is the Price under Company Structure Comment” as appropriate.
Note: The questions added under Extension Attributes are defined by buyer team.
5. Click “Create”. The evaluation KPI is created, and the count is updated in the left navigation pane on the supplier evaluation “Details” page.
Starting the Evaluation
It is mandatory to add an evaluation KPI before starting the evaluation. On clicking “Start Evaluation” the evaluation KPIs are sent for assessment to the evaluator if they are not in “Approved” state already.
Note: Clicking “Start Evaluation” before adding an evaluation KPI displays an error indicating to add evaluation KPI.
To start evaluation:
1. Click “Start Evaluation” on the evaluation “Details” page. The “Please Confirm” window opens indicating to review if the evaluation KPI are ready before sending to evaluator. Click “Yes” or “No” dependent on whether you want to start evaluation. Clicking “Yes” changes the evaluation status to “Evaluation in Progress ”. Clicking “No” keeps the evaluation in the “Evaluation Initiated” state.
Submitting the Evaluation
Evaluators can submit the evaluation after performing all the necessary steps.
To submit the evaluation:
1. Click the eye icon next to the relevant task under “My Tasks” that displays the relevant supplier evaluation to be submitted. The Evaluation KPI “Summary” page opens.
2. Click “Edit” to edit the supplier evaluation and add the scores, answer questions, and click “Next”.
3. Click “Update” to open the evaluation KPI “Summary” page.
4. Click “Submit Evaluation” after making the necessary updates to the evaluation. The “Add Note-Submit Evaluation” window opens.
5. Add the desired information on the “Add Note- Submit Evaluation” window and click “Add”.
The status of the evaluation KPI changes to “Approved ” .
Closing the Evaluation
On closing the evaluation, the actual score of the evaluation KPIs is set automatically based on the addition of all evaluation KPIs.
If the evaluation KPI is not approved, an error message is displayed indicating that evaluation KPI is ongoing.
After all the evaluation KPIs are approved, buyers can close the supplier evaluation.
To close the evaluation:
1. Click “Close Evaluation” on the evaluation “Details” page. The “Please Confirm” window opens indicating to confirm closing the evaluation.
2. Click “Yes” to confirm closing the evaluation. The status of the evaluation changes to “Evaluation Completed”. Clicking “No” on this window keeps the evaluation status to “Evaluation in Progress”.
After the evaluation is completed, buyers can define the performance classification. For low performing suppliers, buyers can define a plan as per the requirement using the “Edit Evaluation” section.
Sending the Evaluation for Approval
Buyers can send the evaluation for management approval after the evaluation is completed. This changes the status of the supplier evaluation to “Waiting for Approval” state.
The approver from the buyer team can perform the following actions in this stage.
- Start Internal Assessment: This allows performing the internal review of the supplier evaluation after the supplier evaluation is completed.
- Approve: This stage involves approving the supplier evaluation.
- Rework Required: This stage involves rejecting and sending the supplier evaluation for rework.
- Download All: Allows downloading the supplier evaluation along with its attachments.
- Delegate : Allows delegating the process of approving the supplier evaluation.
- Recall: Buyers can recall the evaluation sent for approval.
- Review Evaluation: This allows sending the evaluation for additional reviews as per the requirement.
Starting Internal Assessment
To start internal assessment:
1. Click “Start Internal Assessment” on the evaluation “Details” page. The “Edit Supplier Evaluation” page opens.
2. Make the required changes to the “Edit Supplier Evaluation” page and click “Update” to complete the internal assessment.
Approving the Supplier Evaluation
On approving the supplier evaluation, the supplier evaluation status changes to “Evaluation Approved”.
Supplier evaluation can be rejected by clicking the “Rework Required” on the evaluation “Summary” page. Rejecting the supplier evaluation changes its status to “Evaluation Initiated”.
Note: Approvers can request for additional information about the evaluation using the “Review Evaluation” option on the evaluation “Summary” page.
Recalling the Supplier Evaluation
Buyers can recall the supplier evaluation only after the evaluation is completed and its status changes to “Waiting for Approval”.
To recall the supplier evaluation:
1. Click “Recall” under the three dots on the supplier evaluation “Summary” page. The “Add Note-Recall” window opens.
2. Type the necessary information on the “Add Note-Recall” window and click “Add”.
This changes the status of the evaluation to “Evaluation Initiated”.
3. Click the icon next to the evaluation KPI to open it and click “Edit” on the evaluation KPI “Summary” page. The “Edit KPI” page opens which now displays a new section called “Re-evaluation Requirements”.
4. Toggle the “Is KPI re-evaluation required” option as “Yes" and click “Next” to open the “Extension Attributes” section.
5. Click “Update”. The Evaluation KPI is updated with the latest information and its status changes to “Draft”.
6. Click the link under “Parent Record” on the evaluation KPI “Summary” page and perform the evaluation process again as described in the above sections and send it for approval after completing the evaluation.
Discarding the Evaluation
Buyers can discard the supplier evaluation while initiating the evaluation.
To discard the supplier evaluation:
1. Click “Discard Evaluation” on the evaluation “Summary” page. The “Please Confirm” window opens indicating to confirm whether the evaluation must be deleted.
2. Click “Yes” to confirm deleting the supplier evaluation. The supplier evaluation is deleted, and the buyer user is redirected to the supplier evaluation index page.
Related Topics: Agreement Management
