| Line 20: | Line 20: | ||
<div class="image-green-border">[[File:Add note.jpeg|Add Note]]</div> | <div class="image-green-border">[[File:Add note.jpeg|Add Note]]</div> | ||
| | ||
| + | |||
| + | '''Related Topics: '''[[Search_a_Template|Searching Templates]] | [[Working_with_ICM_Add-ins]] | [[Template_Details_Page|Template Details]] | [[Creating_a_Template]] | ||
| | ||
</div> | </div> | ||
Revision as of 07:14, 14 August 2018
Approve/Reject a Template
Every Template has a team consisting of a primary owner, a secondary owner, an approver, and so on. You as an approver have a right to approve or to reject a Template.
To approve a Template:
- On the Dashboard, click the Notifications tile, and then the Tasks tab. A list of tasks pending for your action appear.
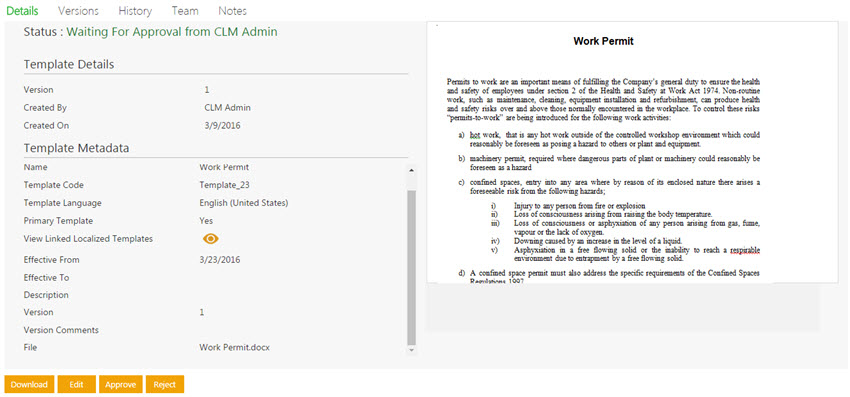
- Click the Template name link that you want to approve. The Template Details page opens.
- Click one of the following buttons.
- Download: Click to download the Template.
- Edit: Click to edit the Template.
- Approve: Click to approve the Template.
- Reject: Click to reject the Template.
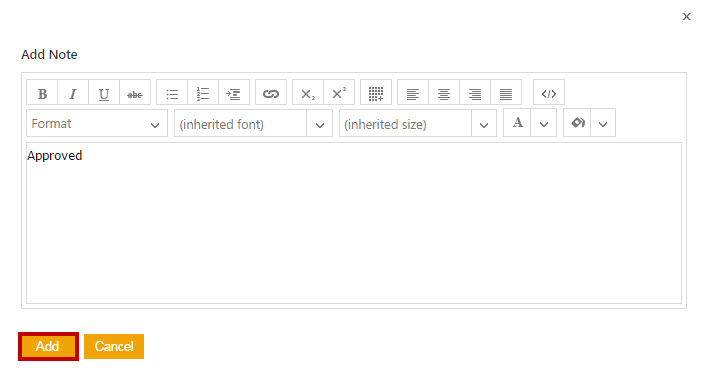
- Type appropriate comments in the Add Note dialog box and then click Add. The status of the Template changes to Approved. In the Add Note dialog box, type appropriate comments, and then click Add. The status of the Template changes to Approved.
When you click Reject, you have to add your comments and select the reason for rejection. After you approve or reject, the status of the Template changes to Draft and the Template has to go through the approval process again.
Related Topics: Searching Templates | Working_with_ICM_Add-ins | Template Details | Creating_a_Template

