Shefali DK (Talk | contribs) |
|||
| Line 27: | Line 27: | ||
| | ||
| + | |||
== Searching the Action Button Configuration == | == Searching the Action Button Configuration == | ||
| Line 37: | Line 38: | ||
*Searches pinned as Favorites | *Searches pinned as Favorites | ||
| − | Refer to | + | Refer to [[Saved_Searches]] for more details on the search. |
| | ||
Latest revision as of 18:24, 22 December 2021
Contents
Action Button Configuration
In ICI we have different Action buttons provided on the top right of the entity Details page. The action button can be single or a group consisting of multiple action buttons. The group action button consisting of multiple actions under it can be configured using “Action Button Configuration” from the "Admin" menu on the top.
For example, in the screenshot below you can see a "Download" group action button with an arrow on the right. On clicking the arrow the actions under the group are displayed and the specific action can be taken.
To navigate to the configuration of the group action button:
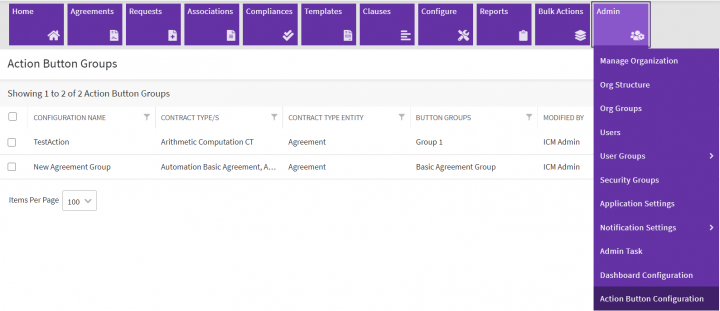
1.Click “Admin” main navigation menu on the top.
2. Click “Action Button Configuration”. The “Action Button Groups” index page opens.
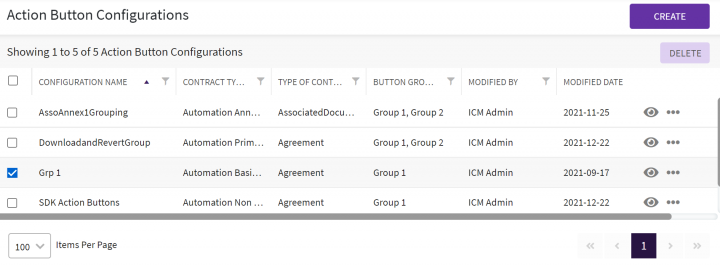
The page will display a grid view with all the existing configurations for the action buttons.
3. Click the filter and sort icons on the right of each grid column heading to filter and sort the records.
4. Click the eye icon in the far-right actions column to view the details of the configuration. The “Agreements” Details page opens.
5. Click the three dots menu (...) in the Actions column at the far right to “Edit” the configuration.
6. Click "Create" on the top right to create the configuration. Refer to section "Creating the Action Button Configuration" for more details.
6. Select one or many records for the "Delete" button to activate for deleting the records located below "Create".
Searching the Action Button Configuration
You can search for templates either from the advanced search page or from Templates Page with 4 methods:
- Global Search and Advance Search on the top of the page
- Category Search under "Refine View" on the left
- Saved Searches
- Searches pinned as Favorites
Refer to Saved_Searches for more details on the search.
Creating the Action Button Configuration
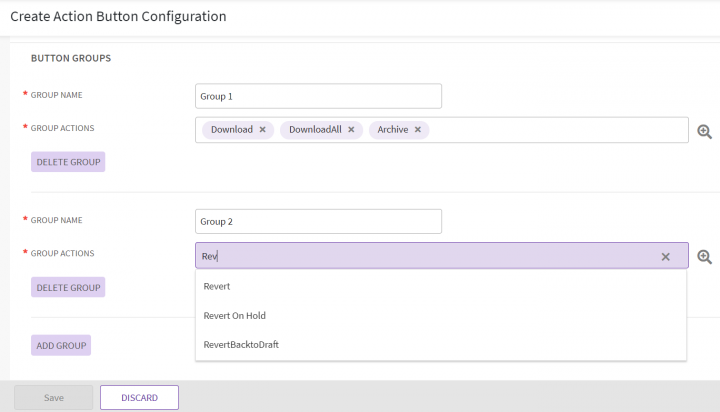
To create the Action Button Configuration you have to specify the group name and the action buttons that will appear under the group. A single action button for a group will be displayed on the top right of the specified page on UI along with other action buttons. The buttons under the group will be visible by clicking the arrow provided on the right of the group button. For example, the "DonloadALL" group button in the following screenshot:
To create the group of action buttons:
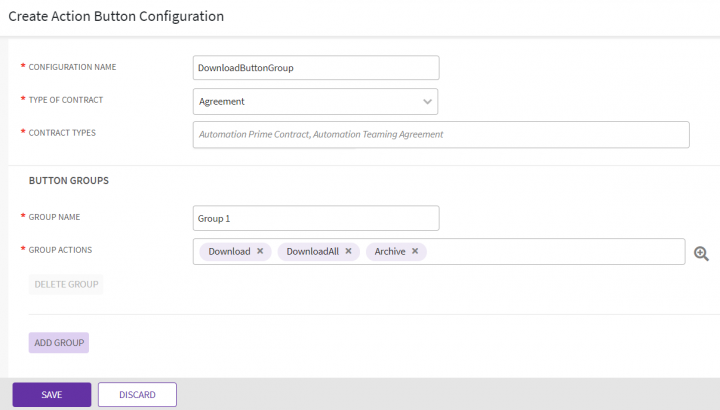
1. Navigate to the index page and click “Create” on the far right. The “Create Action Button Configuration” opens.
2. Enter a “Configuration Name”. For example, “DownloadButtonGroup”.
3. Select a “Type of Contract” for which you want the group of action buttons to appear on UI. For example, Agreement, Request, and so on.
4. Select single or multiple “Contract Types” for which you want to add the action button group. For example, "Automation Prime Contract".
Editing the Action Button Configuration
To edit the configuration of the action button:
1. Navigate the index page and click the three dots on the far right of the grid.
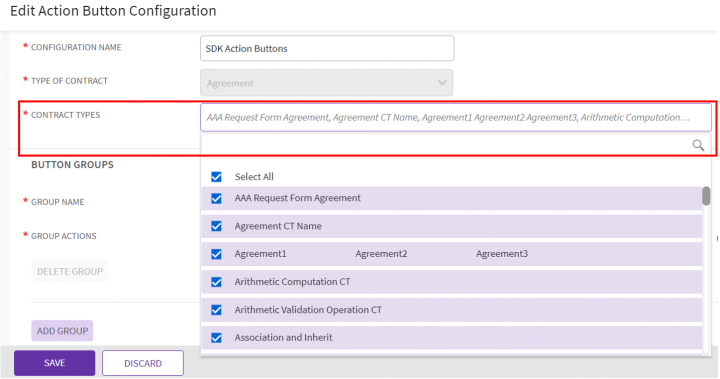
2. Click "Edit". The "Edit Action Button Configuration" page appears. Make changes are required, for example, apply the group action button for agreements belonging to all contract types by "Select All" in "Contract Types".
3. Click "Save"

