


Contents
- 1 Configuring MS Teams with ICI
- 1.1 Azure Portal Configuration for ICI UI Application
- 1.2 Azure Portal Configuration for ICI API Application
- 1.3 Azure Portal Configuration for Microsoft Teams App
- 1.4 Icertis Configuration Sheet
- 1.5 Upload & Approval Process for new Icertis Teamworks app in Microsoft Teams admin center
- 1.6 Update an existing Icertis Teamworks app in Microsoft Teams admin center
- 1.7 Installing the Microsoft Teams app
- 1.8 Verification in ICI
Configuring MS Teams with ICI
To enable this capability, you (client) can make use of the existing ICI UI and API apps (App Registrations) or create 2 new apps for the same on Azure portal. Further we are going to provide certain API Permissions to these apps for interacting with Microsoft Teams to create new teams, channel, add team members to a team, add file and so on.
In case you are using a different identity provider like Okta, Ping Identity then all the internal ICI users are required to be part of the Azure Ad for this integration to work.
With the help of the following sections, you can create/edit the ICI UI and API apps (App Registrations), add URL redirects, provide API permissions etc.
Azure Portal Configuration for ICI UI Application
1. ICI UI Application (API Permissions)
- Clients with different identity provider (for example, Okta or Ping Identity) must create a new ICI UI app registration and provide the required API permissions (listed under Section B.3) on their Azure portal.
- Clients with Azure AD will have to provide the required API permission (listed under Section B.2) to the existing ICI UI app registration on Azure portal.
- In both the above scenarios the following details with respect to the newly created or modified app are required to be shared with Icertis (to be able to enable ICI integration with Microsoft Teams).
- Directory ID (Tenant ID)
- Application ID (Client ID)
- Client Secret
- (ICI UI) Redirect URI
2. ICI UI application (app registration) on Azure portal requires the following Microsoft Graph delegated API permission with Admin consent.


3. Create a new or update existing ICI UI Application: Clients who are updating the existing ICI UI app can skip points ‘a’ to ‘d’ and directly open the existing ICI UI app on Azure portal and start with point ‘e’.
a. Go to ‘App Registrations’ under ‘Azure Active Directory’ on Azure portal and on the right panel, click ‘New registration’ tab.
i. Provide the following information:
- Name: Enter the name for the application
- Select the Supported account types for your application. Select Accounts in this organizational directory only (ABC only - Single tenant).
- For the Redirect URI:
- Select Web.
- Set the URL to (ICI UI Application URL)
- Go to ‘App Registrations’ under ‘Azure Active Directory’ on Azure portal and on the right panel, click ‘New registration’ tab.
- Go to ‘App Registrations’ under ‘Azure Active Directory’ on Azure portal and on the right panel, click ‘New registration’ tab.
</ul>
[https://Template:Your-tenant-name.icertis.com https://Template:Your-tenant-name.icertis.com]
b. Click Register
c. Once it is created, Azure displays the Overview page for the app.
d. In the left panel, select Certificates & secrets to create a client secret for your application.
- Under Client secrets, select ➕ New client secret.
- Add a description to identify this secret from others.
- Set Expires to your selection.
- Select Add.
- Before leaving this page, record the secret.
e. In the left panel, select ‘API permissions’ to add certain delegated permission for your UI application.
- Click ‘Add a permission’.
- Under ‘Microsoft APIs’ select ‘Microsoft Graph’.
- Select ‘Delegated permissions’.
- Now select the following permission (please find more information on usage of every API permission under ‘Section B.2’)
-
- AppCatalog.Read.All
- Channel.Create
- Files.ReadWrite.All
- Group.ReadWrite.All
- Team.Create
- Team.ReadBasic.All
- TeamMember.ReadWrite.All
- TeamsAppInstallation.ReadWriteForTeam
- User.Read
- User.ReadBasic.All
f. Copy and save the following information to a file:
- The Application (client) ID value. You'll use this value later as the Client ID when you register this Azure identity application with your bot.
- The Directory (tenant) ID value. You'll also use this value later as the Tenant ID to register this Azure identity application with your bot.
g. With respect to the newly created or modified ICI API app, you are required to share the following with Icertis (to be able to enable ICI integration with Microsoft Teams).
- Directory ID (Tenant ID) [Copy value to E.1]
- Application ID (Client ID) [Copy value to E.2]
- Client Secret [Copy value to E.3]
- (ICI UI) Redirect URI
Azure Portal Configuration for ICI API Application
1. ICI API Application (API Permissions)
- Clients with different identity provider (for example, Okta or Ping Identity) must create a new ICI API app registration and provide the required API permissions (listed below) on their Azure portal.
- Clients with Azure AD will have to provide the required API permission to the existing ICI API app registration on Azure portal.
- For those customers who do not have an existing ICI API application, are required to create a new app registration by following the steps mentioned under Section C.3.
- For clients with existing ICI API application, an additional ‘Redirect URI’ is required to be added:
- In the ICI API application go to ‘Authentication’ under ‘Manage’
- For the Redirect URI, click ‘Add URI’
- Set the URL to https://token.botframework.com/.auth/web/redirect (required to authenticate the Icertis Teamworks App)
'2. 'ICI API application (app registration) on Azure portal requires the following Microsoft Graph delegated API permission with Admin consent.

3. Create a new ICI API Application: We need an identity provider that can be used for authentication of ICI API & ‘Icertis Teamworks’ (Microsoft Teams) app. For clients who are updating the existing ICI API app can skip points ‘a’ to ‘d’ and directly open the existing ICI API app on Azure portal and start with point ‘e’.
- You'll be asked to provide the following information:
-
- Name. Enter the name for the application
- Select the Supported account types for your application. Select Accounts in this organizational directory only (ABC only - Single tenant).
- For the Redirect URI
-
- Error! Hyperlink reference not valid.
- Under Client secrets, select ➕ New client secret.
- Add a description to identify this secret from others.
- Set Expires to your selection.
- Select Add.
- Before leaving this page, record the secret.
- For the Redirect URI, click ‘Add URI’
- Add a new redirect URL i.e., https://token.botframework.com/.auth/web/redirect (required to authenticate the Icertis Teamworks App)
- Click on Save
- Click ‘Add a permission’.
- Under ‘Microsoft APIs’ select ‘Microsoft Graph’.
- Select ‘Delegated permissions’.
- Now select the following permission (please find more information on usage of every API permission under ‘Section C.2’)
- Files.ReadWrite.All
- User.Read
- Copy and save the following information to a file:
- The Application (client) ID value. You'll use this value later as the Client ID when you register this Azure identity application with your bot.
- The Directory (tenant) ID value. You'll also use this value later as the Tenant ID to register this Azure identity application with your bot.
- Click on Overview in the left panel. In the right panel on the top click on ‘Endpoints’ (We need to record/copy a few values for the next step: Bot channel Authentication mechanism Step F)
</ul>
- Application ID (Client ID) [Copy value to E.4]
- Client Secret [Copy value to E.5]
- (ICI API) Redirect URI
- OAuth 2.0 authorization endpoint (v2) [Copy value to E.7]
- OAuth 2.0 token endpoint (v2) [Copy value to E.8]
- Scope (defined under section B.3.i) [Copy value to E.6]
Azure Portal Configuration for Microsoft Teams App
1. Under ‘Azure Active Directory’, click on ‘App registrations’.
2. Click the New registration tab on the top left.
3. Enter the name of the bot application you are registering. You need to select your own unique name.
4. For the Supported account types select Accounts in any organizational directory (Any Azure AD directory - Multitenant)
5. Click the Register button. Once completed, Azure displays the Overview page for the application.
6. Copy and save to a file the Application (client) ID & Directory (tenant) ID value.
7. In the left panel, click Certificate and secrets.
8. Under Client secrets, click New client secret.
9. Add a description to identify this secret from others you might need to create for this app.
10. Set Expires to your selection.
11. Click Add.
12. Copy the client secret and save it to a file.
13. With respect to the newly created Bot app, you are required to share the following with Icertis (to be able to enable ICI integration with Microsoft Teams).
a. Application ID (Client ID) [Copy value to E.9]
b. Client Secret [Copy value to E.10]
Icertis Configuration Sheet

Upload & Approval Process for new Icertis Teamworks app in Microsoft Teams admin center
-
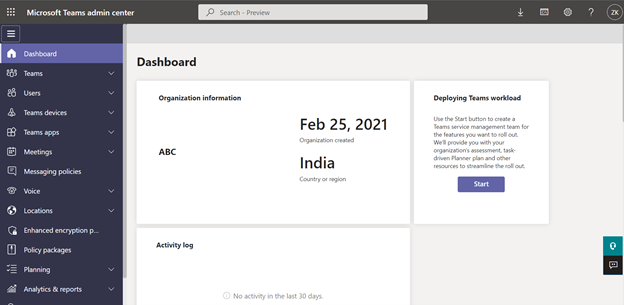
- Go to URL https://admin.teams.microsoft.com/ & login to the ‘Microsoft Teams admin center’.
 2. In the left panel expand ‘Teams apps’ section.
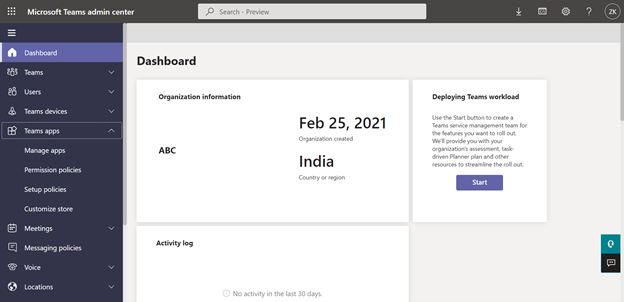 3. Click on ‘Manage apps’
 4. In the right panel under ‘Manage apps’ click on ‘+ Upload’ link
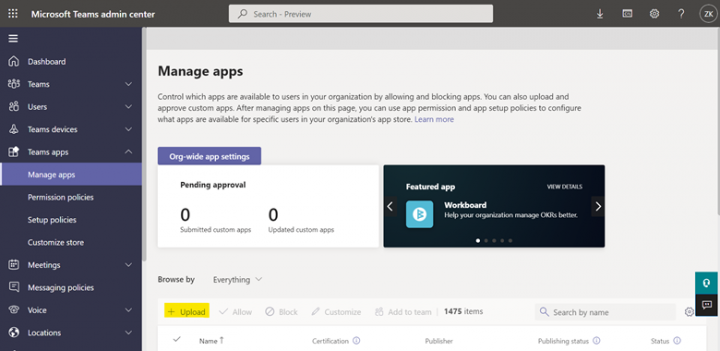
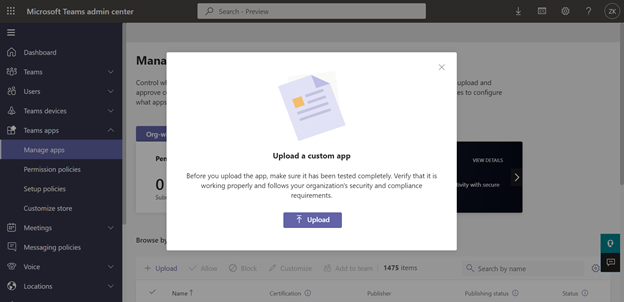 5. Clicking the ‘Upload’ button will open a file selection window. Go to the location where the ‘manifest.zip’ file shared by Icertis is stored. Select the ‘manifest.zip’ file and click ‘Open’.
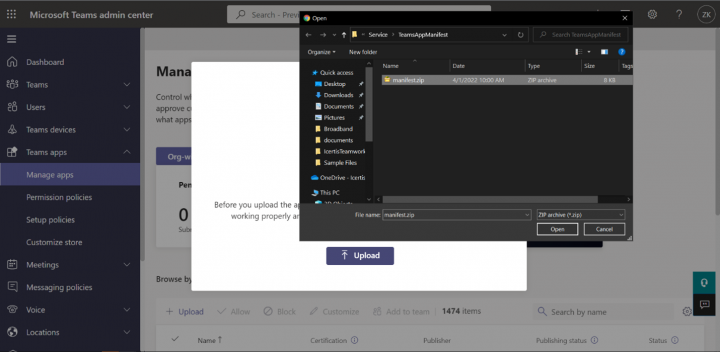 6. The app should be submitted to the app catalog and its ‘Publishing Status’ status should be ‘Published’. You can search for the app by typing the app name i.e., ‘Icertis Teamworks’ as shown below,
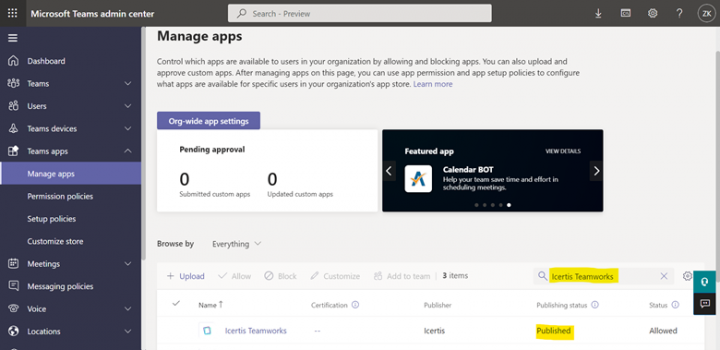 7. The ‘Icertis Teamworks’ app should now be visible under the ‘Build for your org’ under App section in ‘Microsoft Teams’
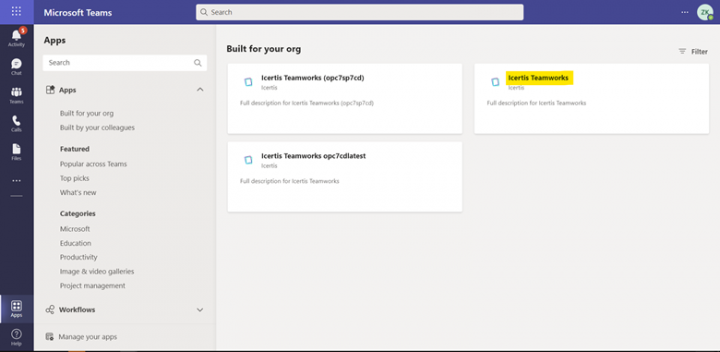
- Go to URL https://admin.teams.microsoft.com/ & login to the ‘Microsoft Teams admin center’.
If the ‘Icertis Teamworks’ app is not in ‘Published’ state as after following the steps stated in the previous section, then you will be required to manually publish/approve the app by performing the subsequent steps:
a. The ‘Pending approval’ widget under the ‘Manage apps’ panel at the top of the page which lets the Microsoft Teams admin know when a custom app is submitted for approval

b. Search for the app name as shown below that you want to approve. The app to be approved status would be ‘Blocked’ currently.

c. Clicking the app link will take you to the app details page.


d. On the ‘Icertis Teamworks’ app details page, click the ‘Publish’ button to approve the app.

e. The ‘Icertis Teamworks’ app should now be visible under the ‘Build for your org’ under App section in ‘Microsoft Teams’

Update an existing Icertis Teamworks app in Microsoft Teams admin center
1. Go to URL https://admin.teams.microsoft.com/ & login to the ‘Microsoft Teams admin center’.

2. In the left panel expand ‘Teams apps’ section.


Installing the Microsoft Teams app
- Go to Microsoft Teams.
- Click ‘Apps’ in the bottom left of the Microsoft Teams screen.
- Select ‘Built for your org’.
- Click on the ‘Icertis Teamworks’ app. A window opens.
- Click on ‘Add to Team’.
- Select the channel where you want to install the Icertis Teamworks application.
- Click ‘Set up a Bot’.
- ‘Icertis Teamworks’ application is ready for use.
Verification in ICI
Once all the above configurations done. User should be able to see ‘Collaborate in Teams’ button on published Agreement instance.

When user clicks on ‘Collaborate in Teams’ button, user should see Wizard to push/send information from ICI to MS teams.
