You do not have permission to edit this page, for the following reason:
You can view and copy the source of this page:
Return to ICI Proposal Management.
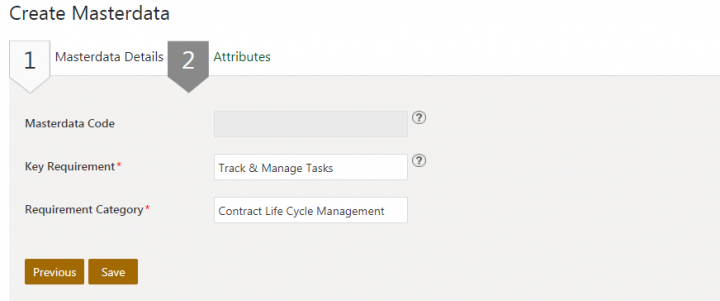
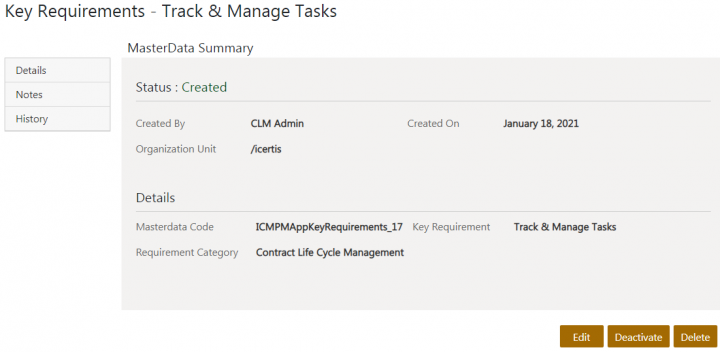
The ICI Proposal Management provides seeded masterdata “Key Requirements” to capture the essential contents of an RFx that would help in winning the bid proposal.
Users can create masterdata instances as per the business requirements.
To create a masterdata instance:
1. Click “Configuration” > “Masterdata” > “Create Masterdata” on the “Home” page. The “Create Masterdata” page opens.


You can view existing sell side RFx from the “Proposal Management” tile.
To view the created sell side RFx:
1. Click “Proposal Management” >” Sell Side RFx” on the “Home” page.
screen 1
The saved search result page opens displaying all available sell side RFx records. Users can refine the search result by applying filters, options and keywords.
screen 2
2. Click “View Record” icon corresponding to the sell side RFx record you want to open. For example, Enterprise CLM. The sell side RFx “Details” page opens.
Suppliers can view the current status of the sell side RFx on the “Details” page. Suppliers can also perform a variety of actions based on the current state of the sell side RFx.
You can modify the sell side RFx as per business requirements:
1. Click “Edit” on the sell side RFx “Details” page. The “Edit Agreement for Sell Side RFx” page opens.
Screen 1
2. Make the required changes and click “Next”. The “Verify” page opens.
screen
3. Verify the changes made to the RFx and click “Update”.
screen
The RFx will save the updates made.
You can cancel a sell side RFx as per business requirements.
To cancel a sell side RFx:
1. Click “Cancel” on the sell side RFx “Details” page. The “Please Confirm” window opens.
screen 1
2. Click “Yes” if you are sure that the RFx should be cancelled. The “Add Note” window opens.
screen 2
3. Enter a note such as the reason for cancellation and select the reason code.
4. Click “Add”. The status of sell side RFx changes to “Cancelled”.
screen 3
Based on the company’s objectives, the Sell Side RFx is qualified for a decision to bid or not to bid. The sales team of the organization can mention the Bid Decision details for a Sell Side RFx in an “Awaiting Qualification” status by creating an RFx Qualification association. There can be only one RFx qualification for a Sell Side RFx.
The creation of an RFx Qualification Association invokes the Approver rule and workflows and moves the corresponding Sell Side RFx to the status according to the bid decision, upon RFx qualification approval.
Users can set Bid Decision using the following options:
After the Sell Side RFx capture is complete, an RFx Qualification captures the outcome of the Bid/No Bid decision.
1. Click the plus + icon next to RFx Qualification in the “Associations” section, on Sell Side RFx “Details” page. The “Create Association” page opens.
scrren 1
2. Select or enter values for the following fields in the “Bid Decision” section:
3. Click “Create”. The RFx Qualification is created in a “Draft” state.
screen 2
Users can access all RFx Qualifications.
Selecting the RFx Qualification option navigates the user to the “RFx Qualification” index page, where a list of qualified RFx is displayed. This option is visible only to users who have “View” or “Manage” access to the RFx qualification. On selecting a record, the user is directed to the “RFx Qualification Details” page that provides information such as Bid Decision details, Versions, History, Team, Notes, etc. in the left navigation pane.
1. Click “Proposal Management” > “RFx Qualification” on the “Home” page. The saved search result for RFx Qualifications is rendered displaying all RFx Qualification records.
screen 1
2. Click the “View Record” icon corresponding to the RFx Qualification you want to open.
screen 2
The RFx Qualification Details page opens
screen 3
1. Click “Send For Approval” on the RFx Qualification Details page. The RFx Qualification will be sent to relevant users for approval.
screen 1
The status of the RFx Qualification changes to “Waiting For Approval from the First (or respective) Approver”.
2. Click “Recall” if you want to recall the RFx Qualification sent to approvers. The “Add Note” window opens.
screen 1
3. Add a note and select a Reason Code for recalling.
4. Click Add. The RFx Qualification will be recalled and moves back to Draft state.
The approvers (sales or business or legal team) can approve or reject the RFx Qualification based on the company’s objectives being fulfilled or not.
To approve the RFx Qualification:
1. Click “Approve” on RFx Qualification “Details” page. The “Association Approve Note” window opens.
screen 1
2. Enter a note and click “Add”. The status of the RFx Qualification changes to “Approved”.
screen 2
The status of the corresponding Sell Side RFx changes as per the bid decision selected while creating the RFx Qualification. For example, here the status changes to “Bid”.
screen3
If a user modifies the approved RFx qualification, it moves back to the “Draft” state and the corresponding Sell Side RFx moves to the “Awaiting Qualification” state.
1. Click “Reject” on RFx Qualification “Details” page. The “Association Reject Note” window opens.
screen 1
2. Enter a reject note and select the relevant “Reason Code” from the drop-down.
screen 2
3. Click “Add”. The RFx Qualification will be rejected and moves back to the “Draft” state.
When a user deletes an approved RFx qualification, the RFx qualification instance is deleted and the corresponding Sell Side RFx moves back to the “Awaiting Qualification” state.
screen 1
Related Topics: Agreement Management | Icertis Business Apps | Biz Apps Release Notes
You do not have permission to edit this page, for the following reason:
The action you have requested is limited to users in one of the groups: Users, User.
You can view and copy the source of this page:
Return to ICI Proposal Management.