Shefali DK (Talk | contribs) |
|||
| Line 116: | Line 116: | ||
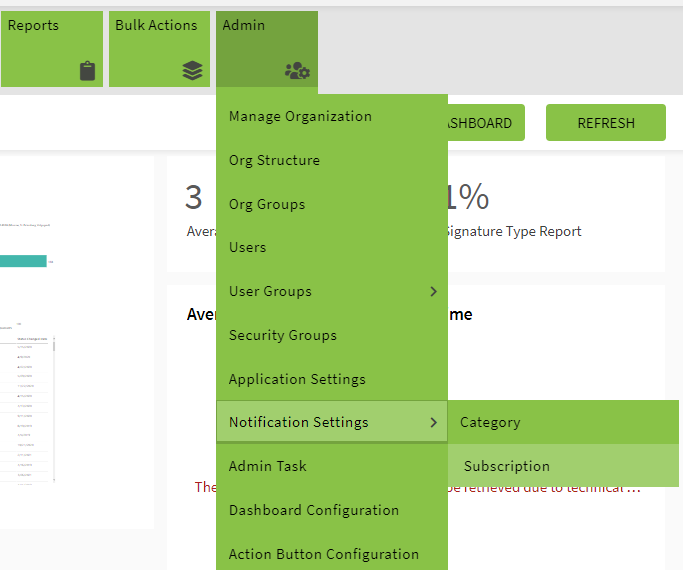
1. '''Click''' Admin > Notification Settings > Subscription on the Home page. The Subscription page opens. | 1. '''Click''' Admin > Notification Settings > Subscription on the Home page. The Subscription page opens. | ||
| − | <div class="image-green-border">[[File:8.0-Subscription8.PNG|720px]]</div> | + | <div class="image-green-border">[[File:8.0-Subscription8.PNG|720px|8.0-Subscription8.PNG]]</div> |
2. '''Click''' "Create". The "Create Subscription" page opens. | 2. '''Click''' "Create". The "Create Subscription" page opens. | ||
| − | <div class="image-green-border">[[File:8.0-Subscription.PNG|720px]]</div> | + | <div class="image-green-border">[[File:8.0-Subscription.PNG|720px|8.0-Subscription.PNG]]</div> |
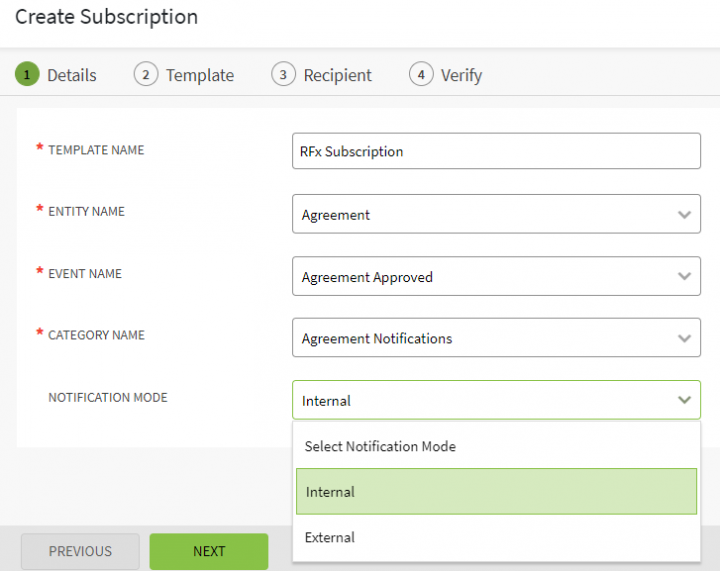
3. '''Enter''' the Template Name. For example, Associated Document Attachment.<br/> 4. '''Enter''' the Entity Name for which you want to send notifications. For example, Master Services Agreement.<br/> 5. '''Enter''' the Event Name to trigger notifications. For example, Agreement Approved.<br/> 6. '''Enter''' the Category Name. For example, Agreement Notifications.<br/> 7. '''Enter''' the Notification Mode. For example, '''select''' External. | 3. '''Enter''' the Template Name. For example, Associated Document Attachment.<br/> 4. '''Enter''' the Entity Name for which you want to send notifications. For example, Master Services Agreement.<br/> 5. '''Enter''' the Event Name to trigger notifications. For example, Agreement Approved.<br/> 6. '''Enter''' the Category Name. For example, Agreement Notifications.<br/> 7. '''Enter''' the Notification Mode. For example, '''select''' External. | ||
| Line 125: | Line 125: | ||
*Internal: select to send notifications to internal users. | *Internal: select to send notifications to internal users. | ||
*External: select to send notifications to external users. | *External: select to send notifications to external users. | ||
| − | <div class="image-green-border">[[File:8.0-Subscription9.PNG|720px]]</div> | + | <div class="image-green-border">[[File:8.0-Subscription9.PNG|720px|8.0-Subscription9.PNG]]</div> |
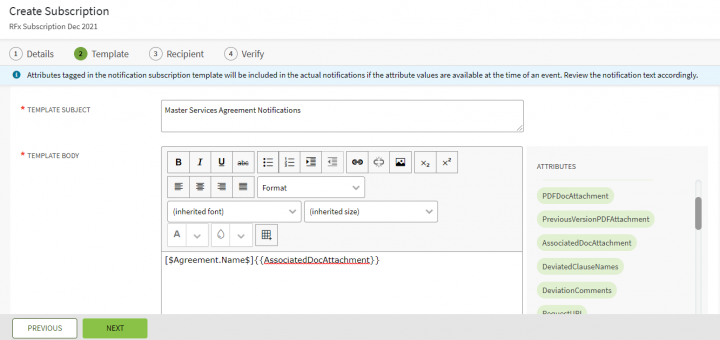
8. '''Click''' Next. The Template page opens.<br/> 9. '''Tag''' the AssociatedDocAttachement attribute for associated documents in the Template. This enables the attachment of Associated Documents in notifications. | 8. '''Click''' Next. The Template page opens.<br/> 9. '''Tag''' the AssociatedDocAttachement attribute for associated documents in the Template. This enables the attachment of Associated Documents in notifications. | ||
| − | <div class="note-box">'''Note''': The tag AssociatedDocAttachement supports attachments of associated documents in all ICI supported file formats.</div> <div class="image-green-border"> </div> <div class="image-green-border">[[File:8.0-Subscription10.PNG|720px]]</div> <div class="image-green-border"> </div> <div class="image-green-border"> </div> <div class="note-box">'''Note''': The associated document tag AssociatedDocAttachement will only be available for selection and tagging in a Notification Template if enabled through technical configuration for an instance.</div> | + | <div class="note-box">'''Note''': The tag AssociatedDocAttachement supports attachments of associated documents in all ICI supported file formats.</div> <div class="image-green-border"> </div> <div class="image-green-border">[[File:8.0-Subscription10.PNG|720px|8.0-Subscription10.PNG]]</div> <div class="image-green-border"> </div> <div class="image-green-border"> </div> <div class="note-box">'''Note''': The associated document tag AssociatedDocAttachement will only be available for selection and tagging in a Notification Template if enabled through technical configuration for an instance.</div> |
10. '''Click''' Add Recipients. The "Add Recipients" window opens. | 10. '''Click''' Add Recipients. The "Add Recipients" window opens. | ||
| − | <div class="image-green-border">[[File:8.0-Subscription2.PNG|720px]]</div> | + | <div class="image-green-border">[[File:8.0-Subscription2.PNG|720px|8.0-Subscription2.PNG]]</div> |
11. '''Select''' Attributes to send the notification to users added during the creation of an agreement instance. For example, External Signatory. | 11. '''Select''' Attributes to send the notification to users added during the creation of an agreement instance. For example, External Signatory. | ||
| Line 135: | Line 135: | ||
12. '''Select '''Action User checkbox. | 12. '''Select '''Action User checkbox. | ||
| − | <div class="image-green-border">[[File:8.0-Subscription11.PNG|720px]]</div> | + | <div class="image-green-border">[[File:8.0-Subscription11.PNG|720px|8.0-Subscription11.PNG]]</div> |
13. '''Click''' Add. The user is added to the Subscription. | 13. '''Click''' Add. The user is added to the Subscription. | ||
| − | <div class="image-green-border">[[File:8.0-Subscription12.PNG|720px]]</div> | + | <div class="image-green-border">[[File:8.0-Subscription12.PNG|720px|8.0-Subscription12.PNG]]</div> |
14. '''Click''' Next. The Verify page opens.<br/> 15. '''Verify''' the details and '''click''' "Create". The Subscription is created. | 14. '''Click''' Next. The Verify page opens.<br/> 15. '''Verify''' the details and '''click''' "Create". The Subscription is created. | ||
| − | <div class="image-green-border">[[File:8.0-Subscription13.PNG|720px]]</div> | + | <div class="image-green-border">[[File:8.0-Subscription13.PNG|720px|8.0-Subscription13.PNG]]</div> |
The configured subscription is displayed on the Subsriptions page. | The configured subscription is displayed on the Subsriptions page. | ||
| − | <div class="image-green-border">[[File:8.0-Subscription14.PNG|720px]]</div> | + | <div class="image-green-border">[[File:8.0-Subscription14.PNG|720px|8.0-Subscription14.PNG]]</div> |
== Defining a type of Association while creating Association instance == | == Defining a type of Association while creating Association instance == | ||
| Line 149: | Line 149: | ||
1. '''Click''' "Agreements" on the "Home" page.<br/> 2. '''Click''' the "View Details" icon corresponding to the agreement you want to open. For example, Master Services Agreement. The agreement Details page opens.<br/> 3. '''Expand''' the Associations tab in the left navigation pane.<br/> 4. '''Click''' the Create Association icon corresponding to the association you want to add to the agreement. For example, Annexure 1. The Create Association page opens. | 1. '''Click''' "Agreements" on the "Home" page.<br/> 2. '''Click''' the "View Details" icon corresponding to the agreement you want to open. For example, Master Services Agreement. The agreement Details page opens.<br/> 3. '''Expand''' the Associations tab in the left navigation pane.<br/> 4. '''Click''' the Create Association icon corresponding to the association you want to add to the agreement. For example, Annexure 1. The Create Association page opens. | ||
| − | <div class="image-green-border">[[File:8.0-Subscription15.PNG|720px]]</div> | + | <div class="image-green-border">[[File:8.0-Subscription15.PNG|720px|8.0-Subscription15.PNG]]</div> |
5. '''Select''' the file and upload in the Select File field. For example, Annexure 1 data.xlsx.<br/> 6. '''Select''' the value in the Type of Associated Document attribute. For example, select External.<br/> | 5. '''Select''' the file and upload in the Select File field. For example, Annexure 1 data.xlsx.<br/> 6. '''Select''' the value in the Type of Associated Document attribute. For example, select External.<br/> | ||
| Line 161: | Line 161: | ||
The notification will be sent with the attached associated documents to the intended users as per the configured notification subscription for the agreement.<br/> | The notification will be sent with the attached associated documents to the intended users as per the configured notification subscription for the agreement.<br/> | ||
| − | <div class="image-green-border">'''Related Topics''': [[User_Administration|User_Administration]] | [[Create_Notification_Categories|Creating Notification Categories]] | [[Create_a_Notification_Rule|Create_a_Notification_Rule]]</div> </div> | + | <div class="image-green-border">'''Related Topics''': [[Notification_Settings|Notification Settings]] | [[User_Administration|User_Administration]] | [[Create_Notification_Categories|Creating Notification Categories]] | [[Create_a_Notification_Rule|Create_a_Notification_Rule]]</div> </div> |
Revision as of 20:01, 7 December 2021
Contents
Creating a Subscription
Using Subscriptions, you can create user notifications and assign appropriate recipients. When creating a subscription:
- Define the entity or a task for which the notification to be sent.
- Define the event for which it will be sent.
To create a subscription:
1. Click the "Notification Settings" option under "Admin" tile and then click "Subscription". The "Subscriptions" page opens. All the existing subscriptions are displayed on this page such as Agreement Notifications, Clause Notifications. Each subscription groups various notification templates of various events that fit into the respective category. You can also edit or delete the displayed categories.
2. Click "Create" on the "Subscriptions" page. The "Create Subscription" page opens.
There are four tabs on this page:
- Details
- Template
- Recipient
- Verify
Details
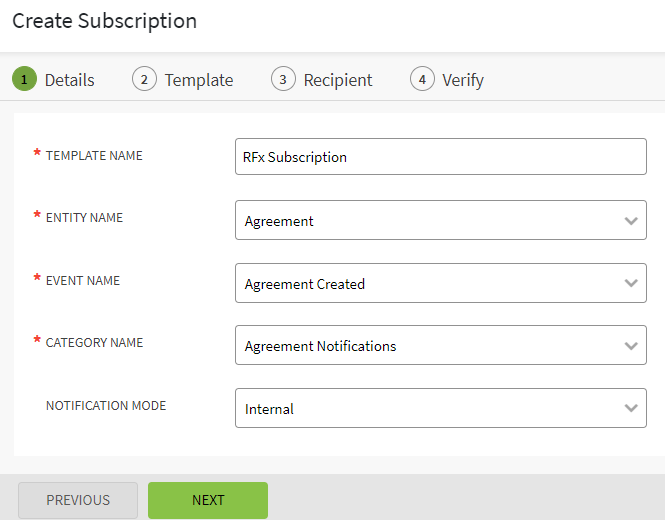
Fill in the mandatory fields:
- Type an appropriate Template Name for the subscription.
- Select an Entity Name such as Agreement.
- Select an Event Name, such as Agreement Approved.
- Select a Category Name such as Agreement Notifications.
- Click Next. The Template tab opens.
Template
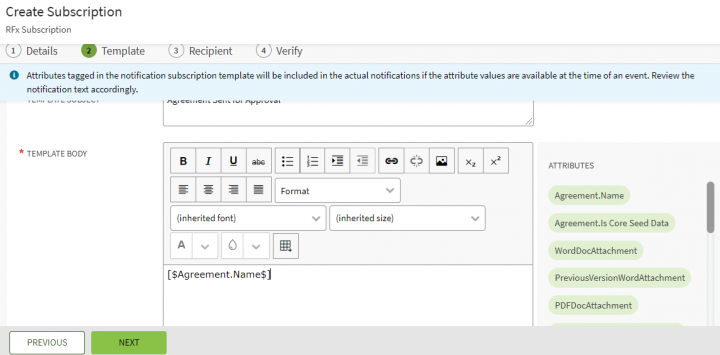
On the Template tab, define a template for user notifications and email notifications:
- Type appropriate subject in the Template Subject box. All the notification emails using this template would have this content in the subject line.
- Type an appropriate message in the Template Body. Click the Attributes list to tag respective attributes in the template body. You can also format the selected attributes by using menu options.
- Click Next. The Recipient tab open.
Recipient
To add recipients:
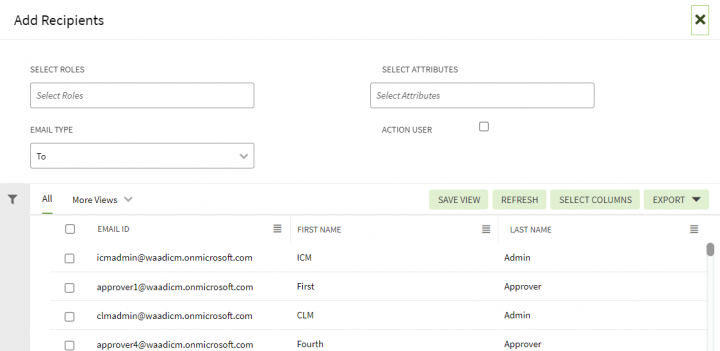
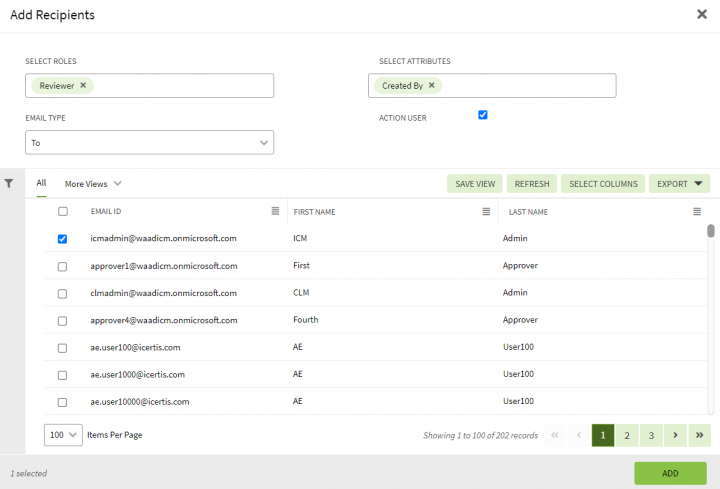
1. Click the Add Recipients icon. The Add Recipients window opens.
2. Select User Roles such as Approver, Internal Reviewer etc.
3. Select User Attributes such as Created By, Modified by etc.
4. Check the Action User box if necessary.
5. Select a desired user from the displayed list or search a user using the search bar.
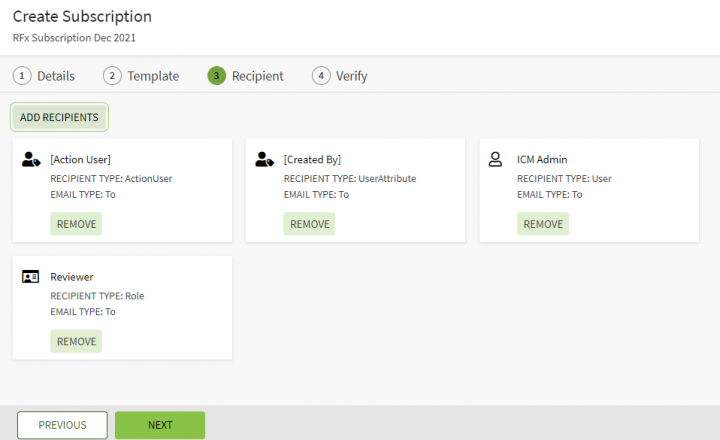
6. Click Add. The user name and role get added in the list.
7. Click Next. The Verify tab opens.
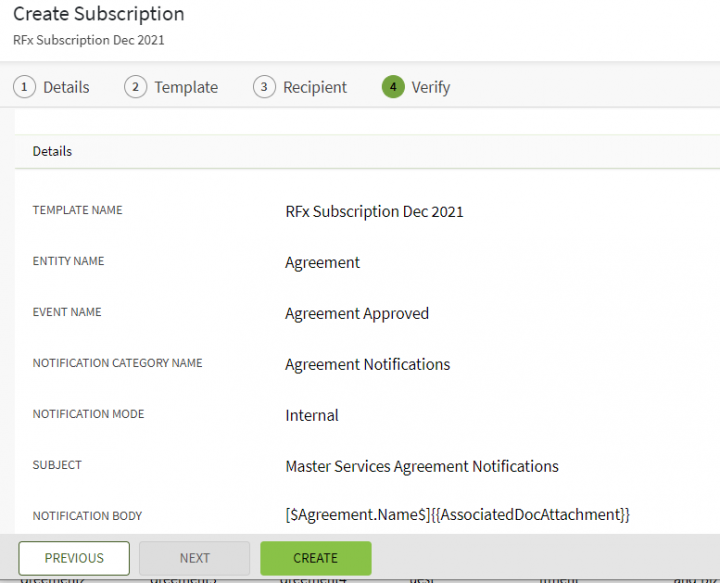
Verify
On this tab, verify all the information you entered for the Subscription.
Configuring the associated document type for attachment
ICI users can share the main agreement document as part of various email notifications that gettriggered for the agreement.In addition to the main agreement document, users can now send associated documents as part of various email notifications that get triggered for the agreement from time to time. Access tothese documents can be controlled based on the type of document – internal, external, or restricted. For example, some documents may only be shared with internal users, some may beshared with internal and external users, whereas some may not be shared with anyone.
Now,
- Administrators can tag the associated document contract type in the email notification template for agreements, assignment agreements, termination agreements, and
amendments. - Users can define:
- The type of notification as internal or external.
- The type of associated document instance as internal, external, or restricted.
- Based on the type of notification and type of tagged associated documents, attachments are added to the email notification
Users can configure the associated document to send in an email as an attachment with the base agreement by adding the global seeded attribute Type of Associated Document while creating or editing an Association contract type.
To edit the Associated Document Contract Type:
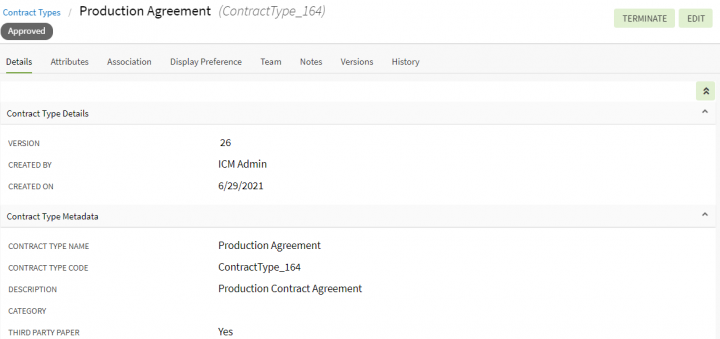
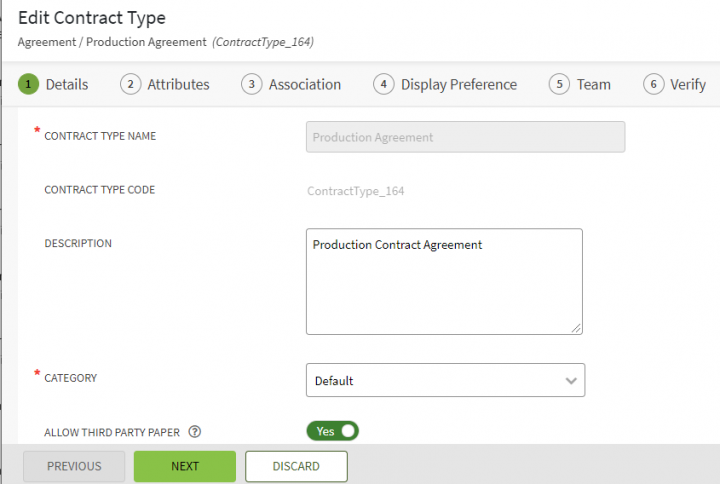
1. Click "Configure" > Contract Types on the Home page. The Contract Types index page opens.
2. Click the "View Details" icon corresponding to the Associated Document contract type you want to edit. For example, ICMAnnexure1. The contract Type Details page opens.
3. Click Edit. The Edit Contract Type page opens.
4. Clik Next. The Attributes page opens.
5. Select and add the attribute Type of Associated Document from the Available Attributes pane to the Select Attributes pane using the action arrows.
6. Click Save. The Attribute saved successfully message is displayed.
7. Click Next. The Associations tab opens.
8. Enter the details on Association, Display Preference and Team tabs.
9. Verify the details and click Update. The Associated Document contract type is updated with the Type of Associated Document attribute.
Configuring a notification subscription for association attachment
Users can define and set the notification mode and tag the associated document as attachment for the notifications email while creating or editing the Notification Subscriptions.
To configure Notifications:
1. Click Admin > Notification Settings > Subscription on the Home page. The Subscription page opens.
2. Click "Create". The "Create Subscription" page opens.
3. Enter the Template Name. For example, Associated Document Attachment.
4. Enter the Entity Name for which you want to send notifications. For example, Master Services Agreement.
5. Enter the Event Name to trigger notifications. For example, Agreement Approved.
6. Enter the Category Name. For example, Agreement Notifications.
7. Enter the Notification Mode. For example, select External.
The available options are:
- Internal: select to send notifications to internal users.
- External: select to send notifications to external users.
8. Click Next. The Template page opens.
9. Tag the AssociatedDocAttachement attribute for associated documents in the Template. This enables the attachment of Associated Documents in notifications.
10. Click Add Recipients. The "Add Recipients" window opens.
11. Select Attributes to send the notification to users added during the creation of an agreement instance. For example, External Signatory.
Configurators can also search and add users through Search User field.
12. Select Action User checkbox.
13. Click Add. The user is added to the Subscription.
14. Click Next. The Verify page opens.
15. Verify the details and click "Create". The Subscription is created.
The configured subscription is displayed on the Subsriptions page.
Defining a type of Association while creating Association instance
Users can define the attachment type for associated documents by setting the value in the Type of Associated Document attribute while creating a new association, editing the existing association from the Agreement Details page as well as from Association Management menu tile on the Home page.
To set the type of association while creating new association instance:
1. Click "Agreements" on the "Home" page.
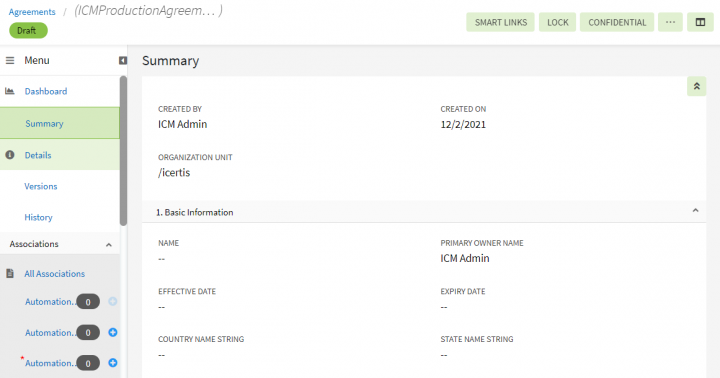
2. Click the "View Details" icon corresponding to the agreement you want to open. For example, Master Services Agreement. The agreement Details page opens.
3. Expand the Associations tab in the left navigation pane.
4. Click the Create Association icon corresponding to the association you want to add to the agreement. For example, Annexure 1. The Create Association page opens.
5. Select the file and upload in the Select File field. For example, Annexure 1 data.xlsx.
6. Select the value in the Type of Associated Document attribute. For example, select External.
The available options are :
- Internal: select to send notifications to internal users.
- External: select to send notifications to external users.
- Restricted: select to restrict the attachment of an associated document in notifications.
When Notification Mode is set as Internal in the Notification Subscription, Associated Documents will be attached in the notification email if the Type of Associated Document set as Internal or External and will not be attached if set as Restricted.
When Notification Mode is set as External in the Notification Subscription, Associated Documents will be attached in the notification email only when the Type of Associated Document is also set as External and will not be attached if set as Internal or Restricted.
7. Enter other details.
8. Click Next.
9. Complete the creation of Association following the standard ICI workflow.
10. Publish and Approve the Agreement.
The notification will be sent with the attached associated documents to the intended users as per the configured notification subscription for the agreement.
