| Line 1: | Line 1: | ||
| + | |||
| Line 17: | Line 18: | ||
1. '''Click '''the ''Tasks ''tile on My Dashboard. | 1. '''Click '''the ''Tasks ''tile on My Dashboard. | ||
| − | 2. '''Click '''the ''Request Name''. The Request details and status are displayed along with the preview. The Request status is displayed as well. Use appropriate buttons to Approve, Cancel or Reject | + | 2. '''Click '''the ''Request Name''. The Request details and status are displayed along with the preview. The Request status is displayed as well. Use appropriate buttons to Approve, Cancel or Reject a Request''.'' |
<ul style="margin-left: 80px;"> | <ul style="margin-left: 80px;"> | ||
<li>'''Click '''''Approve ''- to Approve the Request.</li> | <li>'''Click '''''Approve ''- to Approve the Request.</li> | ||
| Line 24: | Line 25: | ||
3. '''Click '''''Approve ''to approve the Request. This opens the ''Add Note'' dialog box. | 3. '''Click '''''Approve ''to approve the Request. This opens the ''Add Note'' dialog box. | ||
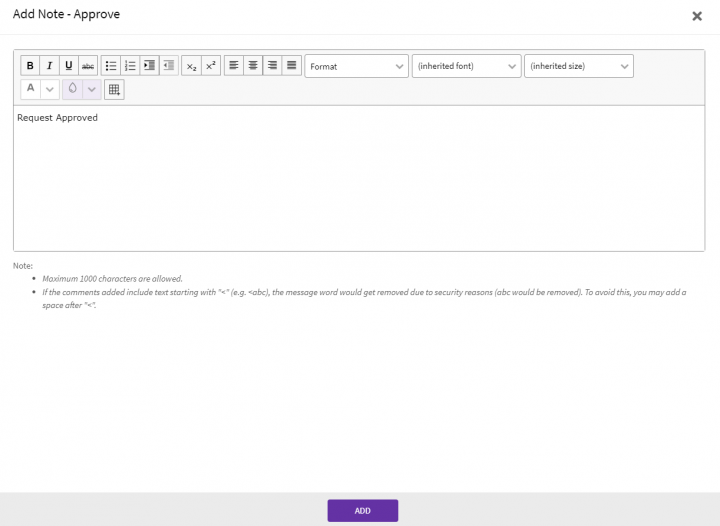
| − | <div class="image-green-border">4. Type appropriate comments and '''click '''''Add''. The status of the Request changes to ''Approved''.</div> <div class="image-green-border"> </div> <div class="image-green-border">[[File:Reviewing a request.PNG|720px]]</div> <div class="image-green-border"> </div> <div class="note-box">'''Note''': It is mandatory to mention the Reason Code if you want to reject the request.</div> <div class="image-green-border"> </div> <div class="image-green-border"> </div> <div class="image-green-border"> </div> <div class="image-green-border">'''Related Topics:''' [[Requests|Requests]] | [[Sending_a_Request_for_Review_and_Approval|Sending a Request for Review and Approval]] | [[Agreements|Agreements]] | [[Agreement_Management|Agreement Management]]</div> | + | <div class="image-green-border">4. Type appropriate comments and '''click '''''Add''. The status of the Request changes to ''Approved''.</div> <div class="image-green-border"> </div> <div class="image-green-border">[[File:Reviewing a request.PNG|720px|Reviewing a request.PNG]]</div> <div class="image-green-border"> </div> <div class="note-box">'''Note''': It is mandatory to mention the Reason Code if you want to reject the request.</div> <div class="image-green-border"> </div> <div class="image-green-border"> </div> <div class="image-green-border"> </div> <div class="image-green-border">'''Related Topics:''' [[Requests|Requests]] | [[Sending_a_Request_for_Review_and_Approval|Sending a Request for Review and Approval]] | [[Agreements|Agreements]] | [[Agreement_Management|Agreement Management]]</div> |
Revision as of 12:07, 23 December 2021
Reviewing and Approving a Request
A user role defines controls or permissions given to user. ICI has the following three predefined user roles for the Requests feature:
- Requester: the person who Generates the Request.
- Approver: the person who Approves the Request.
- Reviewer: the person who Reviews the Request.
You can review a Request if you are assigned a role of a Reviewer.
To review a Request as an internal reviewer:
1. Click the Tasks tile on My Dashboard.
2. Click the Request Name. The Request details and status are displayed along with the preview. The Request status is displayed as well. Use appropriate buttons to Approve, Cancel or Reject a Request.
- Click Approve - to Approve the Request.
- Click Reject - to Reject the Request.
3. Click Approve to approve the Request. This opens the Add Note dialog box.
