| Line 2: | Line 2: | ||
= Team = | = Team = | ||
| − | The ''Team'' tab displays the users with their roles | + | The ''Team'' tab displays the users with their roles assigned to the team of a specific Agreement. You can: |
| − | * | + | *Search any user by either using the ''Grid'' or ''Tile'' view. |
| − | * | + | *Add any user to the ''Team ''from either of the views. |
| − | * | + | *View the graphical representation of the Agreement lifecycle through the ''Progress'' view. It displays the different states that the Agreement has been through and the actions taken on it by various team members. |
| − | Let’s go through each view in detail | + | Let’s go through each view in detail. |
'''Grid View:''' | '''Grid View:''' | ||
| − | ''Grid'' view dramatically reduces the time required to go through the complete list of team members to find a specific one. Through this view you can easily refine your search for any specific team member. | + | ''Grid'' view dramatically reduces the time required to go through the complete list of team members to find a specific one. Through this view, you can easily refine your search for any specific team member. |
| − | The search results are displayed in tabular form. You can further sort your results by using ''Filter'' provided in every column. | + | The search results are displayed in a tabular form. You can further sort your results by using ''Filter'' provided in every column. |
| − | <div class="image-green-border">[[File:Team Grid Edited.png]]</div> | + | <div class="image-green-border">[[File:Team Grid Edited.png|RTENOTITLE]]</div> |
Follow these steps to search the log: | Follow these steps to search the log: | ||
| Line 24: | Line 24: | ||
: | : | ||
| − | :*All: displays all the team members | + | :*All: displays all the team members assigned to the Agreement team, irrespective of their roles. |
| − | :*Approvers: displays the team members | + | :*Approvers: displays the team members assigned as an Approver. |
| − | :*Core: displays the team | + | :*Core: displays the team members assigned as a Primary and Secondary Owner. |
| − | :*Extended: displays the team members | + | :*Extended: displays the team members assigned as a Business Owner, Observer and Reviewer. |
| − | :*Signatories: displays the team members | + | :*Signatories: displays the team members assigned as Signatories. |
<ol start="5"> | <ol start="5"> | ||
| − | <li>The results matching your selection are displayed on the page in tabular form.</li> | + | <li>The results matching your selection are displayed on the page in a tabular form.</li> |
| − | <li>You can refine your search further using the ''Refine Search'' field. For example, type initials of ''User Name'' who created the Agreement or type initials of the ''Team Role''. This filters the results to display only those records that | + | <li>You can refine your search further using the ''Refine Search'' field. For example, type initials of ''User Name'' who created the Agreement or type initials of the ''Team Role''. This filters the results to display only those records that match your search.</li> |
| − | <li>Sort your search results by clicking ''Filter'' icon provided in | + | <li>Sort your search results by clicking the ''Filter'' icon provided in each column. '''Click'''''<i>Filter</i> icon and choose options relevant to your search in the fields.</li> |
</ol> | </ol> | ||
| Line 38: | Line 38: | ||
This view displays all the team members in the box with their respective roles. You can narrow down the search by selecting specific categories. | This view displays all the team members in the box with their respective roles. You can narrow down the search by selecting specific categories. | ||
| − | <div class="image-green-border">[[File:Team tile Edited .png]]</div> | + | <div class="image-green-border">[[File:Team tile Edited .png|RTENOTITLE]]</div> |
You can perform following actions on the team members through ''Grid'' and ''Tile'' view: | You can perform following actions on the team members through ''Grid'' and ''Tile'' view: | ||
| Line 52: | Line 52: | ||
The ''Progress'' view displays the graphical form'' ''of the Agreement worhflow, from ''Draft'' to ''Executed'' state. This view contains three sections which displays different phases of an Agreement. The Progress view can be viewed only after the Primary Owner creates an Agreement. The complete workflow is displayed using two colour green and grey. | The ''Progress'' view displays the graphical form'' ''of the Agreement worhflow, from ''Draft'' to ''Executed'' state. This view contains three sections which displays different phases of an Agreement. The Progress view can be viewed only after the Primary Owner creates an Agreement. The complete workflow is displayed using two colour green and grey. | ||
| − | <div class="image-green-border">[[File:Progress View Edited.png]]</div> | + | <div class="image-green-border">[[File:Progress View Edited.png|RTENOTITLE]]</div> |
The three sections of ''Progress ''view are: | The three sections of ''Progress ''view are: | ||
Revision as of 06:58, 10 October 2017
Team
The Team tab displays the users with their roles assigned to the team of a specific Agreement. You can:
- Search any user by either using the Grid or Tile view.
- Add any user to the Team from either of the views.
- View the graphical representation of the Agreement lifecycle through the Progress view. It displays the different states that the Agreement has been through and the actions taken on it by various team members.
Let’s go through each view in detail.
Grid View:
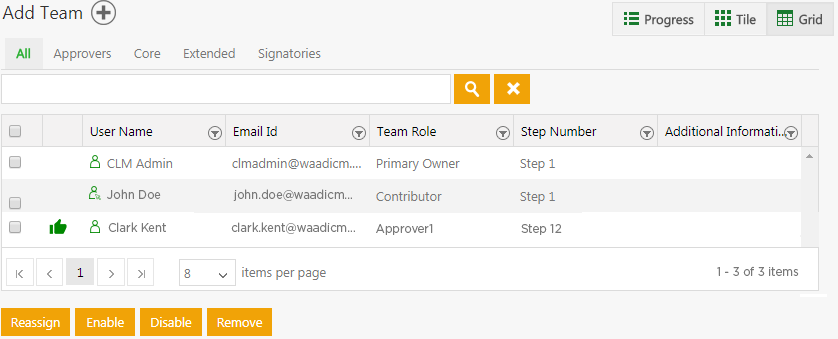
Grid view dramatically reduces the time required to go through the complete list of team members to find a specific one. Through this view, you can easily refine your search for any specific team member.
The search results are displayed in a tabular form. You can further sort your results by using Filter provided in every column.
Follow these steps to search the log:
- Click Agreement Management tile on My Dashboard. This opens the Agreements page.
- Click View icon next to the Agreement, whose Team you want to manage.
- Click Team in the left pane. This displays all existing team members along with their roles. By default, Grid is selected.
- You can refine your search by selecting the Status provided:
-
- All: displays all the team members assigned to the Agreement team, irrespective of their roles.
- Approvers: displays the team members assigned as an Approver.
- Core: displays the team members assigned as a Primary and Secondary Owner.
- Extended: displays the team members assigned as a Business Owner, Observer and Reviewer.
- Signatories: displays the team members assigned as Signatories.
- The results matching your selection are displayed on the page in a tabular form.
- You can refine your search further using the Refine Search field. For example, type initials of User Name who created the Agreement or type initials of the Team Role. This filters the results to display only those records that match your search.
- Sort your search results by clicking the Filter icon provided in each column. ClickFilter icon and choose options relevant to your search in the fields.
Tile View:
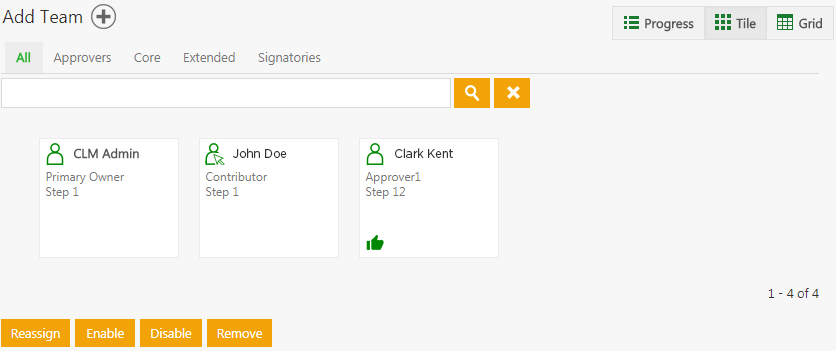
This view displays all the team members in the box with their respective roles. You can narrow down the search by selecting specific categories.
You can perform following actions on the team members through Grid and Tile view:
- Reassign: click to reassign a different Approver for the Agreement in Waiting For Approval state. This takes the previously assigned Approver completely out of the Agreement lifecycle. While doing so you can add a note with the reason for reassigning the approver. It is helpful, if an assigned Approver is either the wrong person or is busy.
- Enable: click to roll back the disabled user to enable state. Once enabled, relevant tasks can be assigned to the user.
- Disable: click to disable a specific user who is not required in the team at present. The disabled user still stays in the team and can be enabled anytime when needed.
- Remove: click to remove the user from the team, if required.
- who is already added in the team system displays an error message stating that the user is already available.
- who is already added in the team but disabled, then a popup is displayed with an error message and an option to Enable the user.
Progress View
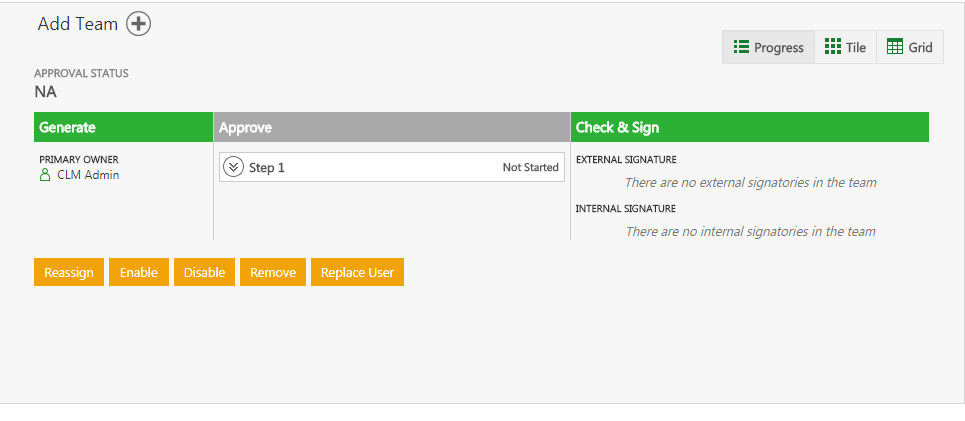
The Progress view displays the graphical form of the Agreement worhflow, from Draft to Executed state. This view contains three sections which displays different phases of an Agreement. The Progress view can be viewed only after the Primary Owner creates an Agreement. The complete workflow is displayed using two colour green and grey.
The three sections of Progress view are:
- Generate - this section displays Primary Owner and Secondary Owner with their names, if selected for the specific Agreement. By default, Generate section will be green as Agreement is created.
- Approval – this section displays different approvers for various steps in separate boxes. It also displays how many approvals are important for each Step for example, if at Step 1 there are 3 approvers assigned, but only 1 approval is needed then it will display 1 of 3 required.The Approval section stays in grey colour until any of the approver has approved the Agreement. If the Approver rejects the agreement it still stays in grey colour. For example, if at Step 1 there are 2 approvers, the first approver accepts the agreement which turns the approver section in green colour. But if the second approver rejects it the approvers section again goes back to grey colour.The thumps up icon is displayed next to the approver who has approved the Agreement.
- Check & Sign - this section displays external and internal signatories in different boxes.
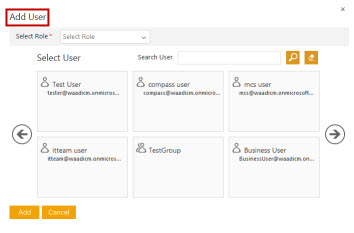
To add a team member through Team tab follow the below steps:
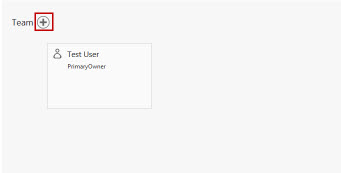
1. Click ![]() next to Team. The Add User dialog box appears.
next to Team. The Add User dialog box appears.
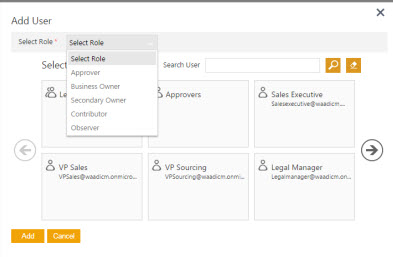
2. Click Select Role list to select a role.
| Note: When you select an Approver role in the Select Role list, a Step Number box appears. Type a number in the box. This number denotes the respective approver's hierarchy for an approval. |
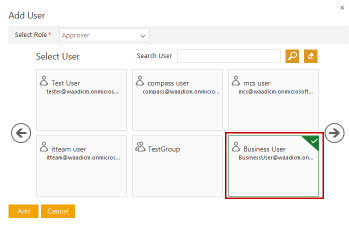
3. Select a user from the user tiles. You can use scroll arrows to browse through the user tiles.
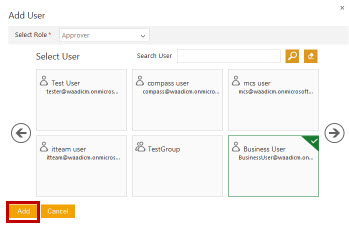
4. Click Add to add the user. The user name and the role appears as a tile.
5. Click , if you want to remove a user from the list.
