| Line 121: | Line 121: | ||
1. '''Click''' the ''Compare Document'' icon. The ''Show Comparison'' window opens. | 1. '''Click''' the ''Compare Document'' icon. The ''Show Comparison'' window opens. | ||
| − | + | <div class="image-green-border">[[File:7.11-CompareAgreement1.png|720px]]</div> | |
2. '''Select''' the two versions that you want to compare. | 2. '''Select''' the two versions that you want to compare. | ||
| + | <div class="note-box">'''Note''': The Agreement document version comparison always takes place between a higher version on the right panel and a lower version on the</div> | ||
| + | 3.'''Click''' the ''View Comparison'' button. A preview of the redline version is displayed. | ||
| + | <div class="image-green-border">[[File:7.11-ViewComparison.png|720px]]</div> | ||
| + | 4. '''Click''' ''Download Comparison'' to download the redlined version of the Agreement document in .docx format. Any deleted text appears with a strikethrough and any added text is underlined. | ||
| − | |||
| − | |||
*Send: the Agreement to various users within ICM. | *Send: the Agreement to various users within ICM. | ||
*Send For Approval: sends the Agreement for approval to the assigned team. Before sending the Agreement for approval, select specific ''Associated Documents'' that need to be approved with the Agreement. This helps the Approvers to review and approve only the required ''Associated Documents'' instead of going through the entire list. '''Click''' ''Send For Approval. ''This opens ''Please select document(s) for approver review ''dialog box. '''Click''' ''Submit ''after selecting the required ''Associated Documents''. | *Send For Approval: sends the Agreement for approval to the assigned team. Before sending the Agreement for approval, select specific ''Associated Documents'' that need to be approved with the Agreement. This helps the Approvers to review and approve only the required ''Associated Documents'' instead of going through the entire list. '''Click''' ''Send For Approval. ''This opens ''Please select document(s) for approver review ''dialog box. '''Click''' ''Submit ''after selecting the required ''Associated Documents''. | ||
Revision as of 18:22, 16 March 2020
Agreement Details Page
You can see the current Status and all the information related to the Agreement in various sections on the left navigation. You can also perform various actions depending upon your role and the state of the Agreement.
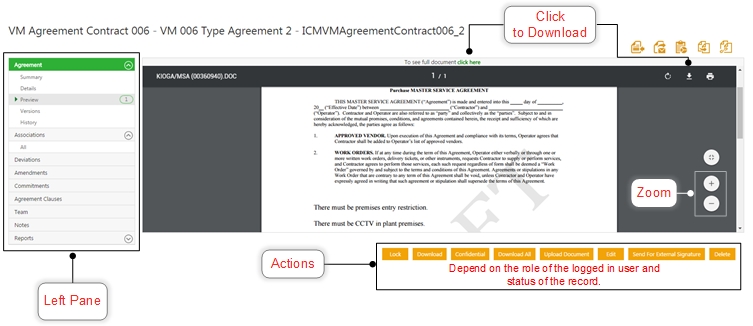
Here are the details you can see when you click on different sections in the left pane:
Agreement: this section shows the basic information of the Agreement. It has the following sections:
- Summary: displays the Agreement Name, the Status and the name of the Agreement creator. It also displays the Template Name and the Template Version used to create the Agreement.
- Details: show the attributes of the Agreement along with the rich text area. Only the Primary Owner can edit the values of these attributes. Note, if Primary Owner is replaced within the Team, the Primary Owner Name and Primary Owner Email fields will get updated with the current information.
- Preview: shows what the Agreement will look like if printed. If the Agreement is in Draft state, the preview only shows the attributes defined in the Agreement. If it is in Approved state, the preview also shows the actual values of the attributes. You can control the size of the document preview by resizing the browser window or print the document or export the agreement attributes to the desired format.
- Versions shows the various versions created for the specific Agreement.
- History shows the entire life cycle of the agreement till now.
Note: The Summary and Details section can both contain attributes with rich text area. Click the View icon to see the details of the attribute.
Association: Click Add icon to add Associated Documents to the Agreement. You can also add Associated Documents instances with a simple drag-and-drop action. For this, click the specific Associated Document under the Associations tab. This displays the drop zone if it is configured to be displayed. Drag-and-drop multiple files into the drop area provided. The name of the resulting Associations will display the file name.
This option is available only for the Associated Documents which are created using the specific Associated Document Contract Type:
- that has the Show File Drop Zone field set as Yes, and
- that does not contain any mandatory fields other than Name.
Associated Documents created using this Contract Type will have this feature enabled.
Deviations: allow you to add any changes to the Clauses. This may require the Agreement to be sent to the Deviation Approver for review and approvals.
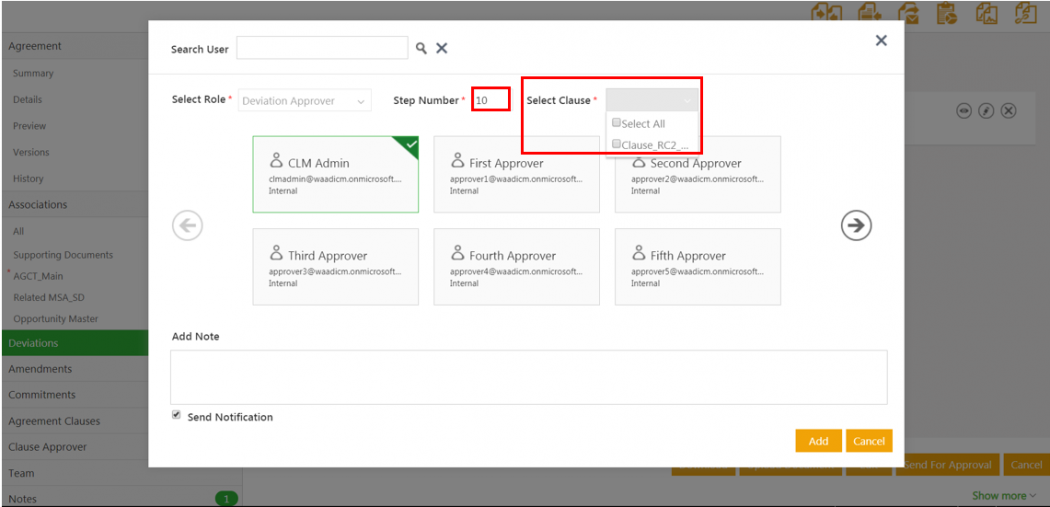
You can add deviation approvers directly from the Deviations section by clicking the Deviation Approver icon. This eliminates the need to navigate to the Team tab to add the Deviation Approvers.
Addition of action buttons on the Deviations tab
The ApproveAll, RejectAll and ClearAll buttons have been added on the Deviations tab of the agreement Details page to approve, reject or clear the selected deviations respectively.
This makes it easier for the user to take actions on multiple deviations of the agreement in one go, considerably reducing the effort of approving, rejecting or clearing each one individually.
Deviated Clauses
To view or add deviations for clauses:
1. Click the view record icon on the Agreement Management page. The Details page opens.
2. Click the Deviations tab.
3. Click the plus icon next to Add Deviation to manually add deviations to the agreement’s clauses. The Add Deviation window opens.
- Click the search icon to select and add the deviated clause.
- Enter the text for the deviated clause.
- Enter your comments for the deviated clause.
- Click Save.
4. Click the plus icon next to Deviation Approver to manually add approvers for your deviated clauses.
5. Click the Send for Approval button.
- Click
 to view the comments provided by other users in the team or other stakeholders.
 - Click
 to open the Deviation Details window. It displays the standard clause text, the deviated clause text and the comments provided by other users. You can add your own comments too.
 - Click
 to remove a deviation.
Note:
- Only deviations that are added manually can be removed. If deviations have been added by downloading the agreement and then uploading the agreement back to ICM, those deviations cannot be removed.
- Deviation approvers can also be added by defining rules from the Rules page.
- The Primary owner can send the reviewed agreement to the Deviation Approver. As a Deviation Approver, you can approve or reject clauses inside the agreement if a Deviation Approver role is assigned to you.
6. Clicking the Send for Approval button in Step 5 enables the Approve, Reject, Approve All, Reject All and Save Changes buttons. The Clear All button will be enabled when an action is taken on any deviated clause. Only the Deviation Approver can view these buttons.
- Approve: Click to approve each individual clause.
- Reject: Click to reject each individual clause.
Clicking the Approve and Reject buttons opens the Deviation Details window, displaying the details of the clause. You can also put in your comments in the Comments box. You do not have to click Save Changes to save your comments; they will be saved automatically.
- To approve or reject deviations in one go, click the Approve All or Reject All button.
In the above example, as we have already selected one clause for approval and one clause for rejection, clicking Approve All or Reject All will select the remaining 2 clauses (i.e. clauses that are not already selected). You can also add a common comment for the clauses. Comments will not be saved until you click the Save Changes button.
- Clear All: Clears all selections.
- Click Save Changes to save your changes.
The clauses that have been approved will have the status Approved, whereas the ones that have been rejected or no actions have been taken will have the status Requires Approval.

Amendments: allow you to make changes to an Executed Agreement. This section will be blank if there are no Amendments made to the Agreement.
Agreement Clauses: displays the clauses that have been defined for this Agreement. These include Rule-based Clauses.
Team: displays the members that are added to the team working on this Agreement for it's complete life cycle. Click Add + icon to add more members.
You can also Replace a User through Team tab.
Notes: displays the comments added for the Agreement.
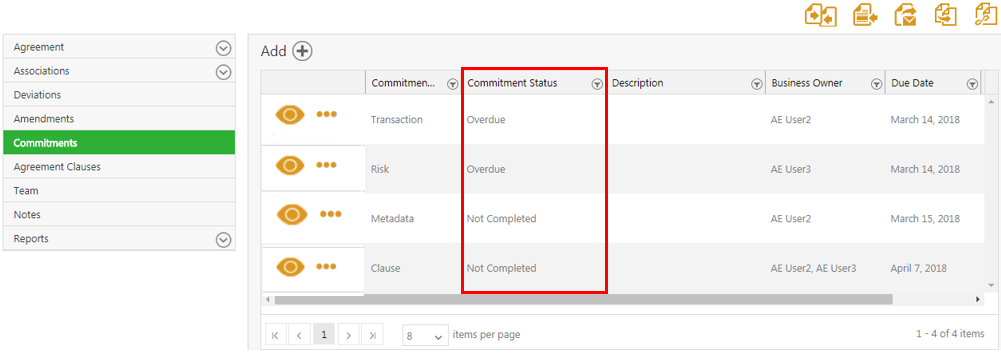
The left pane on the Agreements, Requests and Associations Details pages displays the count for important sections such as Deviations, Amendments, Commitments and Notes. This makes it easy for business users to immediately identify the number of instances in these sections, without having to open each of them. If an Agreement does not have any attached entities, the count for each will be displayed as zero.
You can perform the following actions from an Agreement Details page:
- Use Smart Links: to see any documents related to the selected Agreement.
- Edit: an Agreement to update any information which was either not provided or was not correct. After editing, click Update and Publish so that all the team members can view the updated Agreement.
- Compare the changes made between any two available Agreement Document versions.
To view and download the redlined document of the selected agreement versions:
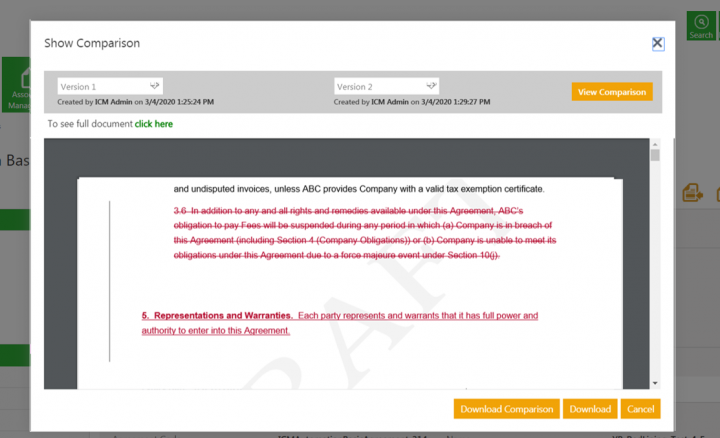
1. Click the Compare Document icon. The Show Comparison window opens.
2. Select the two versions that you want to compare.
3.Click the View Comparison button. A preview of the redline version is displayed.
4. Click Download Comparison to download the redlined version of the Agreement document in .docx format. Any deleted text appears with a strikethrough and any added text is underlined.
- Send: the Agreement to various users within ICM.
- Send For Approval: sends the Agreement for approval to the assigned team. Before sending the Agreement for approval, select specific Associated Documents that need to be approved with the Agreement. This helps the Approvers to review and approve only the required Associated Documents instead of going through the entire list. Click Send For Approval. This opens Please select document(s) for approver review dialog box. Click Submit after selecting the required Associated Documents.
- Copy the existing Agreement. This option with be shown only if the Agreement is in the approved state.
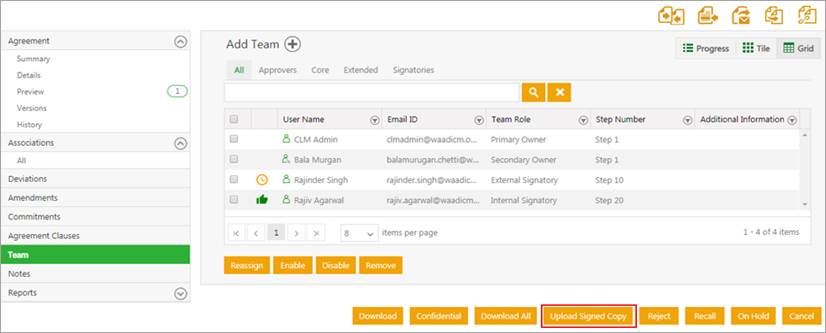
- Upload Signed Copy: Upload Signed Copy button will be available to Contract Admin and Primary as well as Secondary Owners , so they can scan an upload an Agreement manually signed by the Internal Signatory and proceed with the Workflow. The button will be available only when the Agreement is in Waiting for Internal Signatory state.
- Upload Document
- Cancel
- Download document. You can continue with the Agreement workflow seamlessly after a document has been downloaded. After downloading the document, you will be able to handle the:
- Workflow changes when a document is recalled
- Removal of an Agreement from Adobe Sign during recall
- Call back when a document is signed or rejected
- Workflow movement when a document is signed or rejected
- Confidential
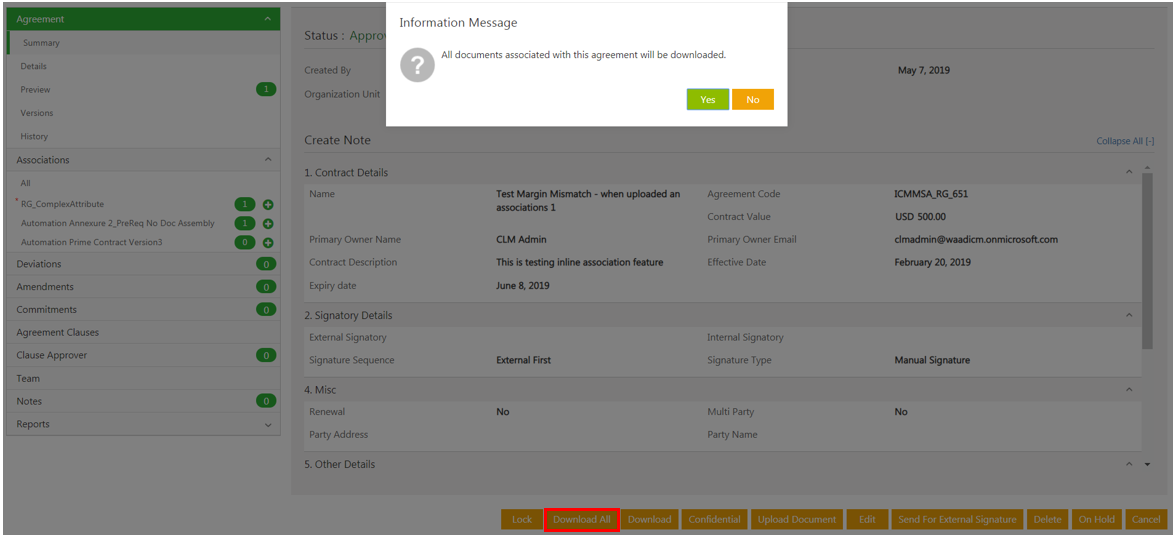
- Download All: You can download an Agreement with all Associated Documents attached to it.
Follow these steps to download an Agreement:
- Click Agreement Management tile on My Dashboard. This opens the Agreements page.
- Click View
 icon next to the Agreement you would like to download.
 - Click Download All. This opens the dialog box with a message that all Associated Documents with this Agreement will be downloaded.
- Click Download. Only the Agreement will be download.
Assigning Executed Agreements: ICMs additional workflow state allows you to assign the executed Agreements to other parties with updated metadata, in order to fulfil obligations and responsibilities, depending on the business requirements. The assignment Agreement goes through the workflow of approval and execution processes, and then supersedes the parent Agreement attributes as configured. Thus, the parent Agreement gets assigned to the new parties on the assignment date.
Terminating Executed Agreements: ICMs additional workflow state allows you to terminate executed Agreements.This is useful in business scenarios where an executed Agreement can be terminated only after executing a termination Agreement for it. The termination Agreement goes through the workflow of approval and execution processes, and then supersedes the parent Agreement attributes including the termination date as per the configuration. Thus, the parent agreement gets terminated on that termination date.
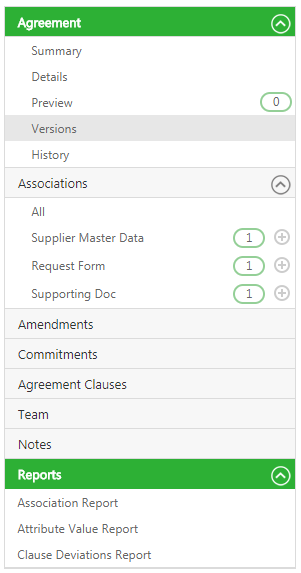
Reports: this section shows reports that are agreement specific and provide information that you are authorized to view. You can select filters and based on the permutation and combinations of the applied filter, the appropriate columns are displayed.
The following reports are accessible on this page:
- Clause Deviations
- Association Report
- Attribute Value Report
An error message is displayed if no results are generated or in case an incorrect filter is applied. You should be able to export the report into Excel, CSV or PDF. You can also schedule an email to be triggered when the report is generated.
To learn more about these reports, go to the Agreement Details Page Reports page.
All other reports can be viewed on various tabs of the Reports tile. To view other reports, go to the Reports Overview page.
Related Topics: Agreement Details Page Reports | Reports Overview |

