Contents
Requests
This page displays all the Requests that you have access to.
From this page you can:
- Search requests in multiple ways. You can search requests from this page or use the Advanced Search.
- View Smart Links to link related documents to one another. For example, if there are several Agreements with the same vendor, you can link all of them through smart links to see the types of Agreements that are currently in force with that vendor.
- View details of a request by clicking the "View Record" icon. The details are displayed on the Request "Details" page.
Creating a Request
You navigate to this page from the "Home" page by clicking the "Agreements" > "Create" option. On this page, you can specify the basic information of the Request such as the nature of Request and timelines, requestor and supplier details. Raising a Request to create an Agreement may be optional or mandatory, depending on how ICI is configured in your organization. This page describes the process of creating a Request.
You can create requests in the following two ways:
- Copy an Existing Request and make changes to the copy.
- Create a new Request using the "Create" option. This help page describes this process.
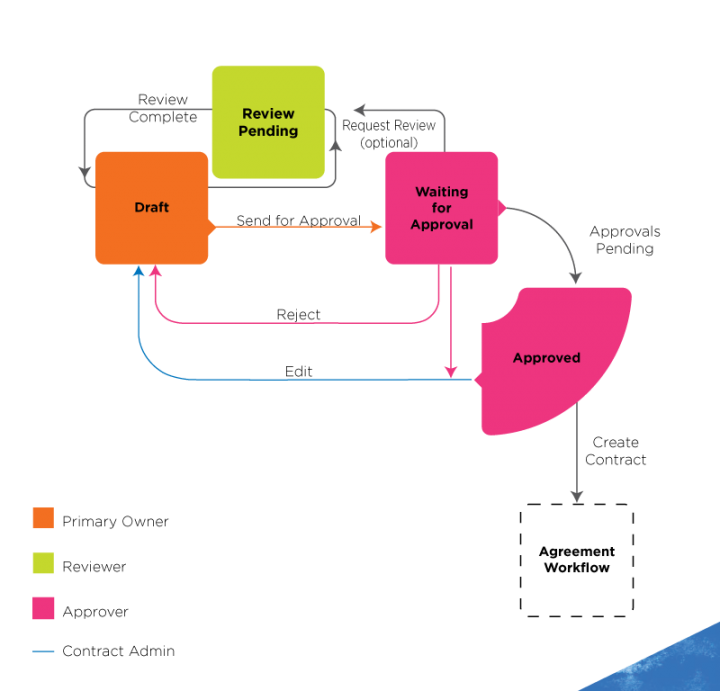
The following image shows the different states of a Request with various roles involved in creating it.
To create a new Request from this page:
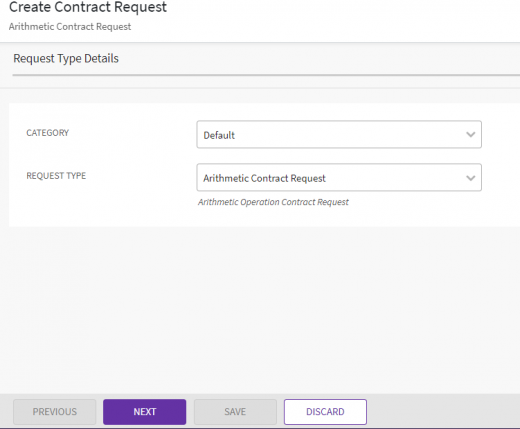
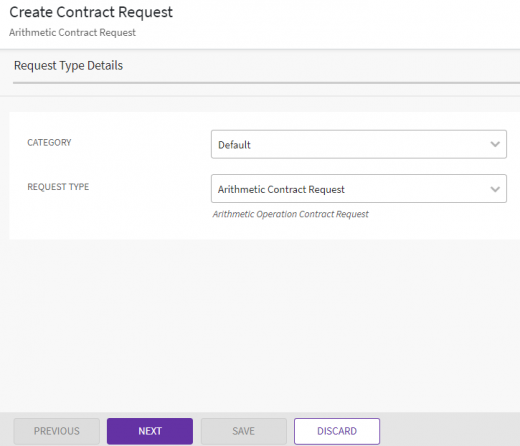
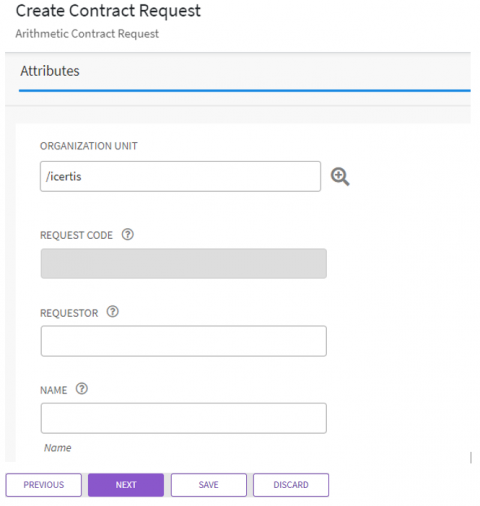
1. Click "Requests" tile on the "Home"page, and then click "Create". The "Create Contract Request" page opens.The options available for the "Category" and "Request Type" fields are based on what has been configured for your organization. These signify the type of contract this request is being created for. Select the category and type of request that apply to this request, and click "Next".
- Organization Unit: select the organization unit to which this request belongs. Users within an organization unit must have certain privileges. With a View privilege, users can only view requests but users with a manage privilege can perform actions. View privilege is also required to search a particular Request.
- Contracting Party Information: enter the required details.
- Nature of Request and timelines: specify the type of Agreement this request is for, such as an Amendment, a Non-Disclosure Agreement, or a Master Service Agreement.
- Requestor Information: specify the details of the person who is raising this Request. If this Request is for an Amendment, specify the ID of the original Agreement that requires Amendment.
- Supplier Contracting Party Information: select the name of the supplier that this Agreement needs to be created for.
- Request Code: Each Request is assigned a unique ID in ICI, known as its Request Code. The system automatically generates the Request code when you click the Create button.
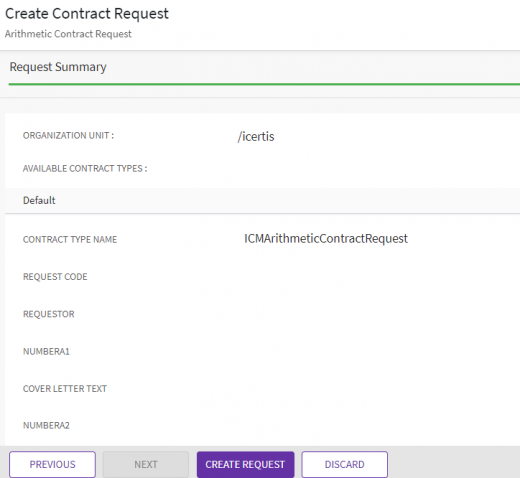
3. Click "Next". The Request Summary page opens. On the Request Summary page, verify all the information of your Request.
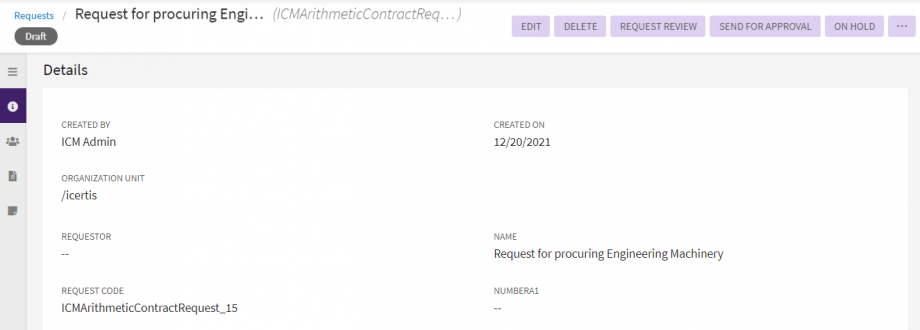
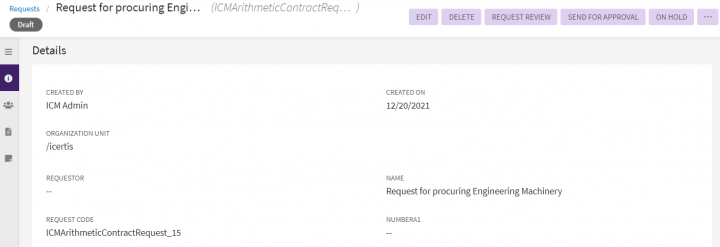
4. Click "CREATE REQUEST" to create a request. After you create the Request, the status of the Request opens as "Draft".
5. If the information is correct, click "Send for Approval". You can edit or delete this request or send this Request for the review as well.
Use the "Edit" button to edit the request or use the "Request Review" button to send the request for the review.
Note: After the request is created, you can add the Contract Admin for the respective agreement from the "Team". You can also cancel or delete the Request from the "Create/ Edit" wizard while creating and editing the Request. The "Cancel" and "Delete" buttons are displayed when you save the Contract Request that is being created.
Initiating Termination for parent agreement from contract request
In ICI, users create and execute a termination agreement on the main agreement instance to terminate an agreement. ICI has now extended this capability to initiate the termination from contract requests too.
Users can now enable the termination process at the contract type level using the seeded attribute "Request for Termination", select the parent contract request, and create the termination contract on a contract request. The termination instance for the contract request will have all the common attribute values inherited if the inheritance is enabled.
The termination record will be displayed as a peer association under the “Association” tab for the contract request. The access privileges for the contract requests termination process is controlled through role action mapping.
Configuring Contract request to initiate termination
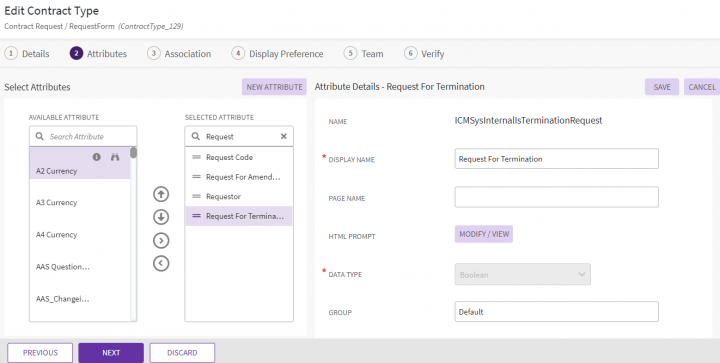
Users can configure the Contract Request Contract Type to enable the initiation of termination from Contract Request by adding the seeded attribute Request for Termination.
To edit the contract type:
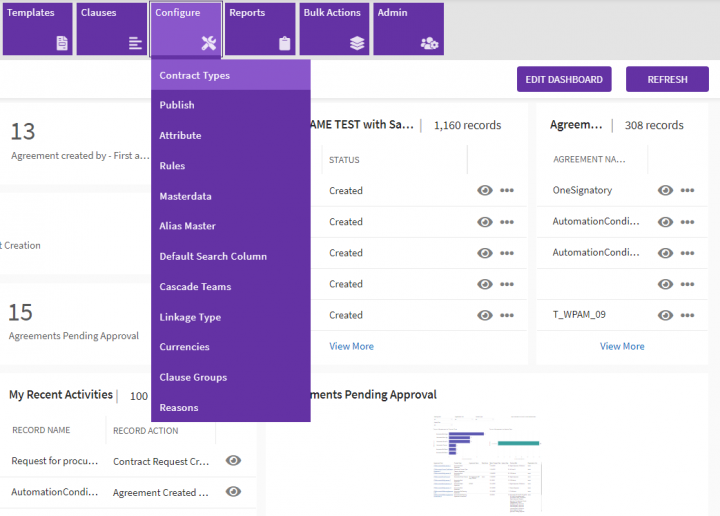
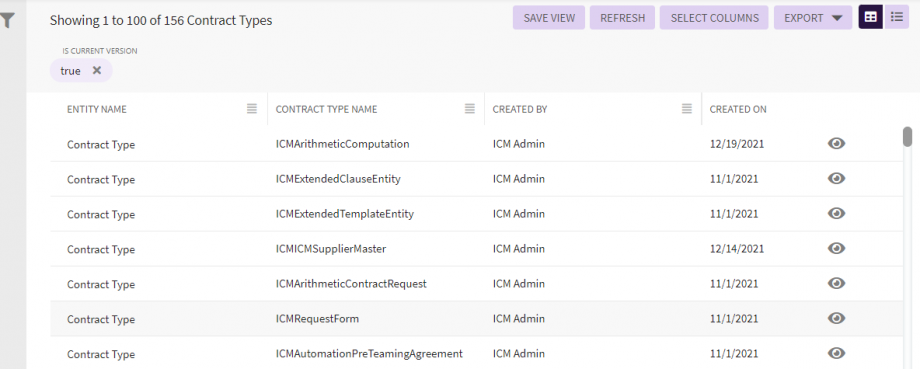
1. Click "Configure" >"Contract Types" on the "Home" page. The Contract Types index page opens.
5. Add the attribute "Request For Termination" from "Available Attribute" to "Selected Attribute" using action arrows.
6. Edit the Display Name if required.
7. Click "Save". The attribute is added to the contract type.
9. Enter details in the Associations, Display Preference and Team tabs.
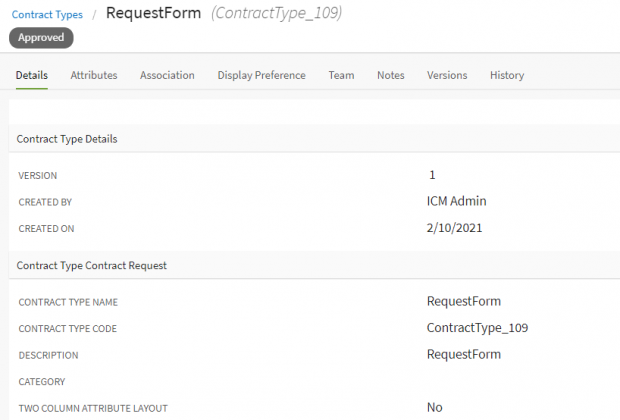
10.Verify the details and click "Update". The Contract Type ICIRequestForm will be updated.
11. Publish and approve the Contract Type following the standard ICI workflows.
Initiating the termination from a contract request
1. Click "Requests" and then click "Create" on the "Requests" page. The "Create Request" page opens.
3. Click "Next". The page opens for entering the details.
6. Choose an agreement and click "Select". The agreement contact type should have termination contract type mapped in masterdata. The Create Request page opens again.
9. Approve the request following the standard ICI workflow for request approval.
Once the contract request is in Approved state, the Contact Admin will have the access to the "Initiate Termination" action.
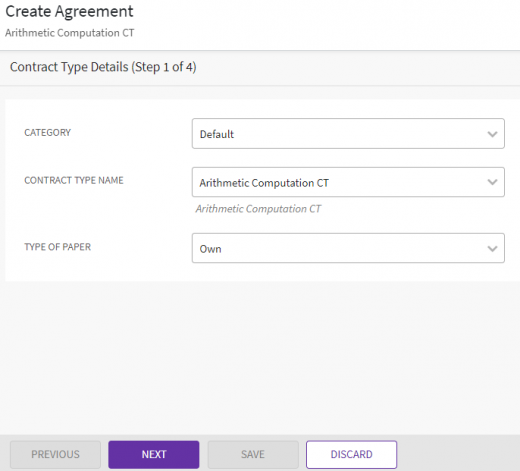
11. Select "Type of Paper". For example, "Third Party".
12. Select "Linkage Type". For example, Peer.
13. Click "Next". The Attributes page opens.
Note: The attributes with enabled inheritance will have their values inherited and pre-populated from parent agreement.
16. Verify the details and click "Create and Publish". The Termination Agreement is created.
The link to the created Termination Agreement is available in the Request Status on the Contract Request "Details" page. Click "here". The Termination Agreement Details page opens.
Click "here". The Contract Request "Details" page opens.
Canceling a Request
You can cancel a request for an indefinite period if it is not currently in use. Use cancel over delete in situations where you want to track the request and possibly take an action on it sometime in the future. Canceled requests are available in the database and can be reverted to Draft state anytime.
To cancel a request:
1. Click "Requests"on the "Home"page. The Requestsindex page opens with a list of all your existing requests in different states.
2. Click the "View Details" icon next to the "Request" you wish to cancel. The Request Details page opens.
3. Click "Cancel". At the message that is displayed, confirm that you wish to change the status of the selected request to draft and cancel it. If you do not wish to cancel the request, click "No".
To revert the canceled Request:
1. Click the "View Record" icon on the "Requests"page.
2. Select the request that is canceled and click "Revert". The Add Note window pops up.
3. Enter the reason to revert it and select a reason code. Both these fields are optional but should be used to enter detailed notes for future reference.
4. Click "Add".
5. The canceled request is reverted to the "Draft"state.
Downloading supporting documents for Contract Requests
You can download all supporting documents associated with a Contract Request. This can be configured through Role Action Mapping. The Download All option in the Associated Documents section of Contract Requests downloads all documents in a zip format, making it easier to review the documents in one go instead of having to download and review each one separately.
To download all supporting documents for Contract Requests:
1. Click the "Requests" on the "Home"page.
2. Select a Request from the list. This opens the Contract Requests Details page.
3. Click the Download All button to download all the supporting documents for the selected Contract Request.
Configuring this capability using Role-Action Mapping:
1. Click the "Admin" tile on the "Home"page.
2. Click the "User Groups" option.
3. Click the "Role-Action Mapping" option.
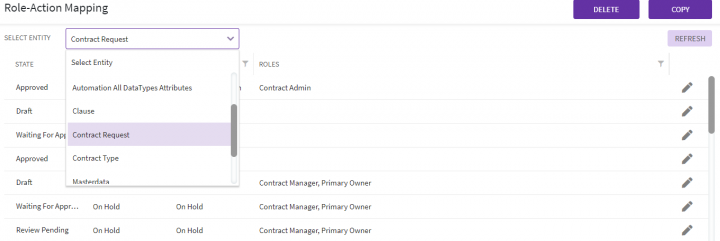
4. Select Contract Request from the "Select Entity" drop-down.
6. Select the Role from the list on the left hand side and click the arrow button to move it to the right hand side. For example, Observer.
7. Enter the "Action Display Name". For example, Download All.
Downloading Supporting Documents for Contract Requests
To download all supporting documents for Contract Requests:
1. Click "Requests" tile on "Home" page.
2. Select a Request from the list. This opens the Contract Requests Details page.
3. Click the "Download All" button to download all the supporting documents for the selected Contract Request.
Copying an Existing Request
You can copy an existing Request to create a new Request. You can reuse the data of an existing request, and create a new Request. Note that Attributes can be flagged to prevent them from getting copied. This helps ensure any sensitive data that is compliance specific or regulatory in nature does not get copied. Such data can be Request-specific and must be entered for each Request manually.
Note: While copying Contract Requests, you can exclude certain Attributes from getting copied from the original Request to the new Request. This is useful when certain attributes are Request-specific which should not be copied from another Request.
To copy a request from an existing request:
2. Click on the Copy icon on the top right corner of Request Details Page. The following message opens: "This will create a copy of existing contract request. Do you want to continue? "
3. Click "OK". The Create Request page opens.
4. Provide/update the appropriate information on each page, and click Next to go to the next page.
5. On the "Request Summary" page, verify the information you have entered, and then click "Create Request" to create a copy of the existing request.
Using the Request feature, you can create multiple copies of a Request.
Editing a Request
You (Primary Owner) can edit an existing request at any state. For example, you can edit a request that is in the Approved state. However, you have to go through the approval process again. You can add or remove, and make the appropriate changes in the request.
To edit a Request:
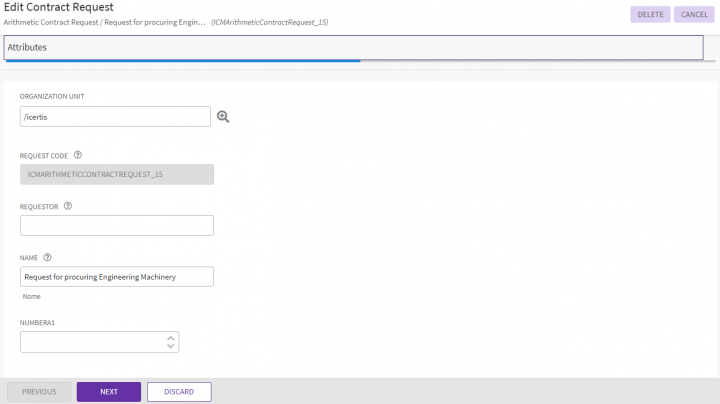
1. On the Contract Requests page, click the "View Details" icon to open the request that you want to edit. The Contract Request Details page opens.
2. Click "Edit". Make the necessary changes.
3. Click "Update Request" to update the details you have entered.
4. Click "Send for Approval" to send the request for approval.

