Contents
Signing Agreements by Click to Sign process
In addition to existing electronic and manual signatures process, users can sign the agreement by Click to Sign signature process.
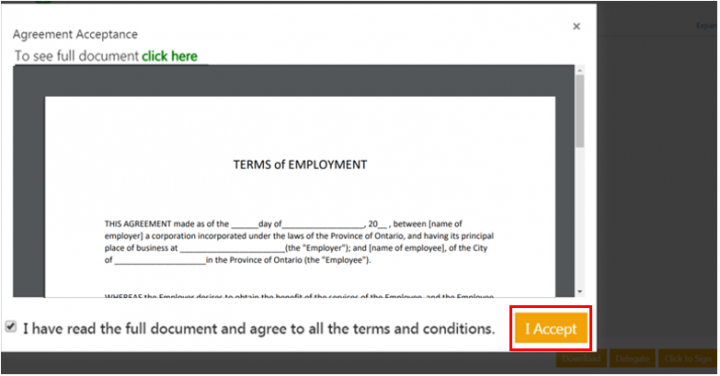
Click to Sign signature process provides an "I have read the full document and agree to all the terms and conditions" option with an online preview of the agreement, which can be used to mark the agreement as signed and executed. Users can decline the terms of agreement with Reject option or close the agreement preview window without any effect on agreement status.
Enabling Click to Sign process
To enable the Click to Sign signature process, administrators need to add this option to agreement contract type while creating.
To create an agreement contract type:
1. Click "Configure" > Create Contract Type > Agreement > Next on the Dashboard. The Create Contract Type page opens.
2. Enter details on Details tab.
3. Click Next. The Attributes tab opens.
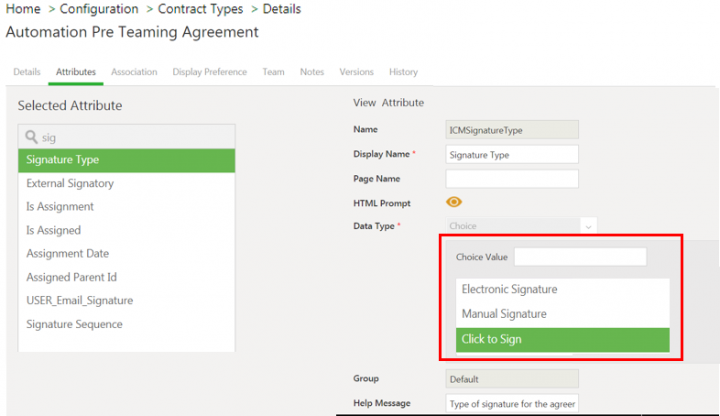
4. Add Click to Sign option in Choice value ICMSignatureType.
5. Click Save. The attribute value is saved.
6. Click Next.
7. Enter the details in the remaining tabs Associations, Display Preference and Team.
8. Verify and click Create. The Contract Type is created.
9. Approve and Publish the agreement contract type as per the ICM’s existing workflow.
The Click to Sign option is then enabled for the agreement contract type and available for selection during agreement instance creation.
You can edit existing agreement contract type and add Click to Sign option in Signature Type attribute to enable this signature option.
To edit existing contract type:
- Click Configuration > Contract Type on the Dashboard. The Contract Type index page opens.
- Click View icon next to the contract type you want to enable Click to Sign option for. The contract type page opens. For example, Automation Pre Teaming Agreement .
- Click Edit. The Edit Contract Type page opens.
- Add Click to Sign option in Choice value ICMSignatureType on Attributes tab.
- Click Save. The attribute value is updated.
- Click Next.
- Verify the details in the remaining tabs and click Update.
Select Click to Sign option during agreement creation
Contract author can select the Click to Sign option while creating an agreement instance for which the Click to Sign option is added in agreement contract type.
To create an agreement instance from Click to Sign enabled agreement contract type:
- Click Agreement Management > Create Agreement on the Dashboard. The Create Agreement page opens.
- Select the Contract Type Name. For example, Pre Teaming Agreement for Teaming.
- Click Next. The Attributes page opens.
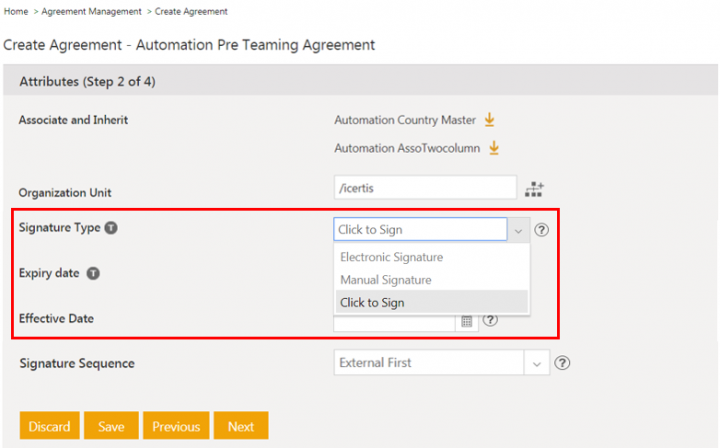
- Select Click to Sign option in Signature Type field.
5. Enter the details in the remaining fields to take the agreement to the Draft state.
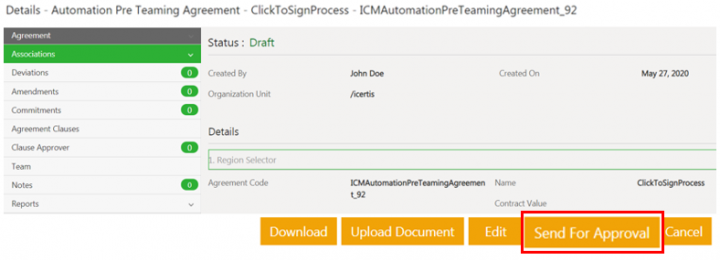
6. Click Send for Approval. The agreement is sent to the approvers added in the agreements Team.
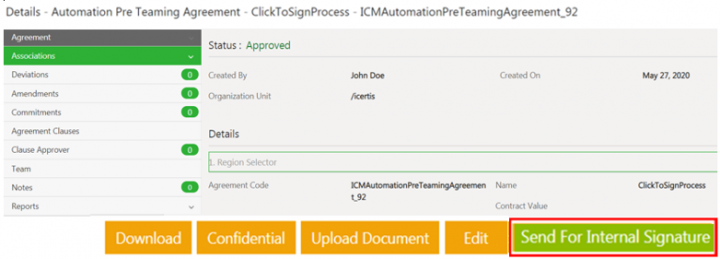
After all the approvers have approved the agreement, the agreement moves to the Approved state. If no approver is added, the agreement moves directly to Approved state.
7. Click Send for Internal Signature or Send for External Signature. The agreement is sent to signatories.
Signing the Agreement with Click to Sign
The Signatories can access the agreements sent to them for their signatures from:
- Notification Dashboard
- Task Dashboard
To sign the agreement from notification dashboard:
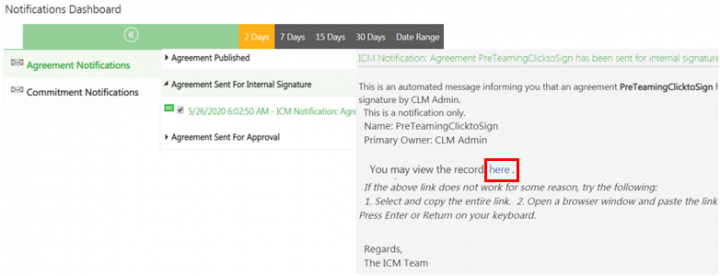
- Click Notifications on the Dashboard. The Notification Dashboard page opens.
- Click Agreement Notifications > Agreement Sent For Internal/External Signature on Dashboard. The notification opens. For example, open a notification for PreTeamingClicktoSign agreement sent for internal signature.
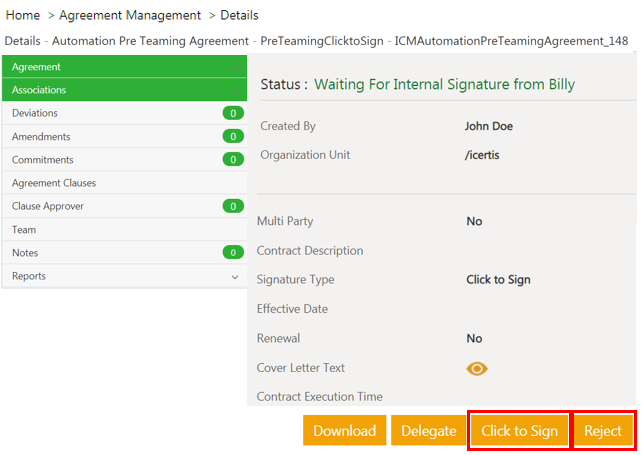
3. Click here to view the agreement. The agreement page opens.
4. Click the Click to Sign button. The Click to Sign preview window opens.
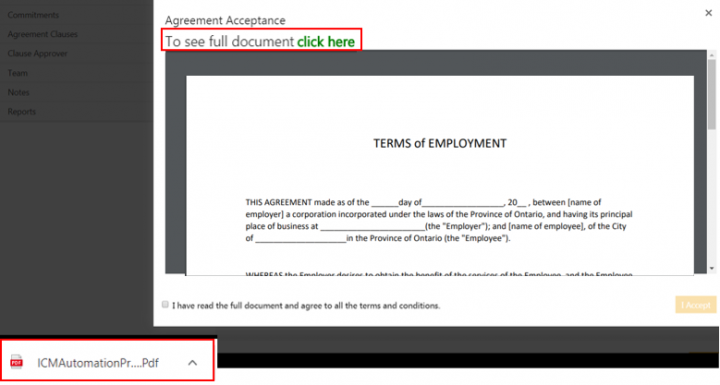
5. Click the checkbox for the option “I have read the full document and agree to all the terms and conditions” if you accept the terms of the agreement. The I Accept action button is enabled.
6. Click I Accept. The agreement is signed and is sent to the next signatory or moves to the Executed state if there is no other signatory.
7. Close the window to go back to the agreement Details page. The status of the agreement will not change.
Click the Reject button on the agreement page if you want to decline the agreement. The agreement will go back to the Draft status.
Related Topics: Agreement Management |Manual_Signature |
