| (2 intermediate revisions by 2 users not shown) | |||
| Line 1: | Line 1: | ||
| + | |||
= Search Sync = | = Search Sync = | ||
| Line 11: | Line 12: | ||
4. '''Select''' the ''Contract Type ''from the drop-down''.'' | 4. '''Select''' the ''Contract Type ''from the drop-down''.'' | ||
| − | <div class="image-green-border">[[File: | + | <div class="image-green-border">[[File:Search sync 7.8.PNG|720px|RTENOTITLE]]</div> |
5. To get the Sys Ids, '''click''' the ''Upload CSV'' button to upload the .CSV Agreement or '''enter''' the Sys Id using comma separated value. | 5. To get the Sys Ids, '''click''' the ''Upload CSV'' button to upload the .CSV Agreement or '''enter''' the Sys Id using comma separated value. | ||
| Line 17: | Line 18: | ||
7. Click the ''Upload CSV'' button to upload the CSV document. The ''Upload Document ''window opens. | 7. Click the ''Upload CSV'' button to upload the CSV document. The ''Upload Document ''window opens. | ||
| − | <div class="image-green-border">[[File:Admin Task - Search Sync - Upload Document.PNG|Admin Task - Search Sync - Upload Document 7.8]] </div> | + | <div class="image-green-border">[[File:Admin Task - Search Sync - Upload Document.PNG|720px|Admin Task - Search Sync - Upload Document 7.8]] </div> |
If the uploaded file format is incorrect, then a validation message window opens. | If the uploaded file format is incorrect, then a validation message window opens. | ||
| − | <div class="image-green-border">[[File:Admin Task - Search Sync - Upload Document - Invalid Format message.PNG|Admin Task - Search Sync - Upload Document - Invalid Format message 7.8]]</div> <div class="image-green-border"> </div> <div class="image-green-border">7. When the Agreement is uploaded or SysId is provided, the File Path field is displayed. | + | <div class="image-green-border">[[File:Admin Task - Search Sync - Upload Document - Invalid Format message.PNG|560px|Admin Task - Search Sync - Upload Document - Invalid Format message 7.8]]</div> <div class="image-green-border"> </div> <div class="image-green-border">7. When the Agreement is uploaded or SysId is provided, the ''File Path'' field is displayed. </div> <div class="image-green-border"> </div> <div class="image-green-border">8. '''Click '''''Sync''. The ''Sync Request Accepted ''message is displayed. </div> <div class="image-green-border"> </div> <div class="image-green-border">[[File:Admin Task - Search Sync - Sync Request Accepted.PNG|560px|Admin Task - Search Sync - Sync Request Accepted.PNG]]</div> <div class="image-green-border"> </div> <div class="image-green-border">9. '''Click '''''OK''.</div> <div class="image-green-border"> </div> |
| + | == Elastic Search Sync == | ||
| + | <div class="image-green-border">Users can now get data from Elastic search for a given instance’s ''SysId'' so that they can look up the value and identify whether it is the latest or if a sync is needed. If the key exists, the latest value from ES will be displayed. If the key does not exist, the system will display the error message “Could not fetch value for provided SysId”.</div> <div class="image-green-border"> | ||
| + | '''Note''': Data can be fetched from only one instance at a time. | ||
| + | |||
| + | [[File:Search Sync ES.png|720px]] | ||
| + | </div> <div class="image-green-border"> </div> <div class="image-green-border"> </div> <div class="image-green-border"> </div> <div class="image-green-border">'''Related Topics: '''[[Agreement_Management|Agreement Management]] | [[Managing_Organization|Managing Organization]] | [[Managing_Users|Managing Users]] | [[Managing_User_Groups|Managing User Groups]] | [[Managing_Security_Groups|Managing Security Groups]] | [[Application_Settings|Application Settings]] | [[Notification_Settings|Notification Settings]] | [[Currencies|Currencies]] | [[Reasons|Reasons]] | [[Deleting_an_Agreement|Deleting an Agreement]] | [[Legacy_Upload|Legacy Upload]] |</div> <div class="image-green-border"> </div> | ||
Latest revision as of 00:17, 19 March 2020
Search Sync
You can search the documents that an Agreement is linked to. To do so:
1. Click the Admin Task tile.
2. Click the Search Sync button.
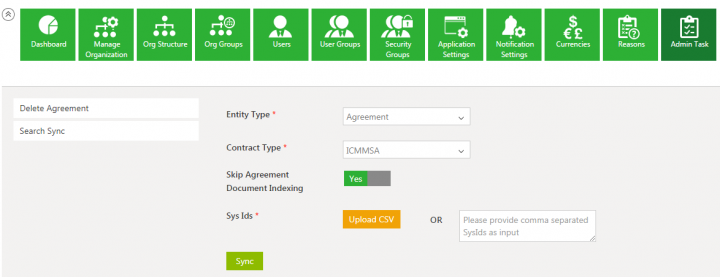
3. Select the Entity Type from the drop-down.
4. Select the Contract Type from the drop-down.
5. To get the Sys Ids, click the Upload CSV button to upload the .CSV Agreement or enter the Sys Id using comma separated value.
6. As required, toggle Yes or No to Skip Agreement Document Indexing.
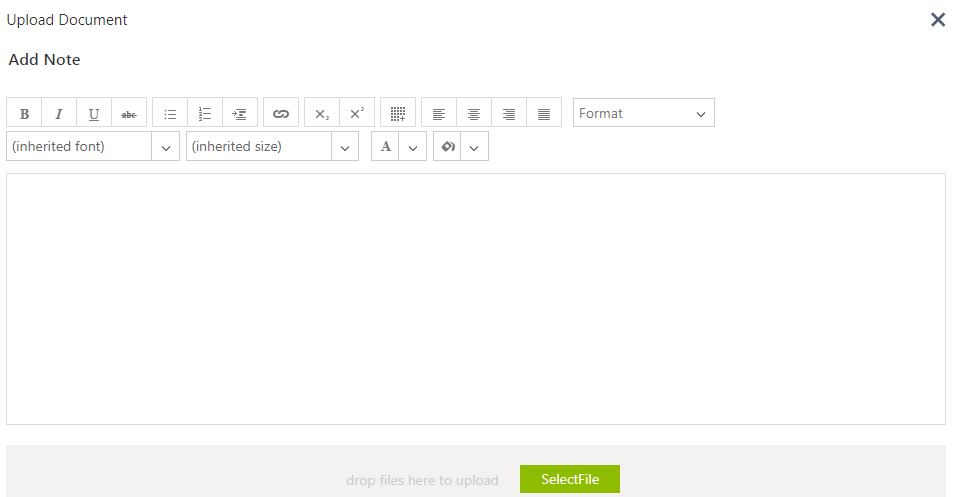
7. Click the Upload CSV button to upload the CSV document. The Upload Document window opens.
If the uploaded file format is incorrect, then a validation message window opens.


