| Line 19: | Line 19: | ||
<div style="float:right;background: #A9A9A9; width:30%; border:1px solid #000000;" align="center" > | <div style="float:right;background: #A9A9A9; width:30%; border:1px solid #000000;" align="center" > | ||
<p> '''Video: Creating a reason''' </p> | <p> '''Video: Creating a reason''' </p> | ||
| − | {{#iDisplay:https://icertis.kpoint.com/kapsule/gcc- | + | {{#iDisplay:https://icertis.kpoint.com/kapsule/gcc-810a67b3-1d1e-4dfa-a110-b82341ccbd76/xc/OZRFL/v2/embedded?autoplay=true?iframe=true|220|150}} |
</div></div> | </div></div> | ||
Revision as of 11:45, 30 June 2016
Home > Administrator > Create a Reason
ICM allows you to create Reasons, to track a particular rejection involved in clause, template, attributes etc.
To create a reason:
1. On the Admin page, click the Reasons tile. The Reasons page appears.
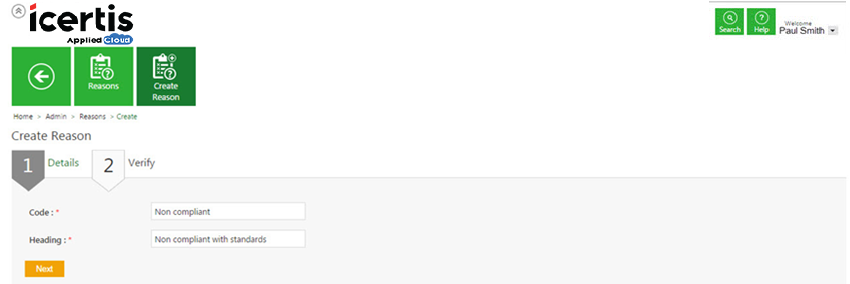
2. Click the Create Reason tile. The Create Reason page appears.
Details tab
Video: Creating a reason
In the Details tab, provide appropriate details as follows.
- a. In the Code box, type an appropriate code for the reason.
- b. In the Heading box, type the appropriate details for the reason.
- c. Click Next go to the Verify tab.
Verify tab
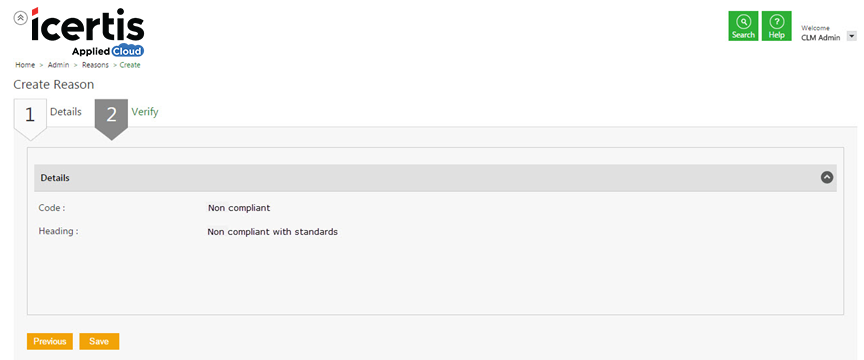
- a. In the Verify tab, verify the information.
- b. Click Save to save the newly created reason.
Related Topics:
Edit a Reason


