| Line 60: | Line 60: | ||
:a. '''Click''' [[File:Add icon.jpeg|RTENOTITLE]] next to ''Add Recipients''. | :a. '''Click''' [[File:Add icon.jpeg|RTENOTITLE]] next to ''Add Recipients''. | ||
| − | |||
| − | |||
| − | |||
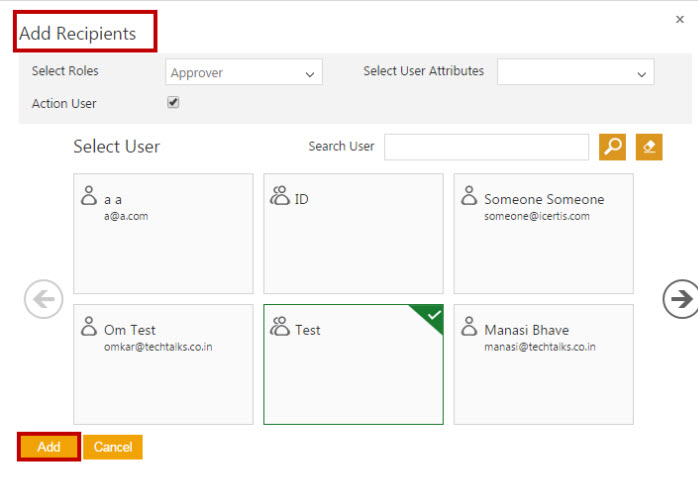
:b. In the ''Add Recipient'' dialogue box, '''select''' respective users. | :b. In the ''Add Recipient'' dialogue box, '''select''' respective users. | ||
Revision as of 06:45, 28 March 2018
Create a Subscription
Using Subscriptions, you can create user notifications and assign appropriate recipients.
While creating subscription:
- You have to define the entity or a task for which the notification to be sent.
- You have to define the event at which it will be sent.
To create a subscription:
- On the Admin page, click the Notification Settings tile. The All Notifications Category page appears.
- Click the Subscription tile. The Subscriptions page appears.
- Click Create Subscription. The Create Subscription page opens.
Enter the information for the following in the page.
- Details
- Template
- Recipient
- Verify
Let us go through each of the tabs in detail.
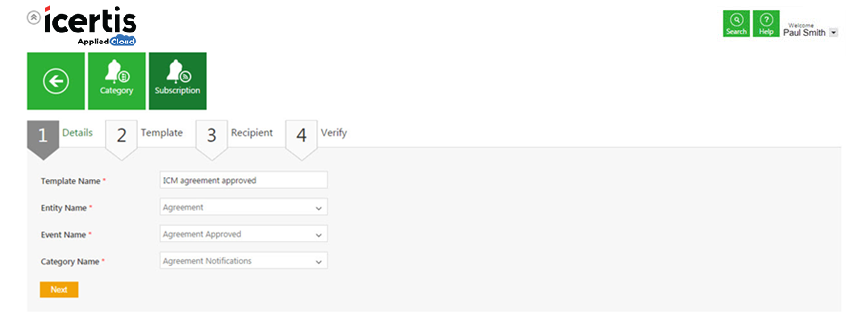
- a. In the Template Name box, type an appropriate template name for the subscription.
- b. In the Entity Name list, click the appropriate entity name.
- c. In the Event Name list, click the appropriate event name.
- d. In the Category Name list, click the appropriate category name.
- e. Click Next. The Template section appears.
Template
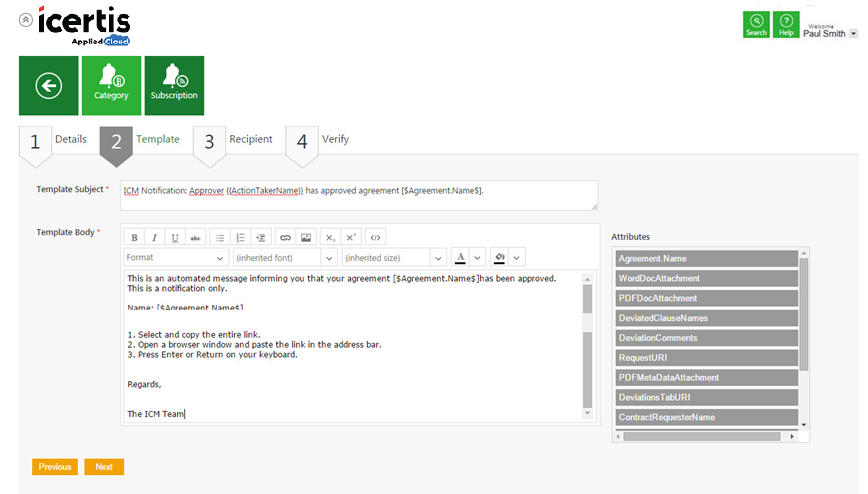
On the Template tab, define a template for user notifications and email notifications.
- a. In the Template Subject box, type the relevant entity name for the template.
- b. In the Template Body, type an appropriate message text. Click the Attributes list to tag respective attributes in the template body. You can also format the selected attributes by using menu options.
- c. Click Next. The Recipient tab appears.
Recipient
On the Recipient tab, add recipients as follows:
- c. In the Select Roles list, click the appropriate role.
- d. In the Select User Attributes list, click the appropriate attributes, and select the Action User box.
- f. Click Add. The user name and role appear as a tile.
- g. Click Next. The Verify tab appears.
Verify
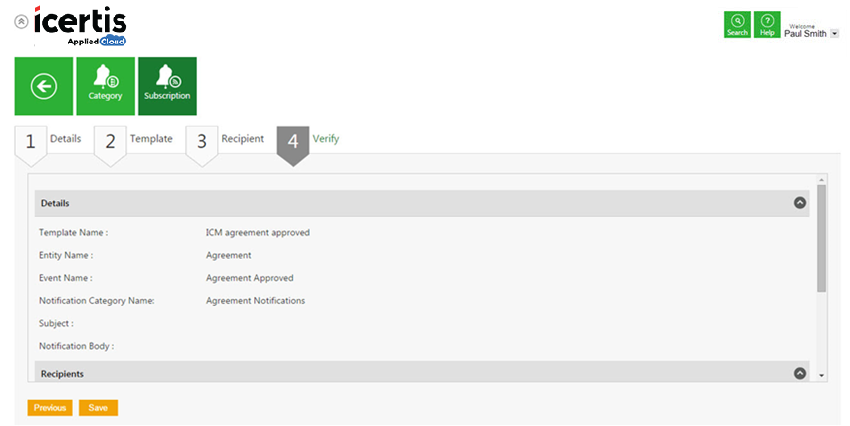
On the Verify tab, verify all the information for the Subscription.
Click Save to create a Subscription.
After a subscription is created, notifications will be sent as and when the respective event occurs.
Related Topics: Edit a Subscription


