Contents
[hide]- 1 Managing Users
Managing Users
Depending upon how ICM is configured in your organization, there are two ways to create a new user in ICM.
1. Using the Create User tile on the UI
2. Adding the users in the Active Directory through technical configuration
Create a New User
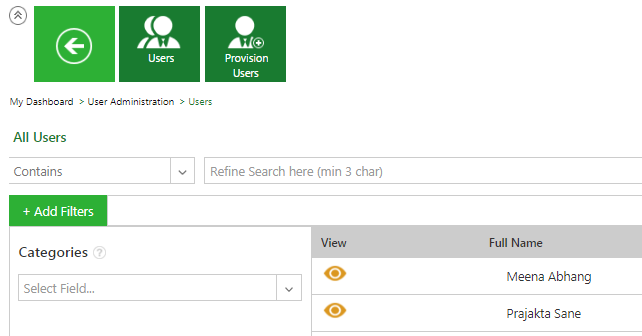
1. Click the Users tile on the User Administration page. The Users page opens. This page displays the list of users and their details such as Name, Email ID, Organization Unit. You can also see the User’s Culture Code (Preferred language). ICM identifies user language from the value they have selected for language in Preferences. On this page, you can view the User Details or replace a user.
2. Click the Create User tile on the Users page. The Create User page opens.
The page consists of the following tabs:
- Details
- Team
Enter the information in each tab as follows and click Next to go to the next tab.
The Details tab is divided into two areas:
- Personal Details
- Work Details
Personal Details
| Field | Action |
|---|---|
| First Name | Type the first name of the user. |
| Last Name | Type the last name of the user. |
| Email Address | Type the e-mail address of the user. |
| Organization Unit | Click the Organization Structure icon and select the organization unit of the user.
|
| Type of user | Select whether the user is Internal or External. Internal users appear while you create internal approver rule and external users appear while you create external approver rule. |
| Is Administrator | Select Yes if you want to set the user as an administrator.
|
| Supervisor User | Click the Add User icon to add supervisor. In the Select User dialog box, select supervisor user, and then click Add. Alternatively, in the Search User box, type the name of the desired user, and then click the Magnifying glass icon. Use the scroll arrows to scroll through users. |
The user receives email notifications of access expiry in the following events:
| Field | Action |
|---|---|
| Hierarchy Level | Type or select a positive integer number. The number depends on your organization hierarchy. For example, for some organizations, hierarchy level one may be the top level while for some organizations hierarchy level 10 may be the top level. |
| Is Authorized Signatory | Select Yes if you want the user to be authorized signatory for agreement. The user appears as internal or external signatory as follows:
|
| Assign User Group | Click the Add User icon to assign user group. In the Assign User Groups dialog box, select user group. Click Add. |
| Assign Security Group | Click the Add User to assign security group. In the Assign Security Groups dialog box, click to select security group, and then click Add. |
| Access Expiry Date | Select the expiry date for the user. After this date the user access to ICM is disabled.
Note: If you are an administrator, you can change the access expiry date to a future date allowing the user to access ICM till the newly specified date. |
The user receives email notifications in the event of access expiry as follows:
- One day before the access expiry date.
- After the user access expires.
- If admin changes the access expiry date.
| Event | Subject Line |
|---|---|
| One day before the access expiry date | ICM Notification: Access of User [FullName] is expiring on [AccessExpiryDate]. |
| After the user access expires | ICM Notification: Access of User [FullName] is expired on [AccessExpiryDate]. |
| If admin changes the access expiry date | ICM Notification: Access expiry date of user [FullName] is modified as [AccessExpiryDate]. |
Work Details
Configure the attributes to display in the Work Details area as per the requirement of your organization. You can create these attributes in the Contract Type - Masterdata which is pre-configured according to the requirements of your organization.
The list of attributes in the Masterdata type must have the attribute named User with the data type as User.
Rest of the attributes vary as per the organizational requirements.
3. Click Next. The Team tab opens.
4. Select the appropriate user as an Approver, and then click Add.
5. Click Create. The Users page appears that displays the user you have created.
Editing an Existing User
You can modify the existing user account information whenever required.
To edit a user:
1. On the User Administration page, click the Users tile. The Users page opens displaying a list of existing users .
2. Click the View Record iocn next to the desired user. The User Details page appears. The page displays the following tabs:
- Details: Displays personal and work details of the user.
- OrgGroups: Displays the Organization Group the user is assigned to.
- Security Groups: Displays the Security groups the user is assigned to.
- User Groups: Displays the user groups the user is assigned to.
- History: Displays the history of all the changes done in the user details with date/time of change.
3. Click Edit to open the Edit User page.
4. On the Details tab, edit the user information, if any, and click Next to open the Team tab.
5. On the Team tab, add or remove the team members, and then click Next to open the Org Groups tab
6. On the Org Groups tab, click the Add icon next to Organization Group. The Select Org Groups dialog box appears. List of already selected organization groups appears in the dialog box.
7. Under Select Org Groups, click to select a group. Alternatively, in the Search box, type the name of the group, and click the Search icon.
You can select new organization groups and remove those that user doesn't need to be a part of.
8. Click Add. The selected user appears in the Org Groups tab.
9. Click Update. The user information gets updated.
Provisioning a User
Provision a user feature is used to enable an existing user to login to the system. The provisioned user can perform tasks as per the privileges assigned by the administrator.
With ICM, you can provision users from the available list of users that are present in active directory.
To provision users:
1. Click the User Administration tile.
2. Click the Users tile. The User Administration page opens. Alternatively, go to the User Groups tile to select a user group.
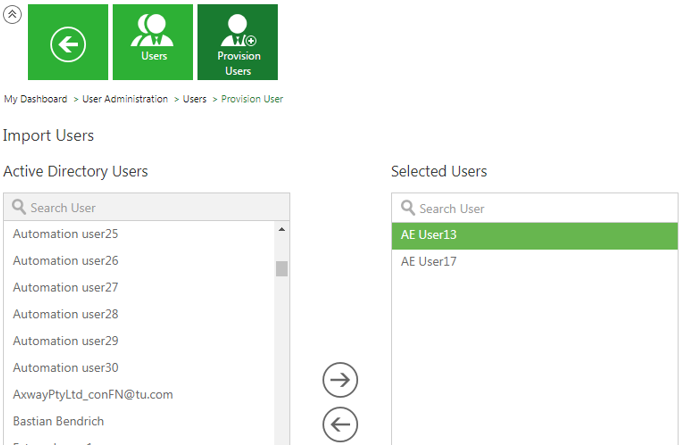
3. Click the Provision Users tile. The Users page opens and a list of users are displayed.
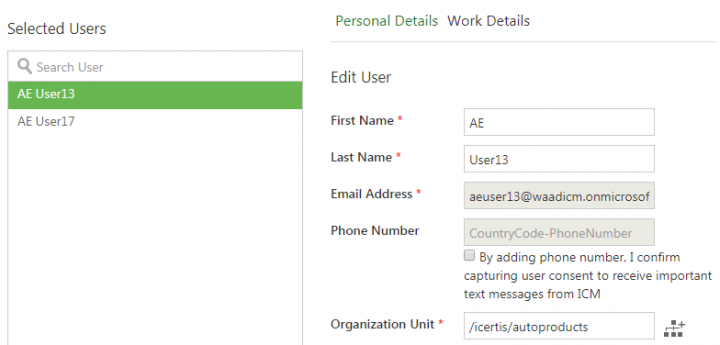
4. Select a user from the Active Directory Users list and move to the Selected Users list by clicking the right arrow. For example, AE User13.
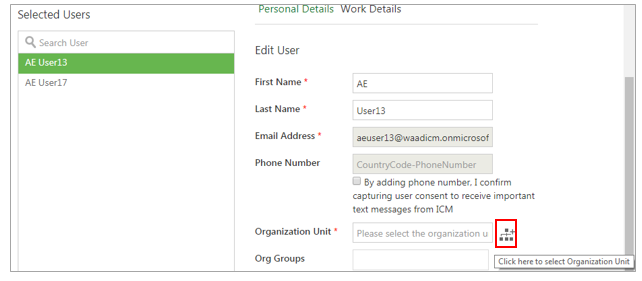
5. Select the user from the Selected Users list to view or enter the Personal Details and Work Details of the user on the right hand side. For example, selecting AE User13 in the selected Users list will display the personal details such as First Name,Last Name, Email Address, and so on of user AE User13.
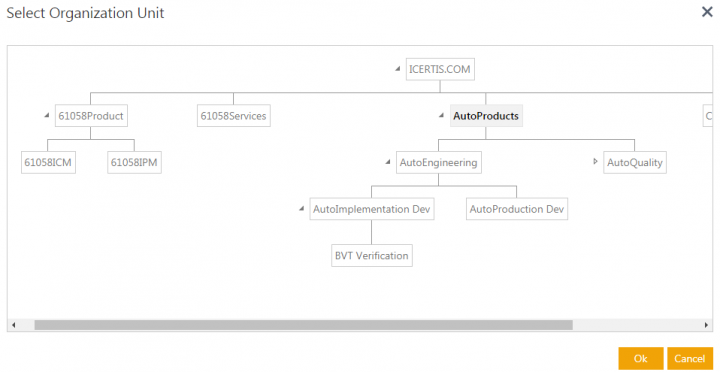
6. Click the Organization Structure icon next to the Organization Unit field to view the organization unit details for the user AE User13. The Select Organization Unit window opens.
7. Select the Organization Unit for the user AE User13 from the organization chart. For example, AutoProducts.
8. Click OK to go back to the Provision User page. The value (/Icertis/autoproducts) for the user AE User13 is now visible in the Organization Unit field.
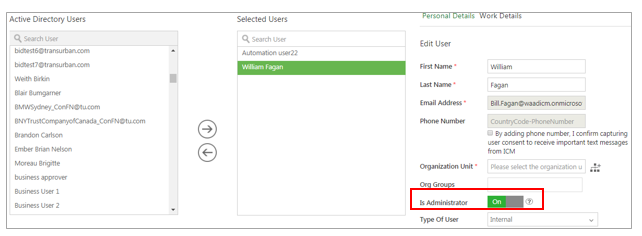
9. Toggle the Is Administrator button on the Personal Details tab to Yes if you want to add the user as an Administrator.
10. Click Next. The Work Details tab opens. You can view or enter the official details of the user such as Department Name, Department Head, Department Code, and so on.
11.Click Save. The User AE User13 saved in ICM successfully message is displayed.
12. Click OK. The Users page opens. You can now view the record for the user AE User13 on the Users Index page.
13. Click View Record on the Users Index page to view the details or verify the team of the user AE User13.
14. Select the Send for Approval button to get an approval for the user AE User 13. The User Detail page opens.
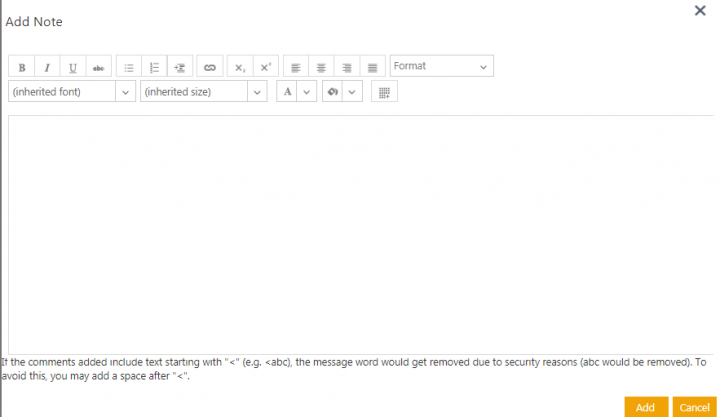
15. Click the Provision button to provision user AE User13 in ICM. The Add Note window opens.
16. Click the Add button after adding a note. The User Details page opens displaying the record for the user AE User13 with the status as Provisioned.
Replacing a User
ICM has a provision to replace User A with User B for a specific role. This may be necessary in several scenarios, such as User A was incorrectly assigned initially, an account may be delinquent for an extended period of time, or the owner is busy.
All tasks and actions that would otherwise have gone to User A (per his/her role), will now go to User B instead. Though User A is replaced by User B, they both will receive the notifications for the replacement happening.
For example, John has the roles of primary owner and approver. If he is replaced by Mary for the primary owner role, all tasks/actions for that role will be sent to Mary going forward. John will not receive any notifications at all. However, he will continue to have all the privileges of an approver and get all notifications for that role. The replacement of the user can be reversed anytime when required.
The replace user functionality is available in Agreements and Amendments, Requests and Associated Documents only. However, the replacement can happen in any state, as long as the Replace User icon is available. The replacement can be done by any user with the following roles having the replace user privilege:
- Primary owner
- Contract admin
- Secondary owner
- Contributor
- Observer
- Business owner
These roles cannot replace user:
- Approver
- Deviation Approver
- Internal Signatory
- External Signatory
- Reviewer
- External Reviewer
- Contract Requester
- External User
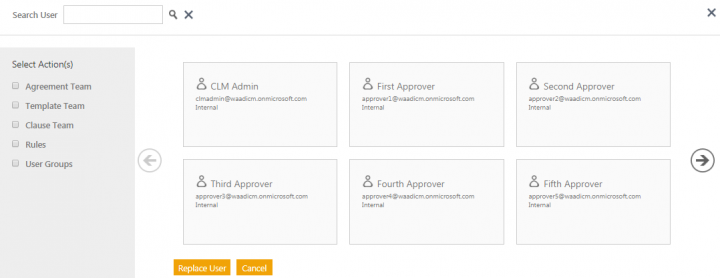
1. Click the Replace User button next to the record for the user that you want to deprovision. For example, Alon Carlton. You can search a user on the Replace User window.
2. Select an Action(s). For example, Agreement Team, Template Team, and so on.
3. Select the user that you want to replace. For example, Alan Carlton.
4. Click the Replace User button. A popup Information Message is displayed indicating that the User replace request is submitted and check back after you receive a notification email.
5. Click OK.
6. When you receive the notification email, the user will be replaced.
Deprovisioning a User
It is imperative to replace the user in ICM before deprovisioning.
To deprovision a user:
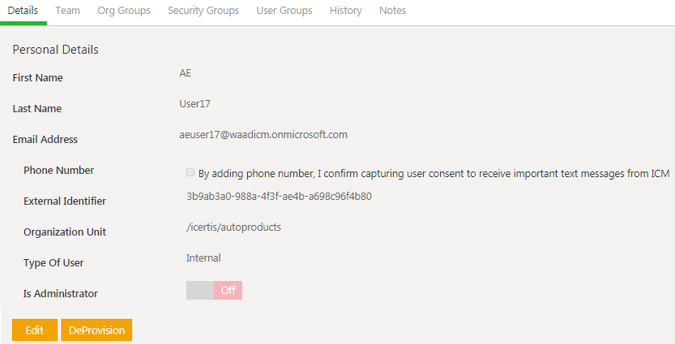
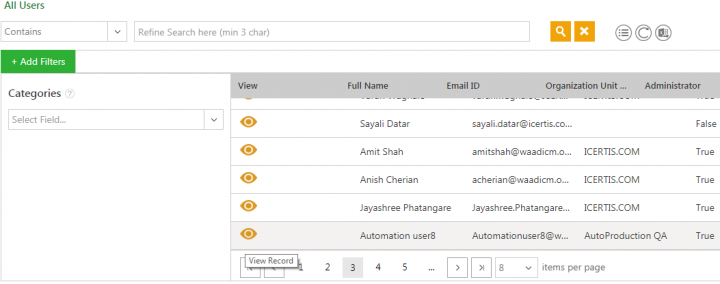
1. Click View Record on the Users Index page to select a provisioned user or verify the team of the user AE User13.
2. Click the Deprovision button. A popup Information Message opens indicating that it is necessary to initiate the Replace User activity to replace the de-provisioned user in ICM.
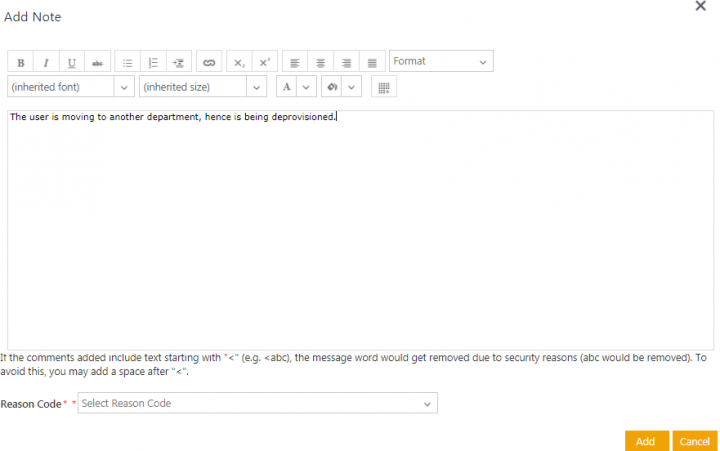
3. Click OK. The Add Note window opens. You can add a note to indicate the reason for deprovisioning the user or the user group.
4. Select a Reason Code from the drop-down list.
5. Click Add to add the note. The Users page opens.
6. Click the Deprovision button. The user is now deprovisioned.
Adding a Secondary Owner
Adding a Secondary Owner using the ICM User Interface
The Secondary Owner can be a user or a user group. The user group can either be Administrator group or a combination of an Administrator and Non-Administrator user.
To add a Secondary Owner using the ICM UI:
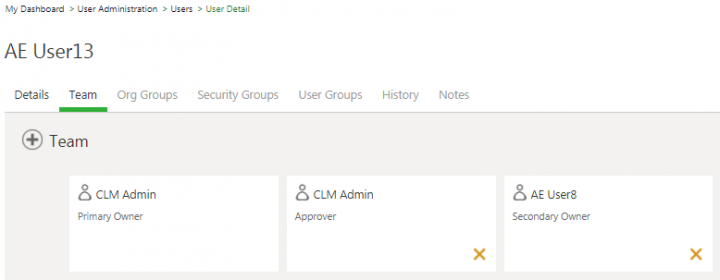
1. Click View Record on the Users Index page to select a provisioned user or verify the team of the user AE User13.
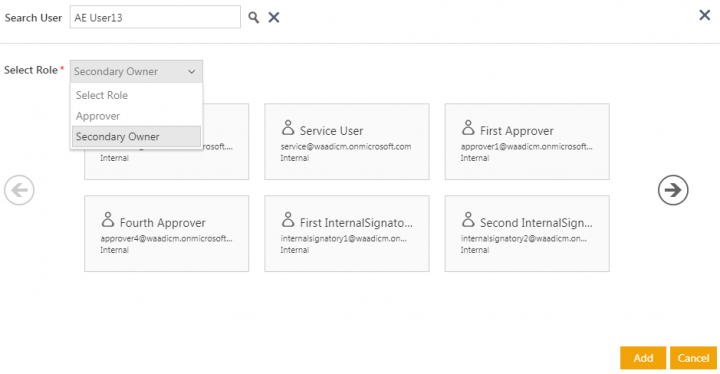
2. Click the Add icon next to Team. A window opens to select a role for the searched user.
3. Enter the details of the user in the Search User field. For example, AE User13.
4. Click the Select Role arrow and a drop-down with a list of roles is displayed.
5. Select Secondary Owner from the drop-down.
6. Click Add to add the selected user as a Secondary Owner to the Team. The User AE User13 will now be displayed as a Secondary Owner on the User Index and the User Details pages.
Adding a Secondary Owner using Excel Add-in
You can also use Excel Add-in to add users or user groups as Secondary Owners using the configuration displayed in the user Team.
To verify that the Secondary Owner has got the privileges to update the user details:
1. Select the Entity on the ribbon.
2. Select the Action for which you want to populate the Excel Workbook.
3. Click Populate Workbook on the Excel Add-in. This opens a popup indicating that it will populate the Workbook for the selected action.
4. Click Yes. The Workbook will be populated with the user information such as Name, Last Name, Email Id, External UPN, Organization Unit, Secondary Owner and so on.
5. Click Validate to validate the user information. The Validation Successful message is displayed.
6. Click OK. The Progress Status popup is displayed showing the progress of the user creation process.
7. The User Created Successfully message is displayed on creation of the user.
8. Click OK.
9. Go to the Users page on ICM. The user provisioned using Excel Add-in is displayed in the grid with a status Created.
10. Click the View Record button for the user. The User Detail page opens.
11. Go to the Team tab. The user provisioned using Excel Add-in is displayed as a Secondary Owner.
Adding a Secondary Owner using Legacy Upload
1. Click the User Administration tile on the Dashboard.
2. Click the Admin Task tile. The Admin Task page opens.
3. Select theLegacy Upload task from the list. The Legacy Upload page opens.
4. To provision a user using the legacy upload option, the following files are required:
- A Mapping file : The users that are going to be provisioned using the data file are entered in the mapping file. It contains information such as the Contract Type Name, User Information such asEmail ID (Primary Key), and so on. It also contains the path from where the data file will pick up information.
- A Data file – Includes user information such as Name, Last name, Email ID (of the user that will be provisioned using Legacy Upload, and so on.
Let's consider an example,
1. Create a batch with automationuser5 as the user, and Admin as a user group.
2. Create a batch file and upload the mapping file fist.
3. Upload the data file. The batch file is scheduled. It will be Executed when the batch is run from ICM.
4. Go to Legacy Upload and see how to upload the document.
User entity supporting the Secondary Owner role
The Secondary Owner has now been extended to User Entity for a user or user groups. This makes it easier for the Administrator to make the required changes for a user or user groups, instead of having to login multiple times to do so. You need to configure actions for User Information entity and Secondary Owner via Role Action Mapping on the user interface.
The Secondary Owner can be added to the User Entity:
- Through a configuration key
- From the ICM user interface
- Using Excel Add- in
- Using Legacy Upload
Related Topics: Agreement Management | Managing Organization | Managing User Groups | Managing Security Groups | Application Settings | Notification Settings | Currencies | Reasons | Deleting an Agreement | Search Sync | Legacy Upload


