Contents
Compliance Management
The Compliance Management tile enables you to go through all Commitments available and take required actions on them. It consists of the following tiles:
- Commitments
- Fulfilling a Commitment
- Adding Commitments to an Agreement
Understanding Commitments
Every Agreement has obligations associated with it. These obligations are known as Commitments. You can manage Commitments by setting up reminders, transaction clauses, review timelines and much more using the Commitment Management tile on the Dashboard.
From the Commitments tile you can:
- See the complete list of Commitments available, and search Commitments in a variety of ways in the same way as for Agreements through Searching Agreements and Requests.
- Customize this page. Refer to Navigating in ICM for details.
- Go to the specific Agreement Details page for which the Commitment was created by clicking the View Record icon.
Adding Commitments to an Agreement
Commitments are reminders of tasks or actions that need to be taken either while creating the Agreement or after its execution. They are added manually to keep track of and ensure that various obligations of the Agreement are being met. While creating the agreement, these Commitments can be towards Rules and Clauses and post-execution for ensuring that certain dates are being met or for exercising the extension option.
You can also add External users and External users with login privilege as business owners of a Commitment. This helps in easy tracking and reporting of Commitments where the external users are supposed to take actions to fulfill those Commitments. This is a configurable feature.
To add a Commitment:
1. Click the View Record icon next to the Agreement you want to add the commitment to. The Agreement Details page opens.
2. Click the Commitments section in the left navigation. The existing commitments are displayed if any.
3. Edit or delete the existing Commitment using the Edit Commitment or Delete Commitment icons.
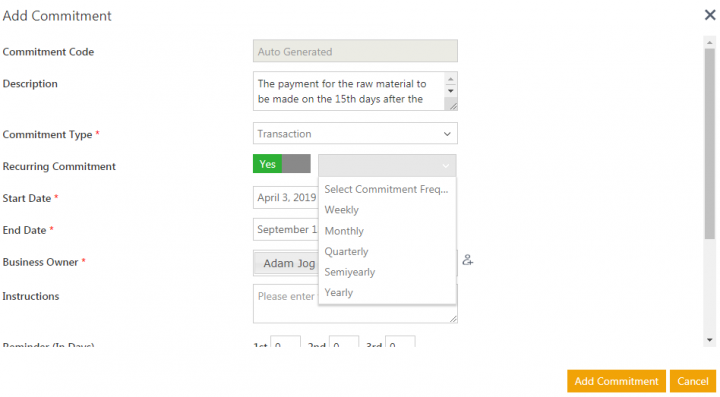
4. Click the Add icon to add new commitments. The Add Commitment window opens.
5. Enter the necessary details:
- Commitment Code: this is a system generated code added automatically when you click the Add Commitment button.
- Description: Type in a detailed description of the action or task.
- Commitment Type: select the appropriate option from the drop-down list. This helps you classify the type of Commitment this is, for example if it is transaction or risk-based.
- Recurring Commitment: You can set the commitments as recurring. Toggle to Yes and select the Commitment Frequency. The available options are Weekly, Monthly, Quaterly, SemiYearly and Yearly. For example, if there is a Clause for extension of the Agreement by 1 year, upto 3 times, you can:
- Add a reminder of 1-2 months before the renewal date
- Add instructions to say review extension for another year
- Define start and end dates of the Agreement
- Set this as a transaction, Recurring Commitment
- Start Date: Select the Commitment start date
- End Date: select a due date for the Commitment. This is the date the Commitment should be completed by.
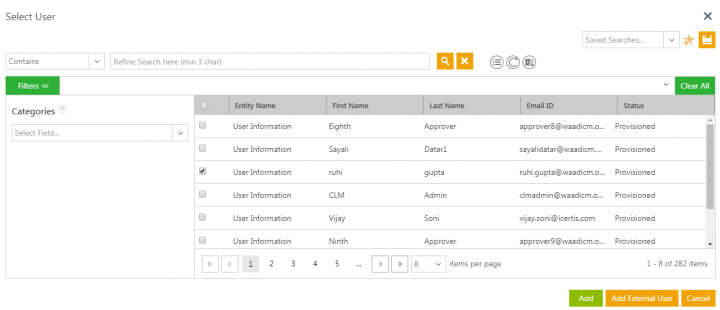
- Business Owner: click the icon next to the Business Owner field. The Select User window opens. If the user is already provisioned in ICM click the desired user name from the list and click Add. You can also search the user(s) using the Search icon. You can add three types of Business users from the Select User window: Internal User, External User with Login privileges, External User without Login privileges
Adding an External User:
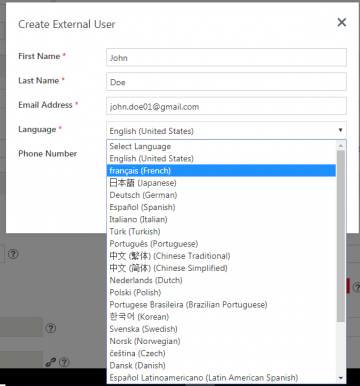
1. Click the Add External User button on the Select User window. The Create External User window opens.
2. Fill in all the mandatory fields such as, Name, Email Address and Language. It’s important to select the appropriate language for the user since the user will receive all the ICM notifications in the selected language.
3. Click Save, the user is added in the Business Owner field.
5. Click the Add Commitment button. The Commitment is displayed in the Commitments section of the Agreement Details Page. The Primary and Secondary Owner also have the privilege, similar to the creator to edit or delete the Commitment.
The following icons are available next to each Commitment text:
: Click the icon to delete the Commitment.
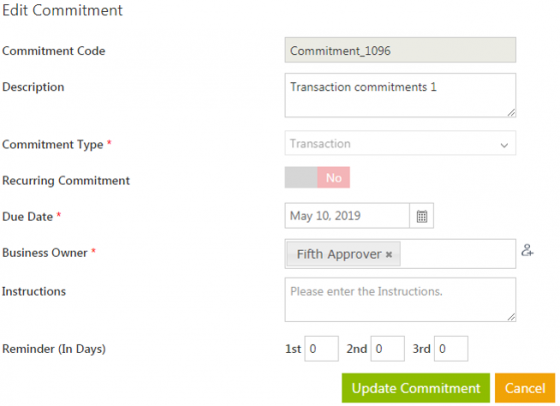
 : Click the icon to edit the details of the Commitment. The Edit Commitment window opens. Edit the desired fields and then click Update Commitment. You can edit only the Due Date and Business Owner fields.
 : Click the icon to take action on the Commitment.
You can define additional details for a Commitment by configuring additional Attributes on the Commitment object. It provides the business owners more context about the Commitments before taking action on them. These extended Attributes are visible to authorized users while creating/editing/viewing the Commitment record. The following additional attributes can be configured for Commitments.
- Category
- Sub Category
- Reference section and Title
- Cross reference
- Obligation Summary
- Criticality
- Obligation type
- Obligation extract
- Target Value
- Trigger
- Number of days to become overdue
- Remarks
Fulfilling a Commitment
Every Agreement or Contract has obligations associated with it. The obligations are towards the transactions, clauses, and so on. Commitment is like a reminder to fulfil these obligations. For example, reminding supplier about contract expiry.
The Primary Owner creates a commitment to keep a track of a certain task relating to an agreement. The commitment owner on the due date of commitment, takes the appropriate action to fulfil the Commitment. For example, a Commitment may be to remind a supplier to provide necessary information on time , or to renew a contract, and so on.
To fulfil a Commitment:
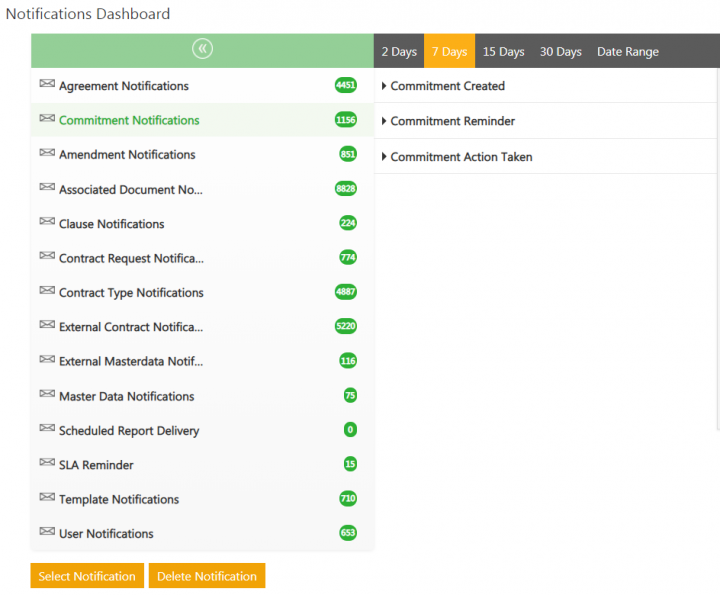
1. On the Dashboard, click the Notifications tile, and then the Commitments tab. List of commitments that you need to fulfil are displayed.
2. Click the option Commitment Reminder to see all pending Commitments. You can see the already created Commitment or action taken on Commitment through Commitment Created and Commitment Action Taken options.
3. Select the checkbox to select the Commitment.
4. To view the selected Commitment in ICM, click here.
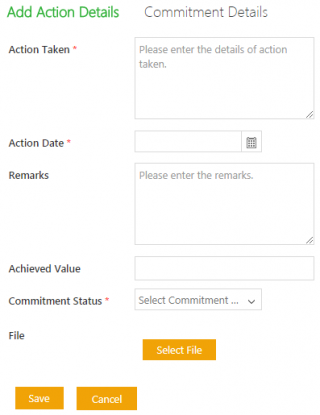
6. In the Add Action Details tab, enter the following information:
- In the Action Taken box, type the details of the action you have taken on the Commitment.
- In the Action Date box, type or select the action date from the calendar.
- In the Remarks box, type your remarks if any.
- In the Commitment status list, select one of the following:
- Cancelled
- Failed
- Postponed
- Succeeded
If you select the status Postponed, the New Expected Completion Date box opens. Type or select the new date from calendar.
7. In the File field, click Select File to upload supporting documents.
8. Click Save. The message opens as follows:
Commitment will not be editable anymore. Do you want to continue?
9. Click Save.
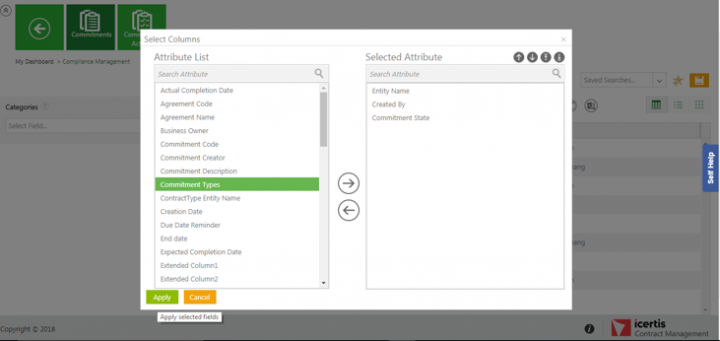
10. Click Select fields to add the Commitment State attribute to the Attributes list for a particular Agreement.
11. The Select Columns popup opens where you can select the desired attributes and click Apply to apply the selected fields.
Search allows you to search the customized values and the facet Search displays values of the commitment state and the count.
The customized values are also reflected in the existing Reports.
Related Topics: Agreement Management | Agreement Details Page

