Contents
- 1 Creating a Template using ICM Word Add-in
Creating a Template using ICM Word Add-in
You can create and manage templates using ICM Word Add-in, and save it in your ICM repository using Microsoft Word.
After the ICM Word Add-in is installed and set up on your computer, the ICM tab opens on the Microsoft Word toolbar. You must log in to ICM before you start creating templates. Follow these steps to log in to ICM:
1. Open Microsoft Word.
2. Click the ICM tab, and click Login. The Login window opens.
3. Enter the username and password, and click Sign in.
After you are in the ICM Word Add-in, you can create templates by tagging different elements.
To create a Template:
1. On the ICM tab, in the Templates group, click Create. The Create Template window opens.
2. Specify details in the Template Details and Team sections, as follows:
Template Details
- Contract Types: select the appropriate contract type.
- Metadata:
-
- Name: enter a name for the new Template.
- Description: enter a description about the Template.
- Version Comments: enter the appropriate version details.
- Effective Date: select the date on which the Template is effective from.
- Expiry Date: select an expiry date for the Template.
- Localization: select a language in the Template Language field, and select the Primary Template checkbox.
Team
This section helps you to add users and specify their roles. Follow these steps to add users:
1. Click Add Team Member, a window opens.
2. Click the Add User icon. A user list window opens.
3. Double-click a user name to add it. You can add only one user at a time.
4. From the Add Team Member window, select one of the following roles for the user:
-
- Approver: approves or rejects the Template after reviewing it. Specify the step number of the approver. The step number is mandatory. It controls the sequence of approvals if multiple approvers are added. The approval flows sequentially according to the step number.
- Secondary Owner: works with the primary owner or independently if the primary owner is not available. Both these roles have the same privileges.
- Contributor: reviews the Template but cannot edit the template or take actions. A contributor sends comments to the primary owner or secondary owner to update the contract type.
5. Minimize the Create Template window.
Observe the Word Editor window with a new document and the Templates pane at the right of the window. This window contains several tabs. Add the following information to create the template:
Attributes: Click the Attributes tab. The Attribute list opens. Right-click an attribute to add it.
Clauses: Click the Library Clauses tab. The Clause list opens. Right-click a clause, and from the Add menu, click one of the following options:
Clause: adds the clause to the Template and displays it.
Rule based clause: adds the clause to the template, but it will be hidden. The clause is displayed in the Template only when conditions to add this clause match the Clause Assembly rule.
Viewing an Alternate Clause
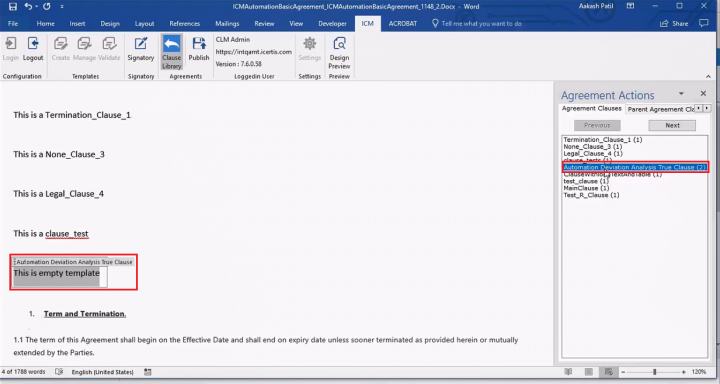
The ICM .NET Word Add-in enables viewing of alternate Clauses under the Agreement Clauses tab itself. You can identify if alternate Clauses are available for a particular parent Clause. Additionally, available alternate Clause (s) are displayed, so that you can easily replace the parent Clause with an alternate Clause if required.
Identifying and Comparing Alternate Clauses
You can identify and compare alternate Clauses using Word Add-in. This enables differentiating between main and alternate Clauses.
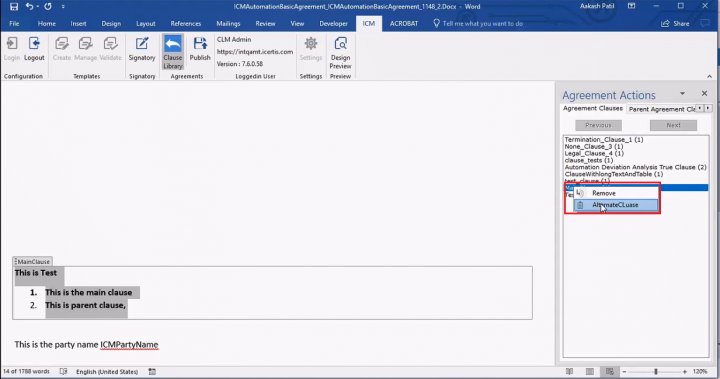
To compare the content between parent and alternate Clauses:
1. Right-click the parent Clause in the Agreement Actions pane.
2. Click Alternate Clause. The Compare Clause window opens displaying the difference between the main and alternate Clause.
- Contract Types: use this tab to add associations to the Template. Right-click an association, and from the Add menu, click one of the following options:
- Association as File: adds the Association content tag to the Template:
- Actual Associated Document is included in the agreement when Assemble Contract action is executed.
- If multiple Associated Documents for the same association are added, they are included in the order they are added.
- Association as Table: adds the Association content tag to the Template:
- Associated Document’s attributes are added to the Agreement as a table row with a header, when Assemble Contract action is executed.
- If multiple Associated Documents for same Association are added, they are added as multiple rows in the table.
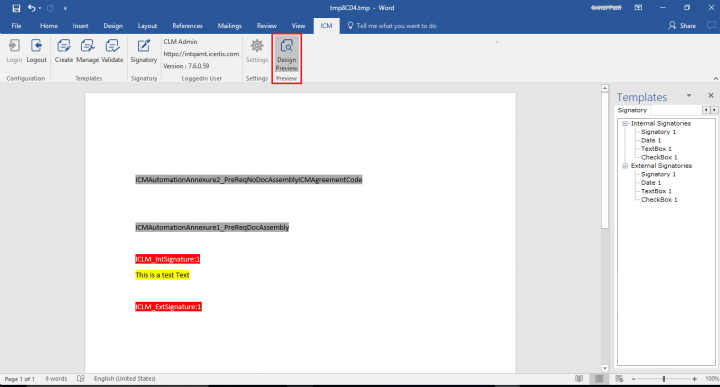
- Signatory: To view the Signatory tab in the right pane, click the Signatory option under ICM. Signatory tab consists of tags for both Internal signatory and External signatory:
-
- Signatory 1
- Date 1
- Text Box 1
- CheckBox 1
To add any signatory related tag, right-click the tag, and add it to the template.
You can make Text Box either as a mandatory field or an optional field for Internal and External signatory, according to your requirement. Click Text box, and then click Add. Specify the following details:
- Tag label: enter the required tool tip (the info you want in text box) if any.
- Contract Attribute: select the attribute whose value you want to map with the text box.
For example, to map Name attribute to the text box, select Name attribute in Contract Attribute field, and select the Mandatory option for the text box. If the signatory enters a value in the text box that is different from the value in the system, the value is updated accordingly in the agreement document.
- Is Mandatory: select Yes, if you want the signatory to specify the required information to finish the task.
- Is ReadOnly: select Yes, if you want the value to be prefilled (when received by signatory) according to the mapped field. You cannot change this value.
- To Sync - select Yes if the information provided for the mapped “Contract attribute” in the “text box” (if differs) is updated throughout in the document and in the system as well.
3. Return to Create Template window, and click Save.
After the Template is approved, you can log on to ICM and view the Template in the Templates tile.
Creating a Template in Word
You can create a Saved Search to get the association attribute and assemble it in the Agreement. You can also apply sorting on any of the available columns. The name of the saved search is used to tag the association’s metadata into the Template.
These changes to the attribute are done manually by editing the content control using the Plain Text Content Control from the Developer menu in Word and adding the attribute’s display name in the Title. This works only on Publish Agreement and Edit Agreement.
To tag the association’s metadata to the clause, edit the control tag as follows:
ICMAssociation I AssociationSavedSearchName{0}. ICMClientContactPerson
where,
the selected Contact Person from the Contract Party association’s sequence is 1.
The index is a zero based index. 0 means 1st instance, 1 means 2nd instance, and so on.
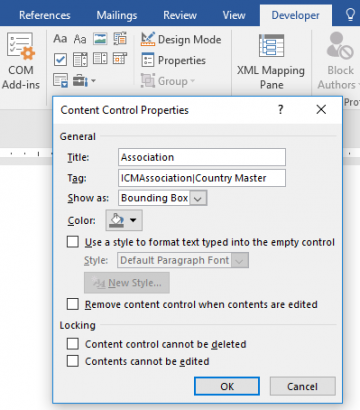
The sample content control will look as follows:
Adding a content control tag:
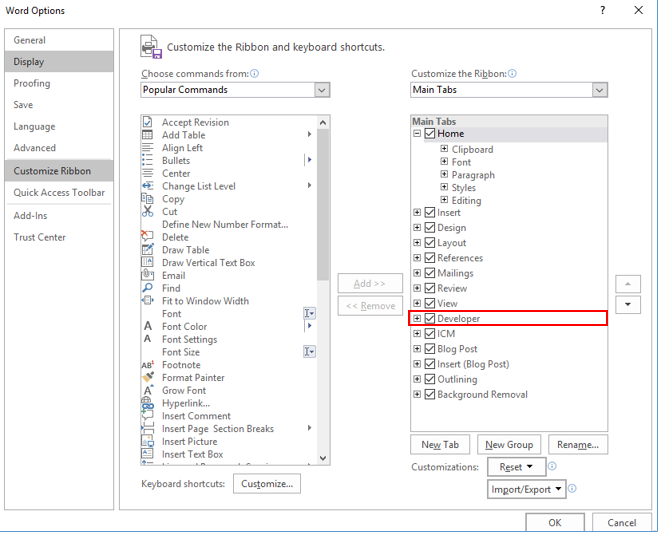
1. Check if the developer ribbon is available in the Word menu.
2. To enable it, go to:
File -> Options -> Customize Ribbon -> Enable Developer
3. From the Developer menu, select the Plain Text Content Control.
4. Select Properties and add the attribute’s display name in the Title.
5. Add ICMAssociation|AssociationSavedSearchName{index}.{Attribute’s Technical Name}
- ICMAssociation -> This is static. Keep it as is. i.e. ICMAssociation
- AssociationSavedSeachName -> As explained above.
- Index -> Zero based index. 0 means 1st instance, 1 means 2nd instance, and so on.
- Attribute’s Technical Name -> The technical name of the attribute of association, such as, ICMCoutryName, ICMPartyName, and so on.
Tagging Associated Document Saved Search
You can add the rich text content control to tag the saved search in the Template or Agreement document using Word.
Refer to section Adding a Content Control Tag and follow the steps 1 to 5 given in the section. The tag should be ICMAssociation|AssociatedSavedSearchName. For example, ICMAssociation|Country Master. Click Ok. The Saved Search is now tagged in the document.
Using Design Preview
This enables you to highlight the tags added in the Agreement or Template and locate them. To enable or disable highlighting of the tags, click Design Preview button in the ribbon in Preview section of the Word Add-in.
Tagging Template Variables using ICM Word Add-in
Template Variable is the attributes specific to the Template. They may not be a part of the Contract Type. Template Variables can only be added using the ICM wed UI. However, you can tag the Template Variables using ICM Word Add-in.
To tag Template Variables:
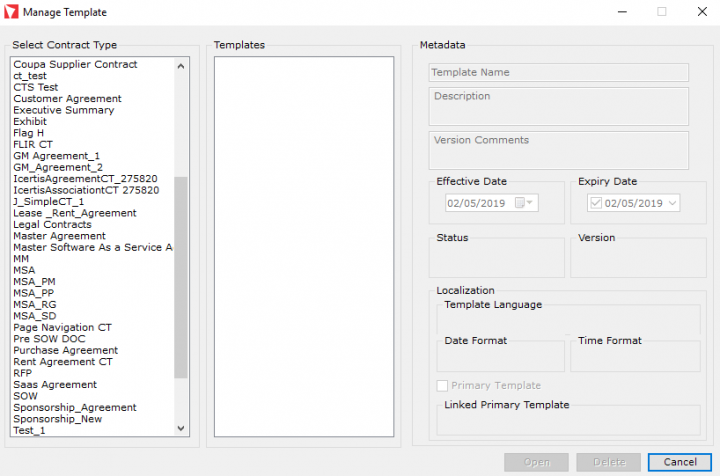
1. Click the Manage button. The Manage Template window opens.
2. Select a Contract Type from the Select Contract Type column. The respective Templates are displayed in the Templates column.
4. Click the Open button. In the Template Variable tab of the add-in pane, all the Template Variables are displayed specific to the Template you selected open.
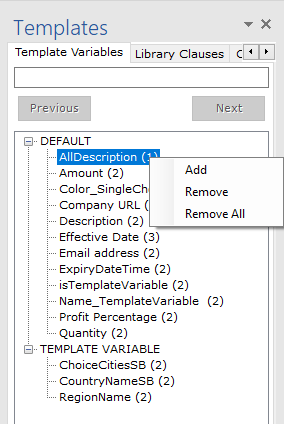
5. Right click a Template Variable, then click Add. The Template Variable gets added to the Template.
6. Right click the same Template Variable, Remove and Remove All options are displayed along with Add.
- Remove: Removes one instance of the Template Variable
- Remove All: Removes all the instanced at a time.
Editing Template in ICM Word Add-in
You can edit a template by using the ICM Word Add-in or by using the Template Management tile. When you edit a template with the ICM Word Add-in, you can add and remove attributes and extension attributes, clauses, and signatories. However, when you use the Template Management tile, you can edit only the values of the attributes that you added to the template.
Follow these steps to edit a template in the ICM Word Add-in:
1. Click Manage under ICM tab. The Manage Template window opens.
2. Select a contract type in the Select Contract Type column, whose template you want to edit. All the templates for that Contract Type are displayed in the Templates column.
3. Select the template that you want to edit, and click Open.
4. Edit one or more of the following specifications of the Template:
- Attributes
- Clauses
- Team
- Template Variables
- Signatories
5. Click Update. The Template is updated and listed on the Templates page in Draft state.
Publishing an Agreement
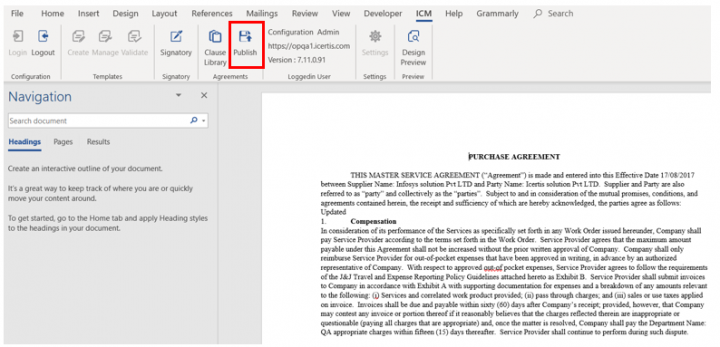
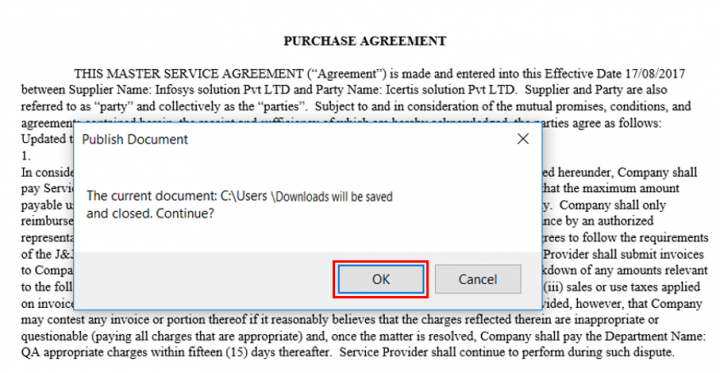
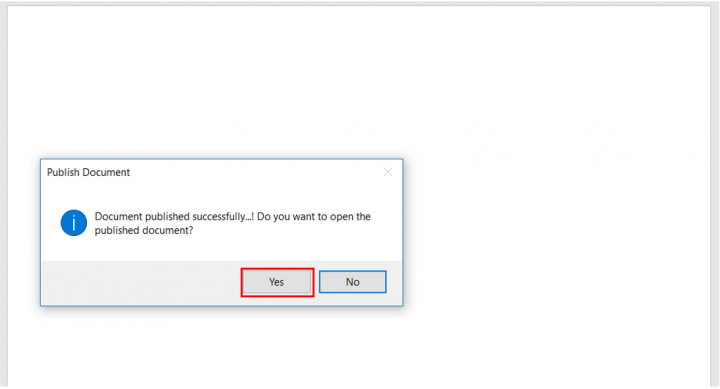
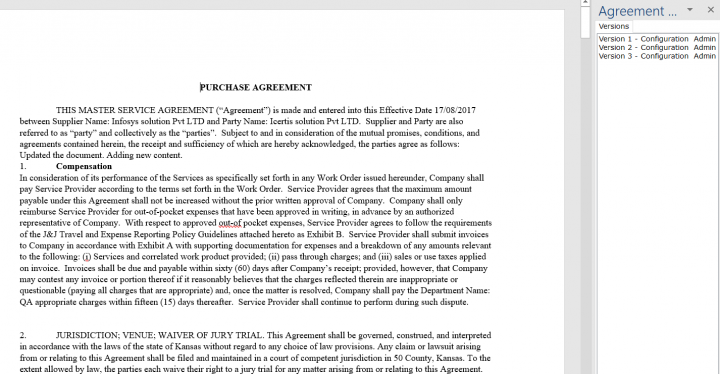
Users can publish the agreement using the Publish button.
To publish an agreement:
1. Open the agreement document using Microsoft Word Add-in (.Net).
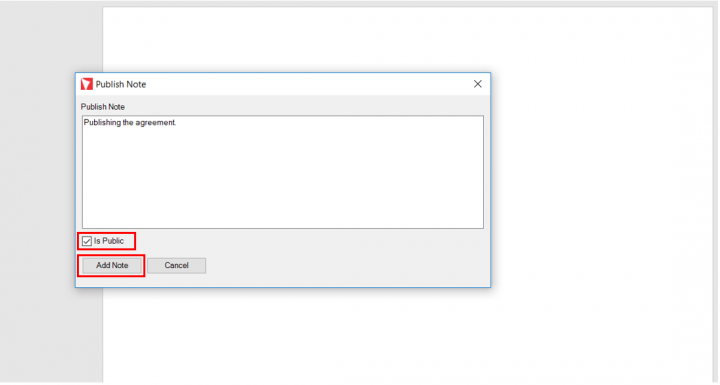
3. Click OK. The Publish Note window opens.
4. Enter a note in the Publish Note field.
5. Select the checkbox Is Public to make this note visible to everyone.
Related Topics: Template Management | Approve/Reject_a_Template | Rule | Agreement Management | Clause Management | Bilingual_Templates
