Contents
[hide]Admin Task
Deleting an Agreement
An Admin has the authority to delete an Agreement. An Agreement may be deleted if it is no longer being used or it is terminated.
To delete an Agreement:
1. Click the Admin Task tile.
2. Click the Delete Agreement button on the page.
3. You can search the Agreement to be deleted by providing any one of the fields listed below. The system automatically populates the data for the other field. Both the fields are mandatory to delete the Agreement from ICI.
- Agreement URL: Enter the URL of the Agreement that you want to delete.
- Sys Id: Enter the unique system ID for that Agreement.

4. Click Execute. The Agreement will be deleted.
Search Sync
The Search Sync tool gets data from Icertis Search for a given instance’s Sys Id and synchronizes it if required. Using the fetched ES value, the tool validates if the Sys Id is the latest for the respective instance or if a sync is required. This tool can be accessed by the Administrator from the Admin Task on User Administration tile.
If the key exists, the latest value from ES will be displayed. If the key does not exist, the system displays an error message indicating that the value could not be fetched for the provided Sys Id. The Sys Id can be provided as input CSV file or as comma separated. Either comma separated Sys Ids can be entered or a CSV file can be uploaded.
This helps to make the entity search more streamlined and efficient. Users can quickly refer to related agreements at the time of deals or audits.
You can search the documents that an Agreement is linked to.
To use the Search Sync Tool:
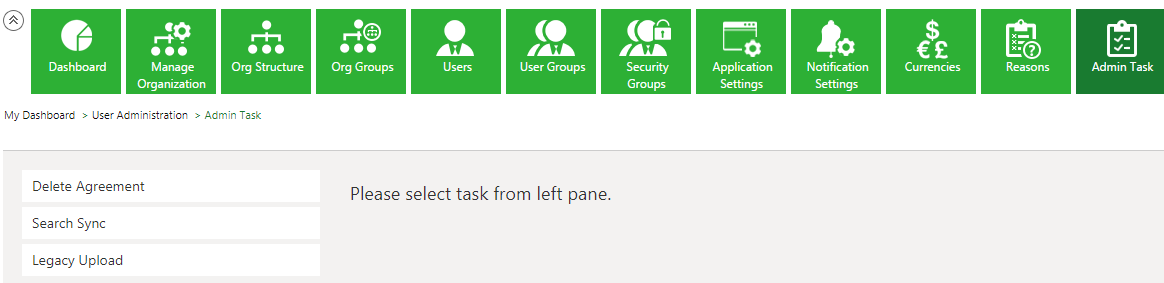
1. Click Home > User Administration > Admin Task. The Admin Task page opens.

2. Click the Search Sync task from the left pane.

5. Select the Contract Type from the drop-down.
5. Toggle Skip Agreement Document Indexing to Yes/No as required.
6. To get the Sys Ids, click the Upload CSV button to upload the .CSV Agreement or enter the Sys Id using comma separated value in the box.
7. Click the Upload CSV button to upload the CSV document. The Upload Document window opens.
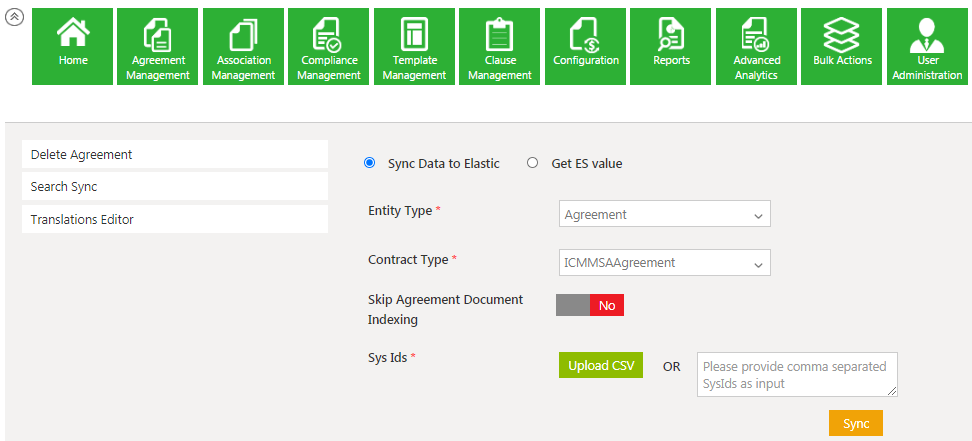
8. Click SelectFile to upload a CSV file and add a note if required.

If the uploaded file format is incorrect, an alert message is displayed. The supported file formats will be also be displayed.

10. Click Sync. The Sync Request Accepted message is displayed.

11. Click Ok. Users can now get data from ES for a given instance’s SysId and can check if it has the latest value or if a sync is needed.
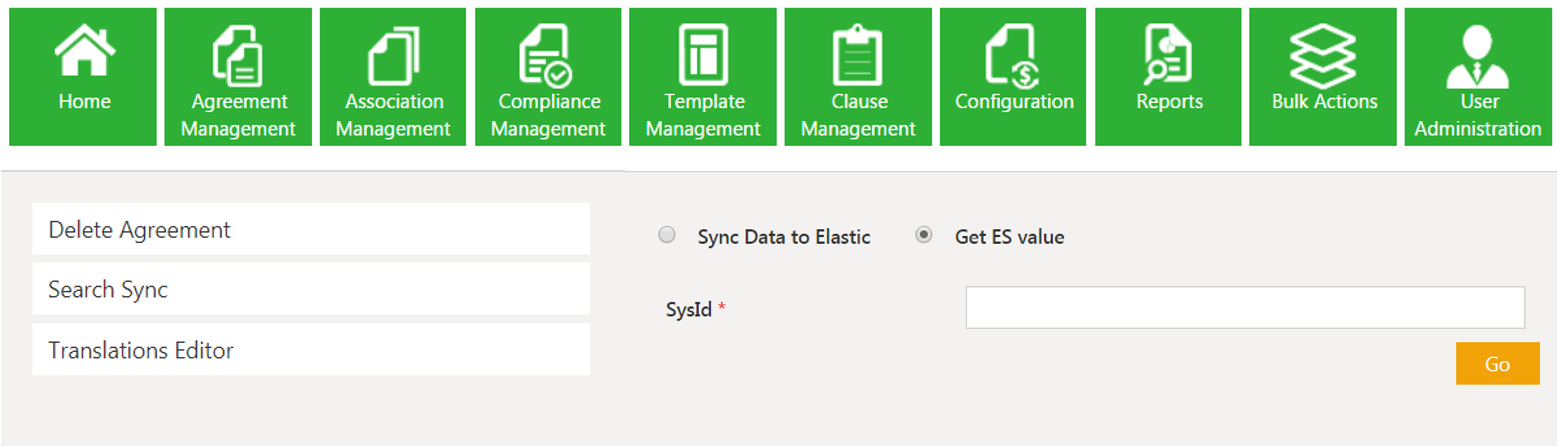
12. Select Get ES Value.
13. Enter the SysId and click Go. If the key exists, the latest value from ES will be displayed. If the key does not exist, the error message Please enter valid SysId is displayed.
Note: Data can be fetched from only one instance at a time.

Icertis Search Sync
Users can now get data from Icertis search for a given instance’s SysId so that they can look up the value and identify whether it is the latest or if a sync is needed. If the key exists, the latest value from ES will be displayed. If the key does not exist, the system will display the error message “Could not fetch value for provided SysId”.
Note: Data can be fetched from only one instance at a time.
Legacy Upload
Organizations may have a large number of existing Agreements that are created outside of ICI platform. These are henceforth referred to as Legacy Agreements. Organizations may want to import these Agreements to ICI to leverage its vast capabilities and manage all Agreements within a single platform.
The Legacy Upload feature enables ICI Administrator to easily upload in bulk the legacy agreements that were created outside of ICI. This feature enhances productivity by allowing you to upload a large volume of existing Agreements and other entities using Excel.
The highlights of this feature are :
- Uploading Agreements, Teams, Notes and Commitments in bulk.
- Uploading Associations, Masterdata, User Information and Amendments in bulk.
- Scheduled batch processing for improved performance.
- Enhanced validations, including the ability to exclude the specified attributes from being validated.
- Ability to view logs and reporting of success and failure statuses for validations and uploads.
You can use the utility to upload the following entities:
- Agreements
- Amendments
- Associated Documents (with or without workflow)
- Masterdata (with or without workflow)
- Team, Notes, and Commitment
- User details
Click the Legacy Upload link in for more details.
Translations Editor
The ICI platform is available in different languages and different languages label text are available for localization. However, to make any changes to the localization values, users had to reach out to the Solutions Engineering or Database teams. Sometimes, these changes were minor and of low complexity, but the turnaround time was substantial.
Hence, a self-service Translations Editor tool has been introduced that contains all strings that are localized.
Users can now download all keys and their localization values as an Excel file, modify multiple values, and upload the modified changes to ICI. Once the values are updated in ICI, the caches are updated automatically to avoid the cache flush and server restart. This has significantly enhanced productivity as the turnaround time to update the Resource Key values has been eradicated.
Using this tool, users can now:
- Search for a specific string using the search bar and update the Resource Key value for Language and Locale.
- Update multiple language strings by selecting and saving the Resource Key value.
- Download and upload the localization key values using Microsoft Excel.
- View the modified values in the ICI instance immediately.
To use the Translations Editor Tool:
1. Click the User Administration tile on the Home page.
2. Select Admin Task from the drop-down. The Admin Task page opens.
3. Select the Translation Editor task from the left pane.

Users can update translations in the following ways:
1. For selective editing, select a language and a resource key to update the translations.
2. For bulk editing and updation of multiple languages and resource keys, use the Download / Upload option to download an MS Excel sheet.
Selective Editing to Update Translations
For editing Resource Key values selectively:
1. From the Select Language drop-down, select a language in which you want to edit the labels. For example, français (French).

The Resource Key and respective values of the selected language are displayed.
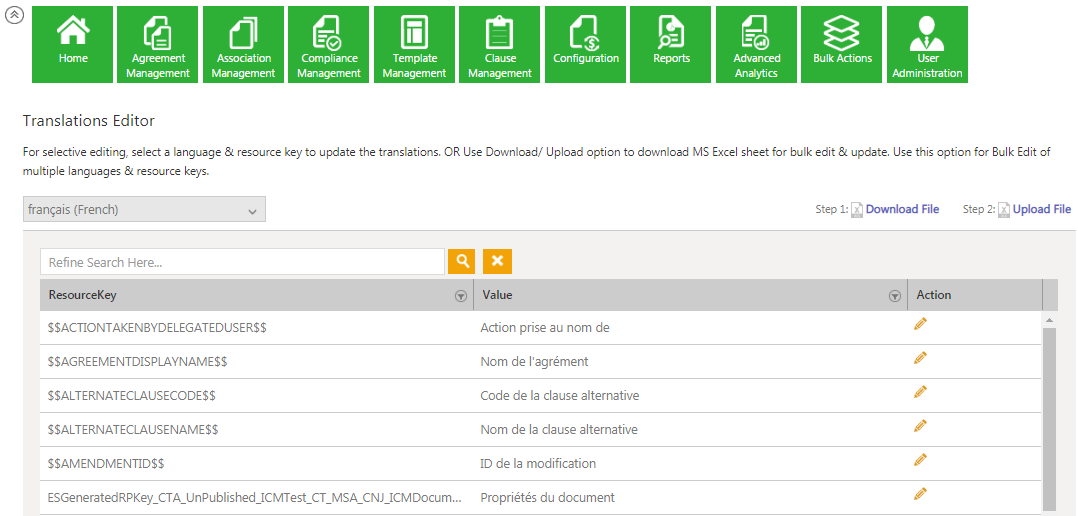
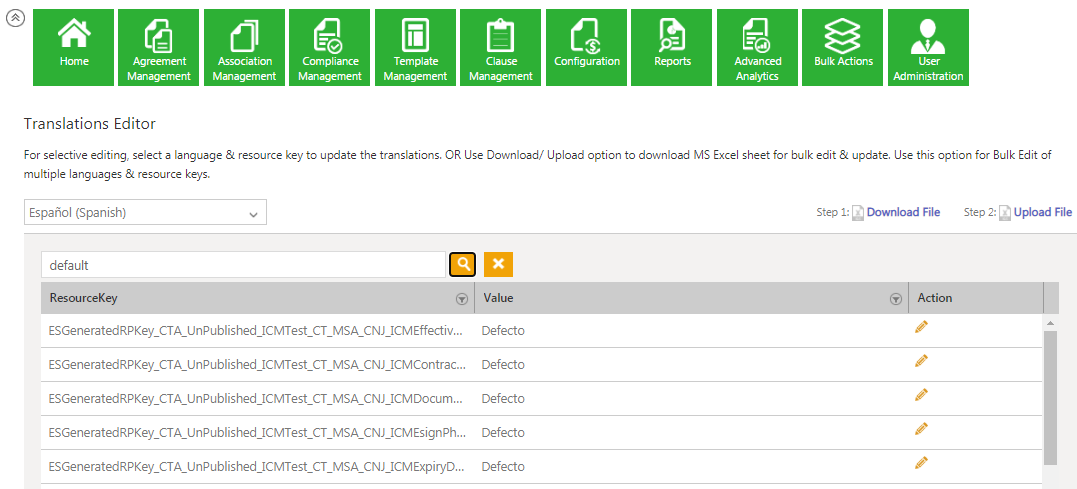
2. Enter a ResourceKey value in theSearch field to edit. For example, default. All ResourceKey(s) with the Par défaut (default) values from the French language are displayed.

3. Click the Edit this Resource Key for Multiple Languages icon in the Actions column.
You can change the key for a single language or for multiple languages as required. For example, change Par défaut to défaut in French or Predeterminado in Español (Spanish) to Defecto.

4. Click Update. The ResourceKey value for default is updated to défaut for French and to Defecto in Spanish.
5. The Resources Updated Successfully message is displayed. Click Ok.

You can select the respective languages (French or Spanish) to verify that the resources have been successfully updated.
Bulk Editing in Multiple Languages
For editing Resource Key values of multiple languages in bulk:
1. Click Download File. A Microsoft Excel file (named BulkActionWorkBookStringResource) that contains all the Resource keys and values for all supported languages in ICI is downloaded.

2. Open the downloaded Microsoft Excel file.
3. Click Enable Editing. All ICI supported language Resource keys and their respective values are displayed.
4. Edit the ResouceKey of multiple languages as required.
5. Save the Excel file.
6. Click Upload File. The Upload Translations window opens.
7. Click SelectFile. The Open window opens.
8. Select the updated Excel file.
9. Click Open. A warning window opens indicating that this is a heavy operation and can potentially affect overall application performance.
10. Click Ok. The Upload Summary displays the number of Records Uploaded, Records Processed, andRecords Updated Successfully values.
11. Click Close. The label translations have been achieved for multiple languages in bulk.
Related Topics: Agreement Management | Managing Organization | Managing Users | Managing User Groups | Managing Security Groups | Application Settings | Notification Settings | Currencies | Reasons | Deleting an Agreement |Legacy Upload |