Contents
[hide]- 1 ICI Mobile Application
- 1.1 Prerequisites to Using the ICI Mobile Application
- 1.2 ICI Mobile App Management support using Microsoft Intune
- 1.3 Downloading the ICI Mobile Application from the App Store
- 1.4 Logging On to the ICI Mobile Application
- 1.5 Mobile App Features
- 1.6 Dashboard
- 1.7 Tasks
- 1.8 Commitments
- 1.9 Searches
- 1.10 Agreements
- 1.11 Requests
- 1.12 Settings
- 1.13 Auto Delegation
- 1.14 Notifications
ICI Mobile Application
Icertis Contract Intelligence (ICI) is a secure, scalable and integrated platform for contract lifecycle management. It transforms contracts into strategic business assets, giving global enterprises powerful new capabilities to increase compliance, improve governance, enhance user productivity, control costs, maximize ROI and mitigate risks.
ICI is available both as a Cloud (Web) offering and a Mobile application. The mobile version in an innovative, easy-to-use, and convenient platform that provides a subset of the features available on the Cloud platform. It allows you to quickly and easily access Agreements, Requests, Tasks and Commitments that you are authorized to view and perform key actions on them. You can approve or reject Agreements/Requests, or delegate tasks, anytime, anywhere from your mobile devices.
Prerequisites to Using the ICI Mobile Application
The ICI Mobile application must be configured at the backend by Icertis before you can begin using it. If you have any issues logging in, please contact Icertis Customer Success.
To install the ICI Mobile Application, your mobile device must meet the following minimum requirements:
● Android: Android 4.2 or later. The mobile application is not supported on custom Android operating systems.
● iPhone: iOS 8.0 or later.
In the 7.15 release, Android 11 compatibility changes have been made by setting the target SDK version to 30 and deprecated methods have been updated.
In the 7.15 release, the UI WebView component for iOS has been deprecated.
Android must have the required third-party applications such as WPS Office and Microsoft Office that are necessary to work with Agreement documents, pre-installed.
The ICI Mobile Application is continuously being updated with new features and enhancements. If you are using an older version of ICI Web Application with a more recent version of the ICI Mobile application, some features in the mobile application may not be supported.
This document explains all features of the ICI Mobile version 7.15, but the availability of the features is determined by the ICI Web version you may be using.
ICI Mobile App Management support using Microsoft Intune
ICI has extended support for Microsoft Intune in Mobile Application Management (MAM).
ICI employees, customers and partners use mobile devices for personal and professional tasks. While ensuring productivity, Icertis also wants to prevent data loss, both - intentional and unintentional. The MAM app protection policies allow users to manage and protect their organization's data within an application.
The ICI Mobile App which is available in the App/Play Store is ready to use for app protection policies but not for app configuration policies.
Microsoft Intune is a scalable cloud service architecture that leverages cloud for insights and baselines for our security policies and configuration settings. It helps safeguard data that is not managed by ICI and used by employees, customers or partners to access work files.
The key benefits of making ICI MS Intune-compatible include:
- Protecting company data at the App level, for both – managed and unmanaged devices, as the management is based on user identity.
- Ensuring App layer protections are in place. For example:
o Entering a pin to open the App in work context
o Controlling the sharing of data between Apps
o Preventing the saving of company App data to a personal storage location
- Supporting Mobile Device Management (MDM) in addition to MAM ensuring device protection and control over App management. For example:
o Entering a pin to access the device
o Deploying managed apps to the device
o Deploying apps to devices through your MDM solution
- Using app protection policies, with or without MDM, at the same time. For example, you may choose to use a company issued phone with both – MDM and App protection policies, whereas, a personal phone may be protected by only the App protection policies.
- Applying a MAM policy to the user without setting the device state. The user will get the MAM policy on both - the BYOD (bring-your-own-devices) and the Intune-managed device. You can also apply the MAM policy based on the managed state.
Administrators can configure the ICI Mobile app as a managed app using Intune configuration policies.
To avail the benefits of Intune MAM settings, users will have to download the ICI app from the Intune store set by the ICI Administrator and set company portal policies on their mobile phones.
Administrators can now:
- Enroll the device in Microsoft Intune.
- Configure the access privileges for users and user groups for ICI Mobile App using Microsoft Intune policies.
- Pre-configure the system URL so that users do not need to enter it every time.
- Manage and protect organization's data within an application.
Refer to the ICI Mobile App Management support using Microsoft Intune configuration guide for details.
Logging on to the ICI Mobile Application for android device managed with Microsoft Intune
The system URL is pre-configured for users who have downloaded the ICI Mobile App from the Intune store set by the ICI Administrator and set company portal policies on their mobile phones. Please refer to the ICI Mobile App Management Support using Microsoft Intune config guide for more details on setting Company Portal Policies on your mobile phones.
- Tap the ICI app
 icon on your device to launch the ICI application. ICI instance login page opens after the Splash screen.
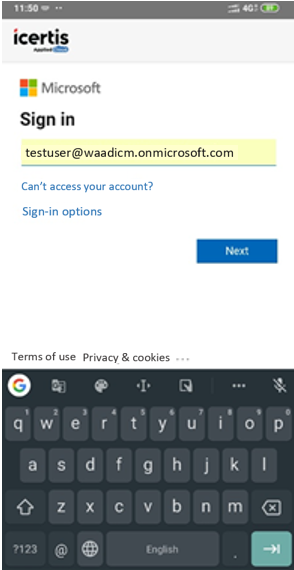
- Enter user email id.
- Click Next.
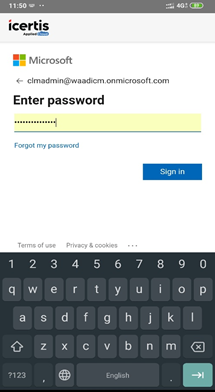
- Enter password.
- Click Sign in. The ICI app’s Home page opens.
When the user logs out of the ICI app from SETTINGS, the ICI App login page opens.
Logging on to the ICI Mobile Application for iOS device managed with Microsoft Intune
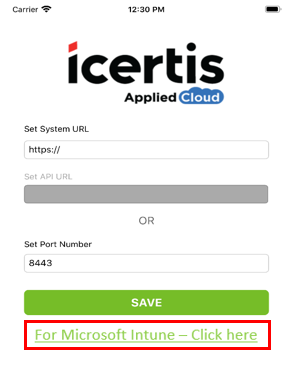
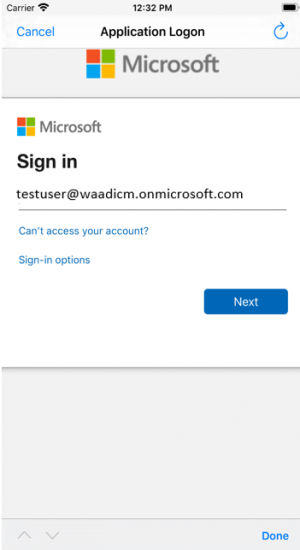
- Click For Microsoft Intune - Click here. The Microsoft Sign in page opens.
- Enter the user id.
- Click Next.
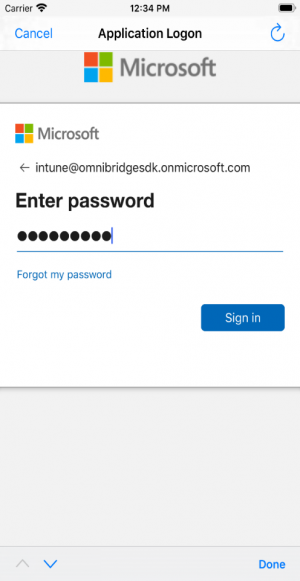
- Enter password.
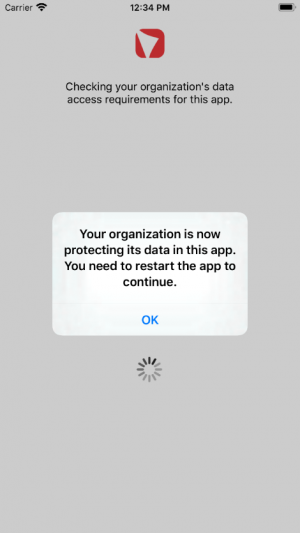
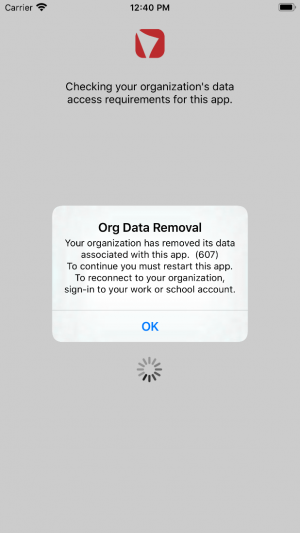
- Click Sign in. The message Your organization is now protecting data in this app. You need to restart the app to continue is displayed. This message indicates that Intune policies are now applied on the application.
- Click OK. The app will close and user needs to restart it to continue. If login URLs are configured the app will redirect to the ICI app Home screen.
Downloading the ICI Mobile Application from the App Store
To download the mobile application:
1. Open the App Store.
2. Search for Icertis Contract Intelligence or ICI.
3. Click Get on your device to download the ICI application.
Logging On to the ICI Mobile Application
To login to the mobile application:
1. Tap the ![]() icon on your device to launch the ICI application.
icon on your device to launch the ICI application.
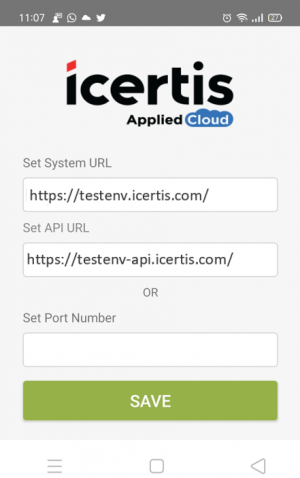
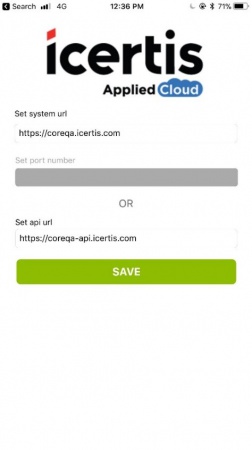
2. Enter your credentials in the fields. There are two ways of doing this:
- Set system URL: Type the URL of the ICI instance.
- Set port number: Type the port number. (It may be similar to 8443).
OR - Set API URL: Type the API URL.
3. Tap SAVE.
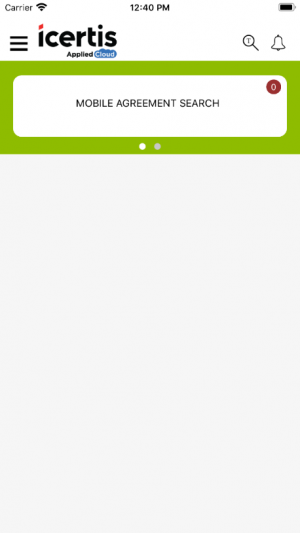
The system authenticates your credentials. On successful authentication, the application opens on your mobile displaying the Dashboard screen.
Mobile App Features
Main Features
The Mobile Application offers the following features:
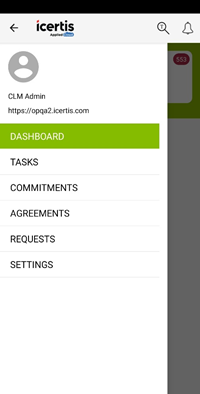
- Dashboard
- Tasks
- Commitments
- Agreements
- Requests
- Settings
- Filter and Searches (Category filter, Faceted Search, Free Text Search and Saved Search)
- Notifications
Configurable Features
The following features are configurable (to show/hide) on the ICI Mobile application:
- Dashboard: for example, the Carousel can be configured
- Agreements
- Requests
- Faceted search
- Saved search
- Buttons: for example, Request Review and Remove Me buttons can be configured
- Tabs: for example, History, Notes Notifications can be configured
Dashboard
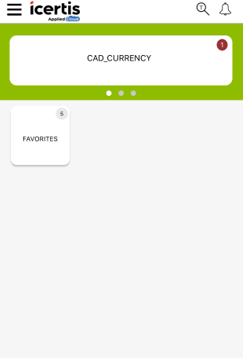
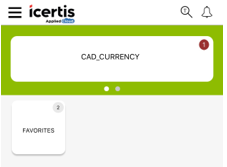
The Dashboard is the first screen you see on successfully logging on to the mobile application. Here, you will see the Carousel, Saved searches, Free Text search, and Notifications. The dashboard allows you to easily access critical information and perform tasks that are important by saving your searches and viewing notifications on the main screen itself.
- By default, the Dashboard shows the top 20 saved searches: the top 5 in the Carousel view and the rest in the Tiles view. This count can be configured to increase or decrease based on your requirements by raising a Customer Service ticket.
- A Free Text search
 can be performed on Agreements and Requests.
 - You can save searches that are relevant and view them from the Dashboard itself.
- A No records found the message is displayed if no saved searches are available.
Tasks
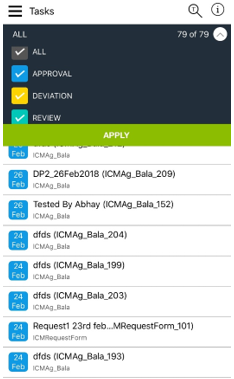
The ICI mobile application shows a list of Tasks that are associated with the Agreement and Request entity types.
- Tasks can be filtered into the following categories:
- Tasks waiting for Approval
- Tasks related to Deviations
- Tasks pending Review
- Tasks are refreshed automatically for approval, rejection or request review actions on contract requests and agreements.
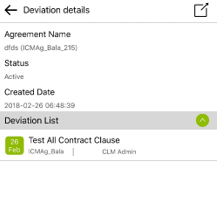
- Deviated tasks display a Deviation List and the Deviation details for each of them.
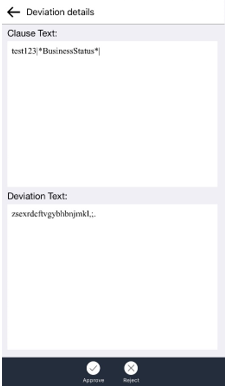
- The Deviation details include the old Clause Text and the new Deviation Text. You can Approve or Reject the deviated Agreement, as required.
- Searching within a task is also possible using the Free Text search.
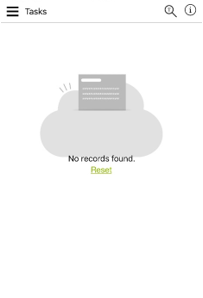
- A No records found the message is displayed if no pending tasks are available.
Commitments
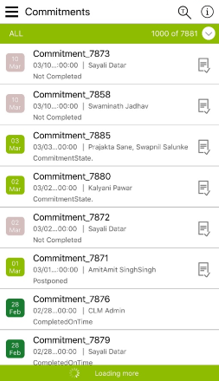
The Commitments tab allows you to manage your Commitments using the mobile application. Only authorized users can view this tab.
- View Commitment details and filter them based on their status.
- Take actions on overdue and pending Commitments.
- Selecting a Commitment opens the respective Commitment’s Details screen providing details such as Contract Type, Commitment Code, Agreement Code, Commitment Type, Business Owner, Status and Due Date.
- A No records found message is displayed if no Commitments are available.
- To take action on a Commitment, either tap the Take action on commitment button on the List view or on the right-hand side of the Commitment that you want to view.
- The Take action on commitment option will not be displayed for completed Commitments.
Taking Action on Commitments
To take action on a Commitment:
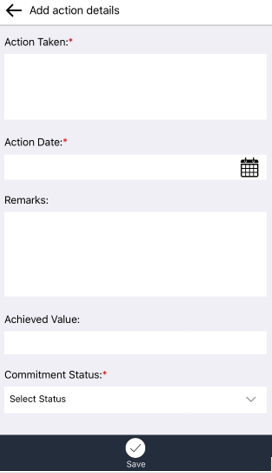
1. Tap the Take action on commitment button to open the Add action details screen.
2. Enter information for the Action Taken, Action Date, Remarks and Achieved Value fields.
3. Select a Commitment Status from the drop-down.
4. Tap the Save button to complete the action.
5. On tapping the Save button, an Alert popup Commitment will not be editable anymore. Do you want to continue? will be displayed. Select the Yes or No action, as applicable.
- Commitments are refreshed automatically for approval, rejection or request review actions on contract requests and agreements.
Searches
Agreements and Requests can be searched using various search options.
All searches performed in ICI are case-insensitive, hence the characters can be entered in upper and/or lower case.
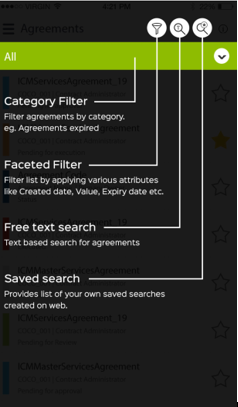
The following search options are available for Agreements and Requests:
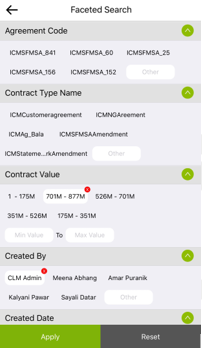
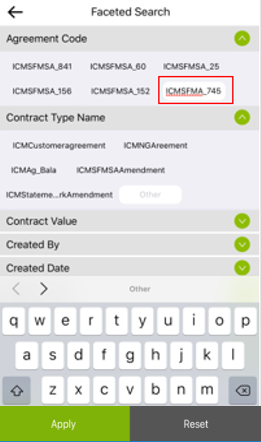
- Faceted Search: Filters records by applying various Attributes, such as Created date, Value, Expiry date, and so on.
- Free Text search: Text-based search for Agreements.
- Saved Search: Provides a list of your own saved searches created on the ICI Web user interface.
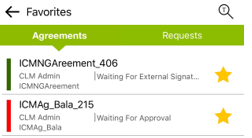
- Favorites Tile: This tile on the Dashboard allows you to directly access Agreements/Requests that have been marked as Favorite.
Faceted Search
To apply the Faceted search:
- Tap the Filter
 icon on the Agreements screen to apply various facets to filter the search results.
 - Use the Faceted search to apply filters on Agreements or Requests on the basis of facets and its value.
- On selecting multiple values for a facet such as Created By, the ICI Mobile Application applies the OR condition for that specific facet.
- However, on selecting multiple filters such as Contract Value and Created By, the ICI Mobile Application applies the AND condition for those facets.
● By default, 5 facets values are available to use.
● If you want to apply a filter other than the available values, type the value in the text box provided and tap Apply.
- Applied filters can also be Reset.
- These facets can be customized based on your requirement. Since this is a backend activity, please contact the Icertis Customer Success if you wish to have any customizations done.
Free Text Search
To apply the Free Text search:
- Tap the
 icon to perform a free text search on Agreements and Requests.
 - You can search across all Attributes of all ICI entities. Use double-quotes to find an exact match for your search phrase, such as "liability insurance".
- Search results display when relevant keywords or contract details are entered.
- A No records found message will be displayed if no search records are available.
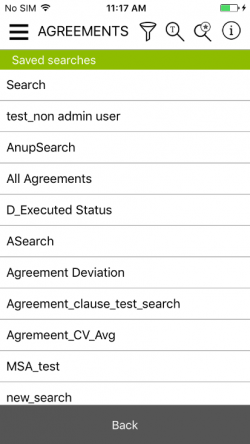
Saved Search
To apply the Saved search:
- Tap the
 icon to view a list of other saved searches inside a particular Agreement list.
 - Select a saved search from the list, and tap the Back button.
- The ICI mobile application loads the saved search and lists the result.
Favorites Tile
To save Agreements/Requests as Favorites:
- Select the Agreements or Requests that you want to mark as Favorites by tapping the Favorite icon
 for each of the Agreements.
 - This creates a Favorites tile on the Dashboard.
- Tap the Favorites tile to view the Agreements/Requests in your list.
Agreements
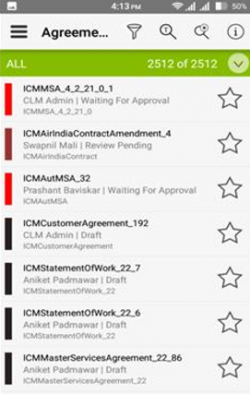
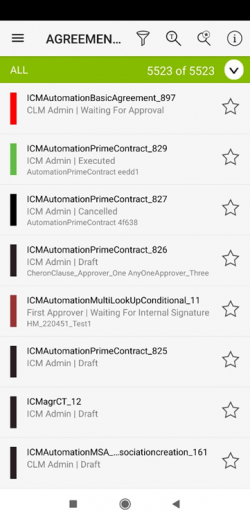
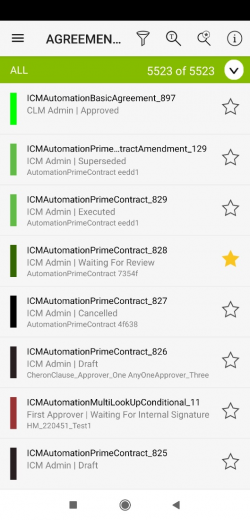
ICI Mobile application displays a list of Agreements that you are authorized to view.
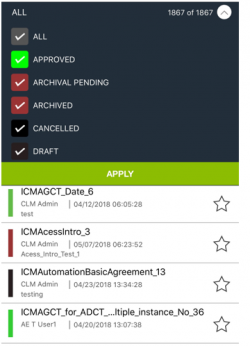
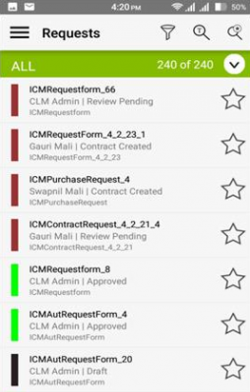
- All Agreements display their assigned status color code. For example, Approved Agreements will have a green vertical bar next to it, Cancelled Agreements will have a black vertical bar next to it, and so on.
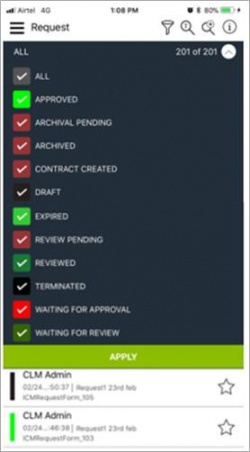
- Agreements can be filtered using the Category Filter or the Faceted Filter.
- The Category Filter is used to filter Agreements by category. For example, Agreements expired.
- The Faceted Filter is used to filter records by applying various Attributes, such as Created date, Value, Expiry date, and so on.
- Agreements can also be searched using the Faceted search, Free Text search and the Saved search.
- Agreements can be marked as Favorites by tapping the Favorite icon which creates a Favorite tile on the Dashboard.
- A No records found message is displayed if no Agreements are found.
Agreement Details Tab
The Agreement Details tab allows you to view the details of your Agreement using the mobile application.
Key Features
- The Attributes on this list can be modified by selecting the appropriate Attributes using the ICI Cloud Platform.
- Tapping the
 icon at the top of the screen, allows you to view or download a document, depending on the mobile application you are using:
- For iOS: downloads are not performed within the ICI Mobile Application. The document opens in Web view with the copy-paste option being blocked – this restricts users from copy-pasting any document details.
- For Android: the document is downloaded in a temporary folder on the device and needs the third-party applications, such as Acrobat Reader installed. Once users click the Back button, the downloaded document gets deleted.
- The Association tab displays the Association details for that Agreement.
- The Commitment tab displays a list of Commitments pertaining to that Agreement. You have an option to take appropriate action on Overdue or Incomplete Commitments.
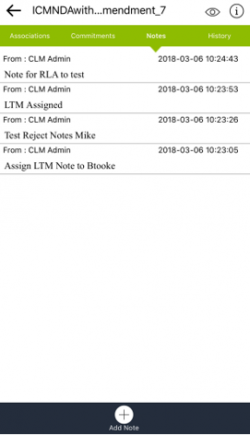
- The Notes tab displays a list of notes added for that Agreement. You can also add new notes to the Agreement.
- You can perform the following actions on an Agreement:
- Approve
- Reject
- Request Review
- Delegate
- Recall delegate
- Remove Me
- A No records found message is displayed if no Agreements details, Associations, Commitments or Notes are available.
Agreement Associations Tab
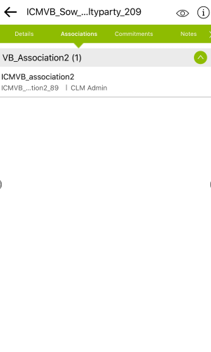
The Associations tab lists the Associations available for a particular Agreement.
Key Features
- You can expand the list to view the basic details of the Association.
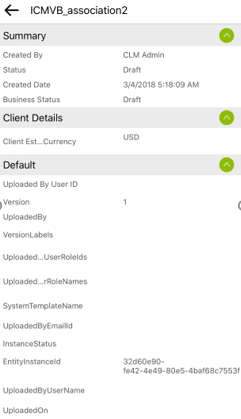
- Tap the Association to view more details of the association, such as Summary, Client Details, and so on.
Agreement Commitments Tab
The Commitments tab lists the Commitments available for a particular Agreement.
Key Features
- You can expand the list to view the basic details of the Commitments.
- Tap the Commitment to view more details of the Commitment, such as Contract Type, Commitment Code, Commitment Type, and so on.
- A No records found message is displayed if no Commitments are found for that Agreement.
Agreement Notes Tab
Tapping the Agreement Add Note tab displays details of the Notes.
Key Features
- Tap any Note record to view the Notes detail screen.
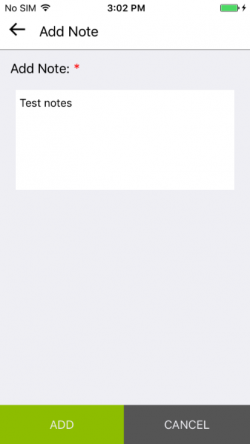
- Tap Add Note at the bottom of the screen to add a new note.
- Enter information in the Add Note box provided.
- Tap the ADD button.
- In addition, the note is listed on the Notes list screen. The note that you add here gets reflected in the UI.
Agreement/Request History Tab
Tapping the Agreement/Request History tab displays the history of the particular Agreement/Request.
Key Features
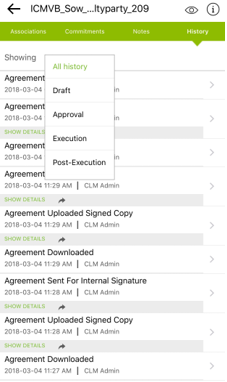
- Tapping the History tab opens the Agreement History screen.
- You can either view All history or select one of the following tabs:
- Draft
- Approval
- Execution
- Post-Execution
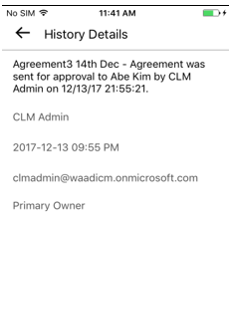
- Tap any row or the Show details to open the History Details screen and get more information about the Agreement/Request.
Taking Action on Agreements/Requests
Tapping the Agreement/Request displays a number of actions that you can perform for the particular Agreement/Request.
Key Features
- The ICI Mobile application supports the following actions:
- Approve
- Reject
- Request Review
- Delegate
- Recall delegate
- Remove Me
- Completing an action opens the Agreement list screen. The Agreement/Request list screen is refreshed displaying the latest statuses upon completing Approve, Reject and Request Review actions.
To approve an Agreement/Request:
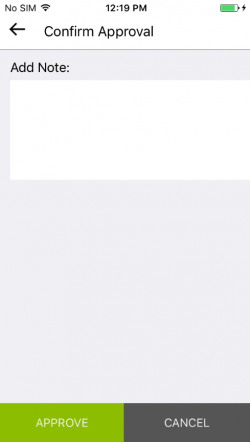
- Select the Agreement/Request that you need to approve.
- Add a Note. Adding a note is optional.
- Tap APPROVE to confirm the approval. This opens the Agreement Details screen.
Agreement/Request Reject Action
To reject an Agreement/Request:
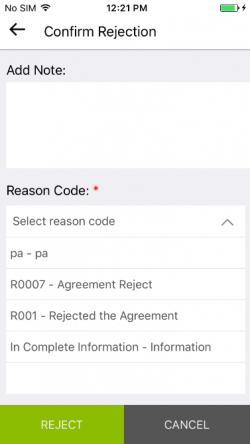
- Select the Agreement/Request that you need to reject.
- Add a Note.
- Select a mandatory reject Reason Code.
- Tap REJECT to confirm a rejection. This opens the Agreement Details screen.
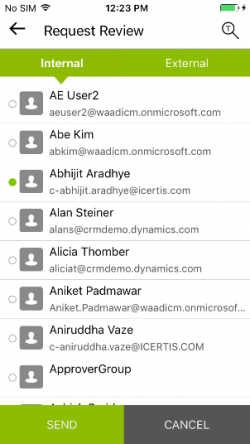
- Select the Agreement/Request that that needs to be reviewed.
- Tap the Request Review button. This opens the Agreement Request Review screen.
- Select a user to review the Agreement.
- Tap SEND. This opens the Agreement Details screen.
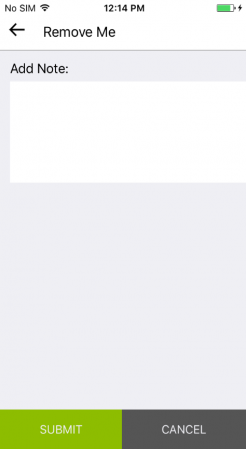
Agreement Remove Me Action
To remove an Agreement/Request:
- Select the Agreement/Request that needs to be removed.
- Enter Notes for the particular Agreement.
- Tap SUBMIT.
- Notes can be viewed under the History tab or the Notes tab.
Requests
The Requests Tab allows you to manage your Requests using the mobile application.
- Only authorized users can view this tab.
- The Attributes on this list can be modified by selecting the proper Attributes in ICI.
- Requests will be displayed based on their assigned status color.
- Requests can be filtered or searched in the following ways:
- Category Filter: Filters Agreements by category. For example, Agreements Expired.
- Faceted Search: Filters records by applying various Attributes, such as Created date, Value, Expiry date, and so on.
- Free Text search: Searches for Requests using free text.
- Saved Search: Provides a list of your own saved searches created on the Web.
- A No records found message is displayed if no Requests are available.
Request Details
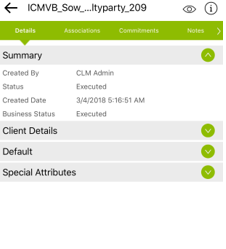
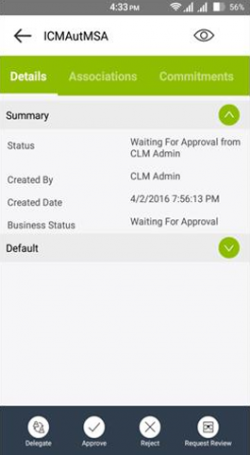
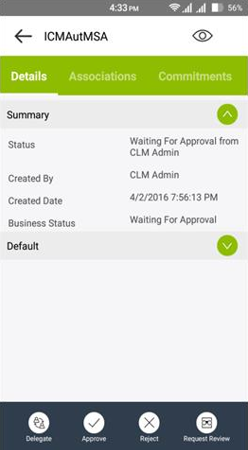
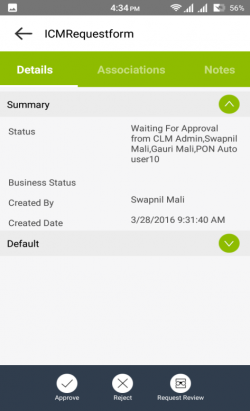
- Tap the Request to open the Details screen which displays the details of the Request, such as Summary, Amendment, Default, and so on.
- The Summary displays details such as Created by, Status, Created Date and Business Status in a collapsed view.
- Default displays all the Attributes in collapsed view.
- The Associations tab displays the Association details for that Request.
- The Notes tab displays a list of notes added for that Request. You can also add a note by tapping the Add Note button.
- A No records found message is displayed if no records are available for Associations or notes.
- The History tab displays All History for that Request.
Taking Action on Requests
The ICI mobile application supports the following actions for Requests:
- Approve
- Reject
- Request Review
- Delegate
- Recall Delegate
Settings
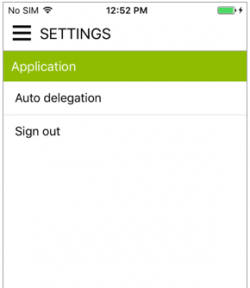
The Settings Tab allows you to manage the settings of the application or auto delegate tasks.
- The mobile Application has the following two options:
- Auto delegation
- Sign out
- Tap Auto delegation to add or edit a delegation.
- Tap Sign out to log out from the ICI Mobile application.
Auto Delegation
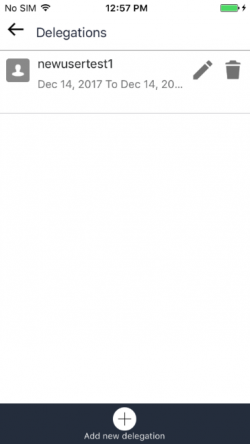
- Tap Auto delegation to view the Delegations screen. You can either add, edit or delete records as applicable.
To add a new Auto delegation:
- Tap the Add new delegation + button at the bottom of the screen to add a new delegation.
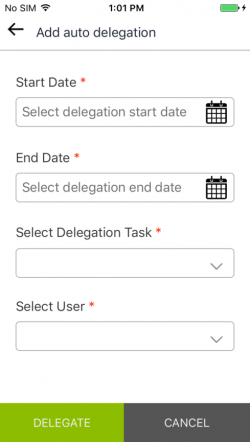
- Select the Start Date and End Date.
- Select the task you want to delegate from the Select Delegation Task drop-down.
- Select a user from the Select User drop-down to whom you want to delegate the task. The Select role drop-down list is displayed when you select Agreement Approve tasks.
- Tap Delegate to complete the auto delegation.
- Tap Cancel if you want to cancel the delegation.
Notifications
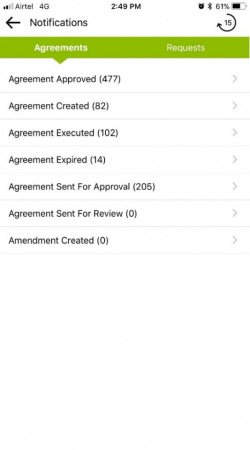
The Notifications screen lists the notifications for your Agreements and Requests.
- Tap the Notifications
 icon on the Dashboard. This opens the Notifications screen.
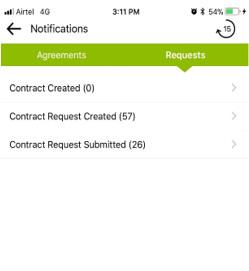
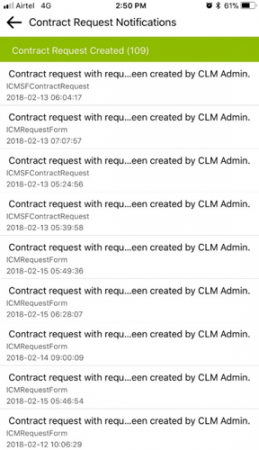
 - Here, you can view notifications such as number of Agreements created, approved, executed, expired, sent for approval or review, or the number of Contracts/Requests/Amendments created or submitted, and so on.
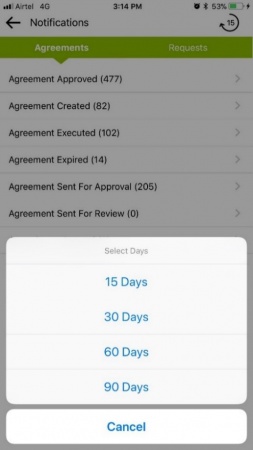
- By default, notifications are set to 15 days.
- Tap Cancel if you want to retain the default of 15 Days.
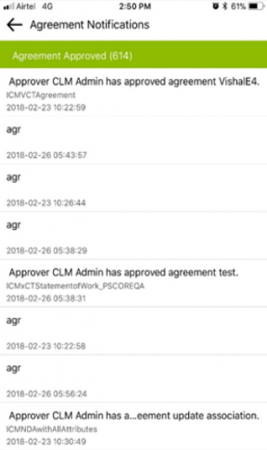
- On the Agreements tab, select the type of Agreements you want to view. This opens the Agreements Notifications screen.
- Details of the Agreement are displayed here, such as, who approved the Agreement or on what date the Agreement was approved.
- On the Requests tab, select the type of Requests you want to view. This opens the Requests Notifications screen.
- Details of the Contract Requests are displayed here, such as, who approved the Agreement or on what date the Agreement was approved.
