Shefali DK (Talk | contribs) |
Shefali DK (Talk | contribs) |
||
| Line 56: | Line 56: | ||
For example in the screenshot below we are adding the "Customization" org unit under the "Development" parent unit. | For example in the screenshot below we are adding the "Customization" org unit under the "Development" parent unit. | ||
<div class="image-green-border">[[File:8.0-Org-Struct4.png|720px|8.0-Org-Struct4.png]]</div> | <div class="image-green-border">[[File:8.0-Org-Struct4.png|720px|8.0-Org-Struct4.png]]</div> | ||
| − | |||
| − | |||
=== Updating an Organization Unit === | === Updating an Organization Unit === | ||
| Line 88: | Line 86: | ||
4. '''Click''' the eye icon or the 3 dots in the last Actions column in the grid to view the details of the Organization Group. | 4. '''Click''' the eye icon or the 3 dots in the last Actions column in the grid to view the details of the Organization Group. | ||
<div class="image-green-border">[[File:8.0-Org-Group-Index-without-refine-view.png|720px|8.0-Org-Group-Index-without-refine-view.png]]</div> | <div class="image-green-border">[[File:8.0-Org-Group-Index-without-refine-view.png|720px|8.0-Org-Group-Index-without-refine-view.png]]</div> | ||
| − | |||
| − | |||
=== Searching an Organization Group === | === Searching an Organization Group === | ||
Revision as of 07:00, 20 December 2021
Contents
Managing Organization
As an Administrator, you can manage the organization's information and the organization's structure having organization units and groups.
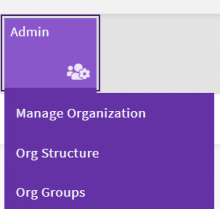
The Organization Management is done with the following three sub-menus under the "Admin" navigation menu on the top:
Manage Organization
In the "Manage Organization" sub-menu you can view and update your organization information.
Viewing the Organization Information
Click the "Manage Organization" sub-menu on the "Admin" navigation menu on the top. The "Organization Details" page opens.
Updating the Organization Information
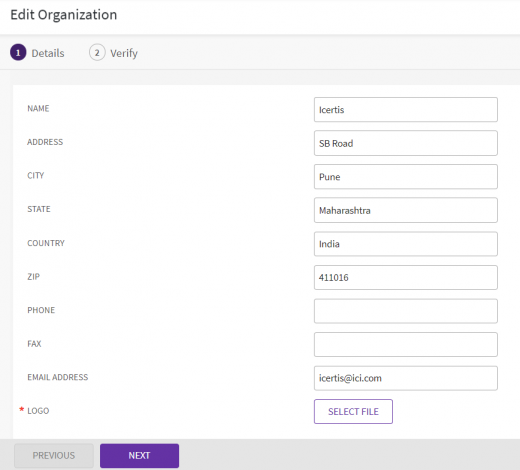
Click "Edit" on the top right in the title bar. The "Edit Organization" page opens.
- The “Edit Organization” page has a navigation bar with numbered tabs depicting the workflow of the edit wizard. The tab number is highlighted with the theme color to easily identify your active tab in the wizard workflow.
- The numbered navigation bar is made sticky to be visible while scrolling the page.
- You can either click the number on the bar or click “Next” on the sticky action buttons at the bottom of the page to navigate to the desired page in the wizard workflow.
- The “Update” button appears on the last page, “Verify”, where the user can verify the changes and update the organization details.
- After updating the details, the user is redirected to the “Organization Details” page displaying the new changes.
Organization Structure
An Organization Structure is made up of multiple Organization Units. The structure has a hierarchy of Organization Units with a parent-child relationship.
The Organization is the parent or root node of all Organization Units.
Viewing Organization Structure
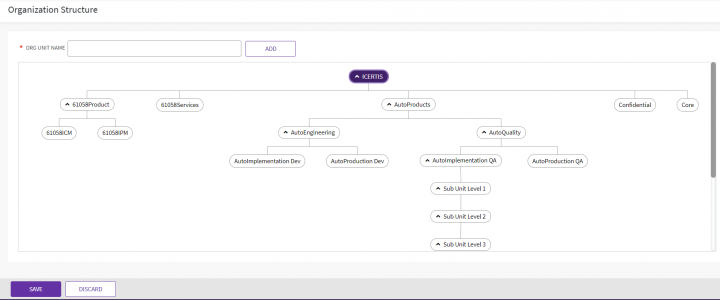
Click the "Org Structure" sub-menu on the "Admin" navigation menu on the top. The "Organization Structure" page opens displaying a hierarchical organization structure with a horizontal and vertical scroll.
- Every user is assigned to one Organization Unit (Org Unit) called the user’s primary or default Org Unit.
- Org Units are like directories or folders in the file system. The user’s primary org unit is the home directory.
- When a user creates an Agreement, it is by default stored in the user’s primary org unit, however, the user can change the agreement’s storage location, if required.
Adding an Organization Unit
In ICI, you can create a new Organization Unit or add a sub-unit or sub-node to the parent Organization unit.
To add an Organization Unit:
1. Navigate to the "Organization Structure" page.
2. Type the name of the Organization Unit you want to add to the main branch in "Org Unit Name". For example, HR and then click the "Add". The Org Unit is added under the main branch. You can now drag and drop it under any sub-branch as per your business requirements.
OR
Select the parent organization unit from anywhere in the hierarchy and then add the new unit under the same.
3. After adding or removing multiple units click “Save” to save or “Discard” to discard the changes.
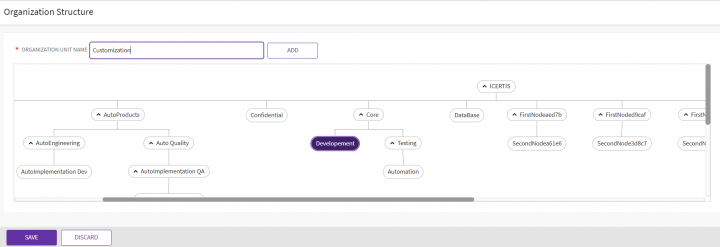
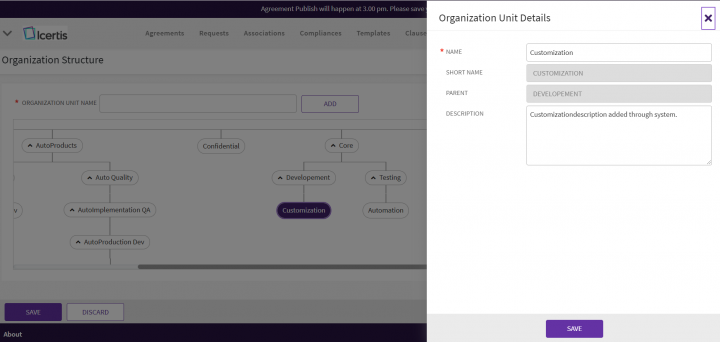
For example in the screenshot below we are adding the "Customization" org unit under the "Development" parent unit.
Updating an Organization Unit
You can also edit the organization unit details.
To edit an organization unit:
1. Click the organization unit that you want to edit. The "Organization Unit Details" drawer slides from the right.
2. Edit the Org Unit "Name" and "Description", if required, and then click Save to save the modifications.
For example, in the screenshot below we are modifying the "Customization" child unit we added under "Development" parent.
Organization Group
You can group various organization units and create an organized group. You can assign these organization groups to the users so that they can become a part of the group. The users in a particular organization group can have access to the information in various units based on their hierarchy.
Viewing an Organization Group
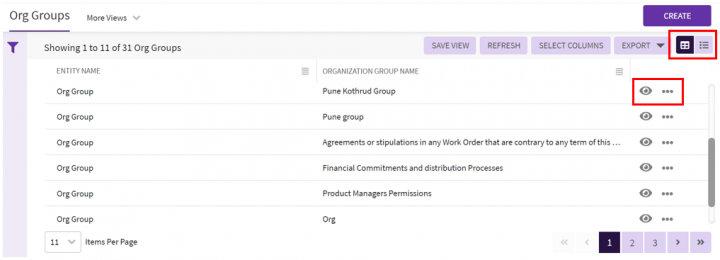
1. Click "Org Groups" under the "Admin" navigation menu on the top. The "Org Groups" index page opens listing all organization groups in a grid view by default.
2. Click "List View" in the far right above the records grid to change the view to list.
3. Once the Organization Group is created, it is listed on top of the "Org Groups" page. Click on the column heading to sort the records as per your business requirements.
4. Drag the column width from the headings to adjust the width of the columns. If the column text is long fit the column width 3 dots appear at the end of the text depicting its truncation. Click on the "Wrap Text" icon in the right of the column heading to wrap the text if it is long to fit the visible column width. You can also view the text by hovering over it.
4. Click the eye icon or the 3 dots in the last Actions column in the grid to view the details of the Organization Group.
Searching an Organization Group
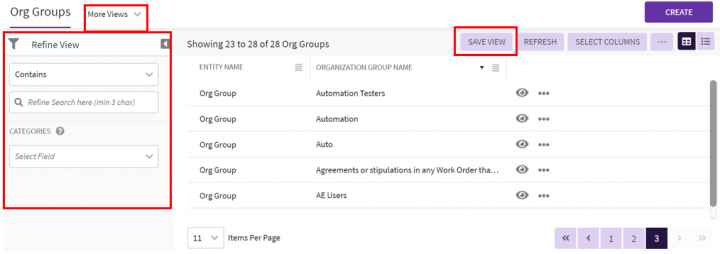
In ICI, you can search organization groups using multiple parameters like all organizations containing a particular keyword.
To search an Organization Group:
You can further narrow your search by using any of the following methods:
| Search Term | Result |
| "..." | Type the search term in double quotation marks. It shows existing organization groups that include the exact search term. |
| *...* | Type the search term in star characters. It shows existing organization groups that include the exact search term. |
| *... | Prefix * to the search term. It shows existing organization groups that end with this term. |
| ...* |
Suffix * to the search term.
|
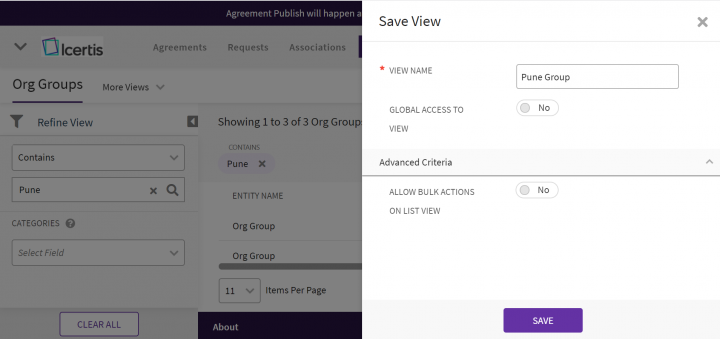
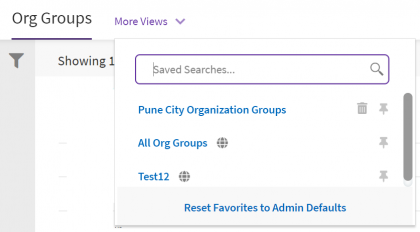
View your saved search terms with the following:
- In the "More Views" dropdown to the left on the title bar, select your saved search, and click the "Pin Favorite" icon at the right to mark the search as favorite.
- You can find your marked favorites listed in a line on the title bar beside "More Views".
Creating an Organization Group
To create an organization group:
1. Click "Org Groups" on the "Admin" navigation menu on the top. The "Org Groups" page opens.
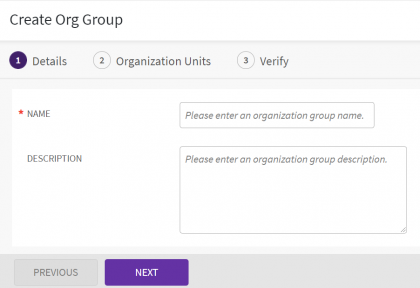
2. Click "Create" in the far right of the title bar on the "Org Groups" page. The "Create Org Group" page opens.
3. Type the name for the organization group that you want to create in the "Name" box.
4. Enter the description for the organization group in the "Description" box.
4. Click "Next". The "Organization Units" tab opens.
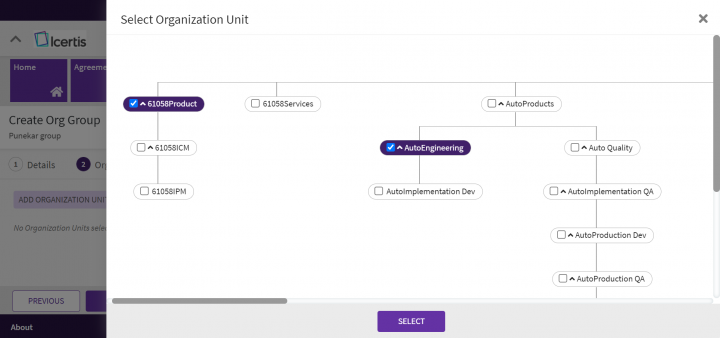
5. Click the "Add Organization Unit" to select one or more Organization Units to add to the group. The "Select Organization Unit" drawer slides from the right displaying the Organization Structure hierarchy with Organization Units.
6. Select the appropriate organization units for which you want to create the organization group.
7. Click "Select". The selected unit appears in the "Organization Units" tab with the "Remove" button to remove the unit.
8. Click "Next" to open the "Verify" tab.
9. Verify the details you entered and click "Create". All tab attributes are grouped under collapsible accordions on the right. A “Collapse All” sticky accordion button is on the right top to collapse all groups.
The organization group that you just created appears on the "Org Groups" index page.
Updating an Organization Group
1. Navigate to the "Org Groups" index page:
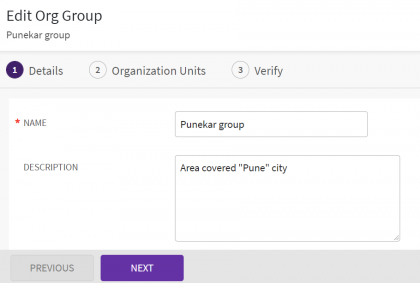
2. Click the eye icon for the Organization Group you want to edit or update. The "Org Group" Details page opens.
3. Edit the information wherever necessary on the "Details" and the "Organization Units" tabs.
4. Click "Next" to open the "Verify" tab.
5. Verify the information you have edited, and choose one of the following:
- Click "Previous" to go back and make changes to the information entered.
- Click "Update" to update (that is save) the information you entered or edited.
Related Topics: Agreement Management | Managing Users | Managing User Groups | Managing_Security_Groups | Application_Settings | Notification Settings | Currencies | Reasons | Deleting an Agreement | Search Sync | Legacy Upload
